
Home of the (world famous since 1989) 'finishing.com HOTLINE'
-----
Gunsmith Blueing / Hot Bluing of Firearms
Quickstart:
The 'black oxide' process is usually called 'bluing' when it is applied to firearms. There are 'cold bluing' compounds available, and they are fine for hobbyists, and handy for small touchups and for certain industrial uses, but in terms of quality, corrosion resistance, and freedom from smut, they are not the equal of the hot processes.
Hot bluing/black oxiding is done in a tank of concentrated caustic soda plus oxidizing agents like nitrates and nitrites, and operating at a slow boil. Depending on the concentration of salts in the solution, that boiling temperature will be between 265 °F and 300 °F.
A special, extremely severe danger with this process is 'eruption' -- it has maimed and killed people. Water must be frequently added to make up for evaporation losses, and water flashes to steam at 212 °F, so there is the possibility of a slug of water encountering this much hotter solution and, instead of mixing with it, flashing to steam and blowing the contents of the tank onto an operator.
Q. Can someone give me information on hot bluing of firearm parts so as to get a factory blued finish. Have tried cold bluing but doesn't seem to be as durable as factory bluing jobs. Information on the chemicals needed, temperatures required, tank design etc. How to obtain the difference in color from blue to dark black.
Stephen M [surname deleted for privacy by Editor]New Zealand
1997
A. From the Chemical Formulary of 1941
Blue-Black Finish on Steel
(Please see our consultants directory for the proper design of the physical plant. There have been many accidents in the improper use of molten salt baths). There are many proprietary solutions for blackening of steel and stainless steel. See our directory of chemical suppliers.
b. Place in following solution for 15 minutes:
copper sulphate
⇦ on
eBay or
Amazon [affil link] 1/2 oz.
Iron Chloride 1 lb.
Hydrochloric acid 4 oz.
Nitric acid 1/2 oz.
Water 1 gallon
Then allow to dry for several hours; place in above solution again for 15 minutes; remove and dry for 10 hours. Place in boiling water for 1/2 hour; dry and scratch brush very lightly. Oil with mineral or linseed oil and wipe dry.
Gun Metal finish on Brass
The brass is polished, buffed, washed, lightly scoured using water and pumice ⇦ on eBay or Amazon [affil link] , nickel plated, black nickel plated, lightly scoured, again black nickel plated, lightly scoured, rinsed, dried and lacquered. In scouring the black nickel deposit, use a soft steel section wheel and little pumice.
Black nickel plating bath
powdered arsenic 2 oz.
ammonium carbonate 2 oz.
Double nickel salts (nickel ammonium sulphate?) 12 oz.
Aqua ammonia
⇦ on
eBay or
Amazon [affil link] (26%) 32 oz.
water 1 gallon.
Add cyanide to clear.
[Note: J.G. Poor (referenced below) advises against arsenical baths for safety concerns. It is also very difficult to analyze and maintain the components].
From Metal Finishing, 1943, J.G. Poor, Black nickel plating
Sodium sulfocyanide (NaSCN) 2 oz/gal (opg)
zinc sulphate
⇦ on
eBay
or
Amazon [affil link]
(7H2O) 5 opg
nickel ammonium sulphate (6H2O) 6 opg
Nickel sulphate 10 opg
nickel anodes.
The black deposit from this bath occurs in a narrow current density range, so racking will become important. It is a thin deposit, but you can rub it with an oily rag to even up the color.
Metal finishing is an art and a science, requires specialized techniques, and is now governed not only by common sense (The layer of prejudices built up before the age of eighteen-A. Einstein), but by statutes designed to conserve public and worker safety. All applicable natural, environmental and safety laws must be obeyed. It is much more effective to find out what these laws are before attempting a job, than to reflect on how easy it would have been to determine them in the aftermath of a workplace accident.

Tom Pullizzi
Falls Township, Pennsylvania
A. Steve,
As a part time gunsmith, I can tell you that most people have NO IDEA of how to reblue guns. Most blue jobs require special heated tanks, burners, special salts, and a lot of hard work. Surface preparation of the metal is a key factor because the bluing will enhance any flaws in the metal. Polishing of the metal becomes a prerequisite to a bluing job. Cleaning of the metal with solvents and a thorough degreasing to remove oils and animal fats in the polishing compounds also becomes a key issue.
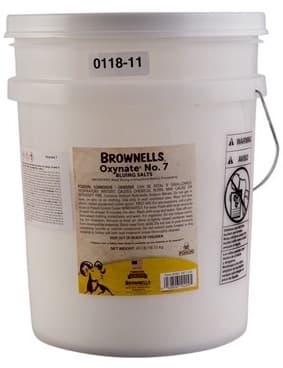
Most home enthusiasts have neither the time or knowledge to duplicate a professional bluing job. If you must attempt it, contact Brownells [ Brownells home page (affil link) ] for their catalog. These people supply the firearms industry and shooting enthusiasts with parts, tools and bluing equipment and chemicals. They have some pretty good 1 step bluing kits using chemicals called Oxynate 7 ⇦ on Brownells affil link] , Dicropan IM ⇦ on Brownells affil link] , Oxpho-Blue ⇦ on Brownells or eBay or Amazon [affil link] and if you want to attempt a full Hot blue, NitreBlue ⇦ on Brownells affil links] .
Be aware of the fact that some of the older side by sides and over unders have only silver solder holding the ribs and barrels together and if you overheat the heated tanks, you could come back to 4 separate pieces instead of a fine old shotgun.
Opt for a cold blue and a lot of elbow grease. It's a lot safer. Leave the hot blue for the pros. You could probably have the job done professionally for about $125 to $175. Probably less than what it would cost you to get the chemicals and equipment together!
Tom S [surname deleted for privacy by Editor]Reading, Pennsylvania
A. I have been practicing the trade of gunsmithing since 1963.
Unless you have some money and time to spare, have your firearms refinished by a pro. This process takes several years of experience to do right. If you want a detail explanation, I'll be glad to help. Always remember that safety is paramount.
Tommy BurttschellMaster Gunsmith - Pinehurst, Texas
1998
Q. Hi I would like some info on hot bluing please
Dennis MaitaDo it myselfer - DUNNELLON,Fl
October 4, 2025
A. Hi Dennis,
Hopefully this thread constitutes "some info on hot bluing". But if you're not seeing answers to the questions you have in mind, please ask them specifically because "some info" is an awfully broad proposition regardless of whether the topic is bluing or baseball 🙂
Luck & Regards,
Ted Mooney, P.E. RET
Striving to live Aloha
finishing.com - Pine Beach, New Jersey
Ted is available for instant help
or longer-term assistance.
Q. Hot bluing is used by the makers of Lionel trains for years with a high quality finish on tin parts not steel.
I am trying to get similar results with cold bluing with NO success! I will try the Chem. formulas listed here.
Thanks for the recipes / formulas. ⇐ answer?
Paul B [surname deleted for privacy by Editor]- Utica, New York
1998
Q. Some years ago I used a solution of potassium nitrate, caustic soda, and distilled water heated to 290 °F, to reblue a colt 1911 pistol. This solution worked well but depends on correct polishing and degreasing of all parts to be blued. Alas I can not find my notes of the exact proportions of ingredients, to obtain the super saturated solution required, can anyone out there shed any light.
Maurice S [surname deleted for privacy by Editor]London - united kingdom
A. After reading the comment from Maurice, I also used to have a formula for hot bluing. It was sodium hydroxide (caustic soda) and ammonium sulphate, I think. It could have been potassium nitrate. I too, cannot find my notes. I did find the four page "how to", but not the salts needed. This was from a gunsmithing class back in the 60's. The instructor was a graduate from Lassen college gunsmithing school. Anyone know of it. My notes indicate a heating of 275 °F.
CJ
CJ DuerksenHollister, California
A. Maurice, CJ: If you can find a copy of the Metal Finishing Guidebook from 2000 or earlier, it will have these formulas (the newer editions of the guidebook only talk about how to operate proprietary blackening baths, revealing nothing about home brew).
But the above two posts partially explain what makes hot bluing dangerous. The flash point of water is 212 °F yet these baths operate at 275 - 290 because the solution is so "salty" with caustic soda. Water evaporates very fast at these temps and the evaporation loss must be made good almost constantly. But if a slug of plain water finds itself in a pocket of 275+ solution it can instantly flash to steam literally exploding this 275 degree concentrated caustic onto everyone. Many have been seriously burned and some killed; please be careful and wear full protective gear.

Ted Mooney, P.E.
Striving to live Aloha
finishing.com - Pine Beach, New Jersey
Ted is available for instant help
or longer-term assistance.
A. You can get this from a druggist to make hot bluing:
spirits of niter 3 drams, tincture of iron 3 drams, sulfur 1 dram, vitriol 2 drams, corrosive sublimate 1 dram, nitric acid 1/2 dram, copperas 1 dram, and distilled water 12 ounces.
However I haven't tried it yet but I hear it works good, but I don't know what temp. to run it at.
Bill R [surname deleted for privacy by Editor]school - Southern California
![]() Bill, have you actually asked your druggist for chemicals like these? 50 years ago most druggists probably could and would sell this to you, but I've lived many different places in the last 35 years and haven't run into a druggist who would sell chemicals to the public. Maybe I've been living in the big city too much.
Bill, have you actually asked your druggist for chemicals like these? 50 years ago most druggists probably could and would sell this to you, but I've lived many different places in the last 35 years and haven't run into a druggist who would sell chemicals to the public. Maybe I've been living in the big city too much.
Ted Mooney, P.E.
Striving to live Aloha
finishing.com - Pine Beach, New Jersey
Ted is available for instant help
or longer-term assistance.
A. You may have been able to get this from a druggist when I was a boy, except, what with the American Civil War going on, all this stuff was in short supply.
I doubt that one in one hundred of today's druggists would even be able to give you the chemical formula of these ingredients without having to look it up, but nitric and sulfuric acid (vitriol) are things you won't get from a druggist. They are supposed to help people with their health, not help them to the emergency room.

Tom Pullizzi
Falls Township, Pennsylvania
A. Dear Sirs:
In answer to Stephen M:
I been bluing for many years, with many products and methods, using very different formulas, but at this moment for me the better is Oxynate 7
⇦ on
Brownells affil link]
from Brownells .
Polish the part very well, like an artisan, be patient, and leave the part at least 45 minutes in the tank, and please let me know the result, ah, don't forget to read Gunsmith Kinks
⇦[this on
Amazon affil links] #1
good luck:
federico quirosgunsmith - Chicago, Illinois
A. I have a 1952 edition of General Metals [on Amazon affil links] by John L. Feirer that has a section on applying a finish to steels. I have not tried any of these (don't know where to get the supplies) and I do not know how well they will work. However for a Black finish: 1 ounce sulfur ⇦ on eBay or Amazon [affil link] in 3 ounces turpentine ⇦ on eBay or Amazon [affil link] . Heat solution in a pan of water.; For a Blue color: 2 ounces antimony chloride, 1 ounce gallic acid, and 2 ounces iron chloride in 5 ounces water. ; For a brown color: 1 ounce copper sulphate and 1 ounce sweet spirits in 15 ounces distilled water.
I would appreciate any comments about these formulas.
Dan D [surname deleted for privacy by Editor]Grand Rapids, Michigan
!! Why do we keep telling folks about formulas that existed years ago? Yes, a lot of them work but only with experience, time, and money --mainly experience. I have operated my own shop for 35 years. Before that I was raised in this trade by my father and grandfather. Both of them "Masters" of the trade. Several of the old formulas were used by them, but with the advent of pre-mixed chemicals from several suppliers, all the old remedies could be thrown out the door. Anyone can copy the finish that any mfg. puts on his firearms. All it takes is TIME and MONEY. Each supplier furnishes detailed instructions for their product. Follow them to the letter and you won't be disappointed. Stop and think about this for a minute. If the older formulas were so great then why don't we use them today?
Because what is available on the market is the best that can be purchased. If you aren't willing to spend approximately $1000.00 minimum and many hours of practice, then take your firearm to a professional and have him do it. If anyone would like to respond to these remarks I would enjoy talking to you.
Tommy BurttschellMaster Gunsmith - Pinehurst, Texas
![]() You get no argument from me, Mr. Burttschell -- I think you are 100 percent right, not only with respect to gun finishing, but all metal finishing. Suppliers started with the century old formulas, then spent decades improving them. And they recover that investment through selling the formulation at a markup.
You get no argument from me, Mr. Burttschell -- I think you are 100 percent right, not only with respect to gun finishing, but all metal finishing. Suppliers started with the century old formulas, then spent decades improving them. And they recover that investment through selling the formulation at a markup.
If people don't wish to pay the markup, or they would rather play with their own formulations, or use what they can find published 50 years ago, that's okay. But they can't realistically expect to find the results of decades of expensive proprietary research for free on the internet.
Still ... many of our readers are from non-Western countries where these Western suppliers are not available to them and they must make their processes from raw commodity chemicals.
Ted Mooney, P.E.
Striving to live Aloha
finishing.com - Pine Beach, New Jersey
Ted is available for instant help
or longer-term assistance.
![]() I agree with the gentlemen regarding refinishing formulas. I have tried many of them over the years and with the exception of molten salts for straw coloring the new methods are much safer and produce superior results. No matter what product you use the metal preparation phase is the most important. I attended a course years ago and learned that Smith & Wesson feels it take 15 years for someone to become a master polisher. That's doing it every work day, all day!
I agree with the gentlemen regarding refinishing formulas. I have tried many of them over the years and with the exception of molten salts for straw coloring the new methods are much safer and produce superior results. No matter what product you use the metal preparation phase is the most important. I attended a course years ago and learned that Smith & Wesson feels it take 15 years for someone to become a master polisher. That's doing it every work day, all day!
gunsmith - Suffolk, Virginia
RFQ: I stumbled across this link in search of hot gun-bluing supplies. We are interested in setting up a small scale business in our area after being involved with it with a friend in Florida. There appears to still be a high demand for quality hot bluing, especially at the local level. Many don't wish to ship their firearms out of the area. Many here still believe in contact at the personal level when it comes to goods or services. So, if there is anyone out there that can help us find a web site or information on any companies that offer the supplies to set up for a hot bluing business, please let me know.
Thanks
Jill S [surname deleted for privacy by Editor]1998
Ed. note: This RFQ is outdated, but technical replies are welcome, and readers are encouraged to post their own RFQs. But no public commercial suggestions please ( huh? why?).
A. Hello, Jill --
You'll readily find suppliers in our Directory of Equipment or Directory of Chemicals.
The problem isn't in trying to find someone who is interested in selling chemicals and supplies! The problem is in establishing your operation in a way that doesn't scare them about their potential liability if they do sell you this stuff.
Show them the industrial facility where you'll put the equipment, the protective gear that you will be wearing while doing the bluing, the shelves full of books about the topic, and your 'vanity wall' with certificates from Hazmat training sessions -- and they will be desperate to sell to you. But if ask them to ship it to your home, or you convey the idea that you lack chemistry experience and training, they'll do whatever they can to avoid selling to you.
Ted Mooney, P.E.
Striving to live Aloha
finishing.com - Pine Beach, New Jersey
Ted is available for instant help
or longer-term assistance.
Q. At the present time I have just retired, and was thinking of going into gun repair with my son-in-law who will be getting out of the Navy soon. We would be looking into restoring guns. We are looking for any information on the how gun bluing is done (hot bluing that is) -- any information would be of great help to us. Books, type of material, type of tools, etc.
Robert M [surname deleted for privacy by Editor]self employed/retired - Fairfield, Maine
1998
Ed. note: Our "must have" book list is a good start to such a library, Also please see our FAQ on Black Oxide vs, Cold Blackening.
A. I'd like to thank all of the responses here. I have been saving some victims of neglect myself. I bought a cold chemical blue kit and have had decent results. After careful prep work, and I mean tedious hours of prep work, I still believe that no matter how fine the finished product, If you don't keep the weapon cleaned and oiled you'll be right back where you started. It is important also that those of us who know, teach the less informed in the art of tool and toy care. One more note on all of this. Be very careful about the decision to strip and refinish any older gun or any other surface for that matter, you may seriously reduce its value.
DANIEL S [surname deleted for privacy by Editor]Arden, North Carolina
![]() Indeed, Daniel, a blackened finish offers virtually zero corrosion protection by itself; it is the oil that you put on it that provides the protection.
Indeed, Daniel, a blackened finish offers virtually zero corrosion protection by itself; it is the oil that you put on it that provides the protection.
Ted Mooney, P.E.
Striving to live Aloha
finishing.com - Pine Beach, New Jersey
Ted is available for instant help
or longer-term assistance.
A. Bluing gun parts.
As a gun interested hunter I often want to change parts of my guns or improve the surface of the parts. In beginning , bluing was a problem. But using heat I discovered that my gun parts got nice color. Adding some cold bluing - and my gun parts had the desired color. I use acetone
⇦ on
eBay
or
Amazon
[affil link] Flammable!
to clean the parts. Then three times in a small furnace at 250 °C three times with new cold bluing solution each time. Remember that bluing steel is like a paint job on your car. You have to do the job properly.
Norway
Q. I have been looking for information on reblueing firearms because I have a lot of older weapons. This information put out in this site is the best that I have seen. I think I would like to try some cold bluing on a DD barrel I have if anyone could give me a good product name and the best thing to strip the metal with I would be grateful. Its nice to find other people interested in guns. GOOD SITE!
Barry W [surname deleted for privacy by Editor]Pasadena, California
1998
Q. Anybody have any tips on cold bluing the end of the barrel? I have a Taurus M605CH (2" .357 Magnum Revolver) that seems to lose the bluing from barrel end after every twenty rounds. I've learned how to get pretty good results using a bluing pen, but retouching is getting tiring. Oh, for those of you considering touch up work, be careful of the original finish, cold-blueing products can strip it pretty fast.
John S [surname deleted for privacy by Editor]- Ft. Huachcua, Arizona
1999
A. I SEE A LOT OF OTHER PEOPLE ARE IN THE SAME BOAT AS I. HAS ANYONE ELSE DISCOVERED THE "JOY" OF RUST BLUING?. IT'S NOT THE EASIEST THING TO DO, BUT IT IS SAFE AND CAN BE DONE IN THE KITCHEN. RESULTS ARE VERY PRETTY IF YOU'RE A LITTLE PATIENT. SEE Brownells [ Brownells home page (affil link) ] CATALOG.
BILL HARDINGQ. Could you tell me how to fill in Rust pits on a barrel to prepare it for bluing...I bought a Mauser 98 and it had rust pits under the stock not very many but with the new stock it shows...
George F [surname deleted for privacy by Editor]- Vista California
1999
A. For George F's question about welding out "pits" on his Mauser 98 barrel. You would have to strip the barrel of its color by turning it in a lathe. Using a fine tooth file, cut just the surface to new clean base metal. Use a carbide burr to burr out those areas of pitting. Last step? Degrease in a caustic cleaner.
Now find/buy some 4130 copper flashed welding rod, smallest diameter you can get.Take the 4130 rod with you to someone who does "TIG" welding. Make sure he preheats your barrel to deep straw before he starts using the rod to fill your burred out pits. He has to keep the barrel hot, stopping to reheat if necessary. After all pits are filled, you have to heat the whole barrel up to 800 °F to 900 °F and hold at that temp for five or so minutes. This will help normalize the thermal shook between the barrel and the filled pits. Hand file down the filled pits until flush with the rest of the barrel. Back into the lathe and turn. Now here is where you need to file and sandpaper the barrel to approximate the original barrel surface texture. When your satisfied, you can see if hot bluing gives you the appearance you desire. if the welds show? You might have to have the barrel rust blued. That's all there is to it. Or ... find a professional restorer and save your mind.
Michael H [surname deleted for privacy by Editor]Paradise, California
1999
Q. All I am seeing here is real old formulas and Brownell's #7.
I would like any response anybody has on Unibath bluing system? I want to add bluing to my shop but I want what is best for me AND my customers. #7 salts are REAL corrosive, I mean they will eat porcelain tops off of cook stoves. This is a big responsibility to have around with kids in the neighborhood. I don't restore antique firearms since that take a special type of gunsmith (my clients hunt deer and turkey) so I need a good set up. Thanks for any replies.
David S [surname deleted for privacy by Editor]- Trenton, Georgia
1999
A. I work part time for a local gunsmith and my job consists mostly of cleaning and bluing. The key factor for a pleasing finished product is the polishing. Sanding or polishing to about 600 will leave a beautiful finish. Hot bluing on a small scale (less than 6-10 guns at a time) seems to be expensive because of the tanks salts and propane required. However, for a single gun rust bluing might be the answer to your problem. it is time consuming but leaves a satin luster just like on fine English doubles and is more durable.
brian smith- baton rouge, Louisiana
Q. I have been an avid Winchester collector for many years and I'm looking for detailed instructions on the process of rust bluing used by Winchester and others. I'm not looking to do Rust Bluing, just want to know the process and what chemicals were used. Can anyone point me to information on how it was done?
Jerry C [surname deleted for privacy by Editor]- Tupelo, Mississippi
2000
A. I started researching rust bluing in 1963 and am still going!
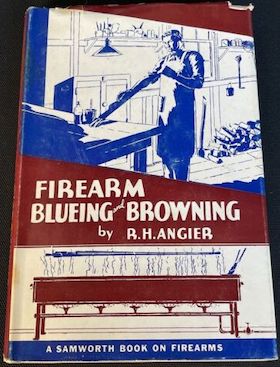
This method gives the best finish in my opinion. I have a lot of stuff on the subject including some original documents from Vickers Ltd . The book Firearm Blueing and Browning [on eBay , Amazon, AbeBooks affil links] by Angier gives many solutions, try the Swiss arsenal formulae, I have an original bottle of this that I was given in Bern in 1979. It works but I like mixing my own! When you have the parts polished hold them under a slowly running hot tap and polish with 600 Wet or Dry paper when the water 'wets up' the complete surface dry with tissue and apply solution . Use cotton wool held in a clothes peg soak the wool in solution but squeeze most back into the bottle!
Don't get solution on skin and don't touch the steel. Don't bother with getting a mirror finish on the steel just get all the "Tool marks" going the same way !
let coated parts rust in a warm place until red rusty this may take 24 hours! Boil parts in soft water repeat soft water for ten minutes. Then remove wipe dry and allow to cool. Rub off black dust with oil-free #0000 steel wool ⇦ on eBay or Amazon [affil link] . You will be quite disappointed to see almost no effect . If you have a grey-ish tint all is well, re-coat the parts and repeat the process.When rubbing off the black oxide dust do a thorough job especially in corners, etc. After 5 to 7 passes you should have a durable blue black finish that can even be burnished with a fine revolving wire brush.
I promise that when you get the hang of rust bluing you will never bother with cold blue again apart from touching up.This is NOT a difficult process, you can even blue parts without a tank by holding the rusted parts in the steam from a kettle .I have even blued 12 gauge barrels this way as you get no water in the rib joints.FN Browning finish soft soldered barrels like this. Often as the blue starts to form the black dust can be rubbed off with a wet cloth instead of steel wool, try small STEEL wire brushes instead of steel wool if you want, don't use brass brushes they leave a brass film . When the blue looks OK still give one more pass but boil for a little longer , say 5 minutes more to stop after rusting. The rusting periods will take longer of course as the protective coat builds up .
When finished I coat the parts with motor oil or underbody protective wax then leave for 2 days to let the finish "set". In 36 years of hobby gun restoring about the hardest job has been typing this with one finger! I hope this has been of help.
Has anybody got detailed information on the EXACT rust bluing as carried out by DWM , Mauser, ERFURT, Sauer und Sohn and other arsenals? I have steam chambers and copies of the W+F BERN, RSAF Enfield, HAMMERLI, and other firms such as BRNO. Apart from unpublished formulae I would like to know how complex parts could be so smoothly rust blued. RSAF Enfield MAY have used fine husks or walnut shell media ⇦ on eBay or Amazon [affil link] to "Scratch off" the black oxide dust . DWM MAY have used tumbling barrels with powdered Arkansas stone mixed with sawdust. Has anyone tried using a cartridge case cleaner for this purpose?
Good luck to anybody starting out on rust bluing I hope you have as much fun as I have had over the years . To get you started here is the 1877 W+F BERN solution that works well. Later solutions were similar but with a little copper sulphate ⇦ on eBay or Amazon [affil link] added:ferric chloride ⇦ on eBay or Amazon [affil link] solution {29%?} 66 grams Mercuric chloride 18 grams, Alcohol 20 grams, Nitric acid 15 grams, Distilled water 1 liter. Dissolve the Mercuric chloride in the alcohol first and add the acid last. Better still have a druggist mix it for you. NEVER plug the bottle tightly as it tends to ferment a bit at first I have used this solution for many years without trouble but take no responsibility for it.GOOD LUCK!
T H Deary- Norwich, Norfolk, England
Ed. note: Thanks, Mr. Deary. Readers should know that mercuric chloride is, of course, a mercury salt. Here in the states we can't even easily get mercury sealed within a glass thermometer anymore, so it may prove difficult to buy loose quantities of mercury compounds :-)
A. In response to the "editor's note" to post about Mercury compounds being illegal in the US, www.al-chymista.com will sell 25 grams Mercury Chloride for 6.50 USD. This may be different from nearly 6 years ago.
What I am trying to duplicate is a bluing solution I had made at a local apothecary's shop, aka, druggist, 48 years ago, recipe as follows:
Sodium Nitrate 7.5 grams
Potassium Nitrate 7.5 grams
Mercury Chloride 15 grams
Potassium Chlorate 15 grams
Sweet Spirit of Nitre 15 grams
Distilled Water 10 ounces
At www.al-chymist.com , Mercury Chloride, 25 grams, 6.50
Sodium Nitrate, 1# 4.00
Potassium Nitrate 1# 8.00
Sweet Spirit of Nitre is Nitric acid, I assume 70%.
Potassium Chlorate, from another site, 250 grams, 13.10, has to be available at a lower price, just haven't found it, 17 times what's needed, and the pound quantities, forever stock
My pint bottle, brown glass, has evaporated to the last inch and a half, don't know if I have lost just the water, can add more distilled, get back to 8 ounces or so.
Have tanks welded up for me 35 years ago, never used them.
Cheers,
- Rillton, Pennsylvania, USA
Ed. note: Thanks for sourcing the chemicals for us, George. Mercury compounds are hard to get because they are toxic and can't be sent by post. Your reply helps.
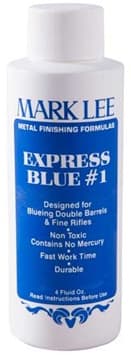
A. I have been experimenting with Rust bluing, and I believe I've found a way that is working well. I tried mixing my own solution but they didn't work well (and were a hell of a lot more expensive) than using the "Mark Lee Express Blue #1" .
It comes with good instructions.
The Roy Dunlap book, Gunsmithing [on Amazon affil links], gives several formula's, but the cheapest way to get information is to get the Metal Finishing Magazine reprint from Brownells - it's only about a $1. The Big expense is a tank a burner large enough to put a barrel in $300 bucks or so. But if all you're doing is pistols you can boil them in a pot on the kitchen stove! Go ahead and buy the larger carding brush from Brownells, you'll have trouble finding bristles soft enough locally.
Liberon #0000 steel wool ⇦ on eBay or Amazon [affil link] is made without oil and is MUCH better to use than oily stuff you normally buy. Degrease thoroughly, and don't leave the Lee solution on too long or it will pit your metal. After 5 or 6 passes it will start to look like what you want. I think if you weren't doing rifles you could probably get started from scratch for less than $50 bucks. You need the Lee solution, a carding brush, degreaser, degreased steel wool, and something to boil your parts in. Good luck
David R. Jones Jr.- OKC, Oklahoma
Q. This may be the equivalent of preaching heresy, but can anyone direct me towards a temporary gun sight blacking product, something to take the glare/shine off my foresight and shoulders of my backsight?
Years ago I had an aerosol of Gun Sight Black made by Browning, but cannot get it now. I fire competition pistol in the Irish Army, with the pistol having to be holstered after each practice, with the resultant shining of the sights. I am currently burning rags soaked in burnt oil to blacken the pistol.
- help!
Gregory O'Keeffe- Cork, Ireland
A. RE: Sight Blackening:
Creedmoore Sports of CA sells Rig Blackout, Sight Black Spray, or a Gun House Carbide Lamp; any will work well if you can't find a Butane lighter sooty enough or have plastic sights.
David. R. Jones Jr. [returning]- OKC, Oklahoma
A. I was just at a muzzle loader shoot this weekend. I ask the old timer's there about browning. They responded that the old method of browning was performed by using stale urine. Sounds gross but they all swore by it. According to them it was rubbed into the barrel, allowed to set for a period of time, the rinsed of and dried. The process was repeated until the desired finish was achieved. I suppose if you talked to someone or looked it up you could find the ingredients of urine and make this solution, or use what nature has given you.
Chris LaMaster- Guilford, Missouri
Q. My question is for mr. Tommy Burttschell the master gunsmith
I am wondering what is the difference in polishing grits for bluing , I don't have trouble with my bluing staying on the weapons but I just haven't got the shines that I would like and I was hoping that mr. Burttschell could send me in the right direction on the grits or another method .
Mike Lamb(pres. & owner of the Lone sStar Rattlesnake Handlers Assoc. here)
Brownwood, Texas
2000
A. Hi,
I see you haven't had a reply from the respected master gunsmith yet so I thought maybe an answer from a S&W Academy and Beretta school graduate with 30 years gunsmithing experience may be helpful.
Just as in sanding wood the different grits will impart different finishes on the material, i.e., the lower grit rating such as 240 will leave a rougher finish on the metal and the higher the grit rating the finer the finish or as you put it"shinier" the finish will be. Excellent polishing compounds are available from Brownells [ Brownells home page (affil link) ]
Many gunsmiths will for a field grade blue only finish the metal ending with a 400 grit polish, using rougher grits and then working up to the 400 polish then degreasing, bluing, neutralizing and lubricating. It is possible to obtain mirror finish polishing using
brown tripoli buffing compound
⇦ on
eBay
or
Amazon [affil link]
and jeweler's rouge
⇦ on
eBay
or
Amazon [affil link] or Fabulustre ⇨
the later two of these polishes are used by Jewelers to impart mirror finishes on Gold, Silver and Platinum. be careful with these polishes as they will lap into the metal and must be cleaned thoroughly before any finish is applied!
You didn't mention what type of bluing you are using i.e., rust, hot salts, liquid or dry chemical. This is important as many chemical liquid compounds have acids designed to etch the metal to assist the chemical blackening ingredients achieve their means and will dull the luster of the finish when applied and no matter how shiny the finish is when the chemical is applied the end result will be a dull finish.
If you are using Hot salts bluing the temperature of the salts are of utmost importance, i.e., overheating the salts will not only harm the bath but will also cause reactive damage to the metal you are trying to blue. There are many metal alloys that will respond differently to all sorts of bluing some metals will take a deep blue at lower temperatures than others and some cast metals are copper bearing and and will come out of the bath with a reddish cast, sometimes raising and lowering the temperature of the bath or cooling the metal in a cold water bath between submersion in the salts will help and sometimes not. Many cast metals you will play the devil and it will never blue!
Also different heat treating methods are used on firearms and this will affect the way the blue "takes" some frames or slides only had the intended area heated and air hardened and this makes for a super hard surface and the bluing sometimes will not be even.
I don't care for the liquid chemical blues and always use hot salts blue or rust blues for firearms.
As for the pretty rainbow colors on many shotgun receivers, best leave this to the nuts like myself with the high temperature ovens, cyanide and blow pots! Send these receivers to a pro for the color case hardening!
The key to beautiful finishes on metals is Polish and cleaning before heading to the tanks. Gunsmiths use many different types of wheels i.e., wire, muslin, felt, stitched, loose and wheels of different diameters loaded with polishing compounds and spin them at speeds from a few hundred RPMs to three to four thousand RPMs, and you can take this to the bank! It is easier to take metal away than it is to put it back. My advise is to practice on cheap junk guns before you jump on that gun your Grandad gave you before he passed on!
It is difficult for a beginner using a buffing wheel not to drag screw holes or round off corners or remove markings!, this makes for a repulsive finished product! Many times I would liberate paint stirrer sticks from the paint store and glue silicon carbide sandpaper of the desired grits to the sticks and use these to polish flat surfaces to keep everything flat, and while using the buffing wheels on the barrel keep the work moving at different angles to the wheel and DO NOT SLOW DOWN FOR PITS! as you will make dips in the barrel that are noticeable when sighting the firearm! Bluing will not hide any metal surface defect!
Practice and experience are the best teachers and those who are afraid learn are just like my Uncle Clarence, we go bird hunting and he hardly shoots from fear of missing and being laughed at! Needless to say if it weren't for the Piggly Wiggly he would have starved years ago.
In these days of mass produced stamped-out and Polymer framed firearms it seems that workmanship and pride in beauty and craftsmanship is slowly ebbing away. Those of you who are interested in gunsmithing will find the best teachers in the library or book store many of the authors are dead and gone but were thoughtful in leaving their priceless knowledge behind.These books may not be on the shelf but may be ordered, also check on-line auctions, sometimes you can luck up on an out of print masterpiece.
Many inferior gunsmiths (parts changers) do not understand metals, heat treating, fit and function, and do not care to learn and unless Sony comes out with a Gunsmith Playstation game they will probably die just as clueless as they were born. My advise to them is do something simple like pushing a camel through the eye of a needle or play the stock market and leave the gunsmithing to the guys who are never to old to learn!
Best of luck to our future gunsmiths, I hope our government will not outlaw the ownership of firearms and press the trade into demise.
Respectfully Submitted
Timothy Bell- Lake City South Carolina
Q. This is to timothy bell
Thank you for that info that will be very helpful to me. I am just starting out (a part changer) but I am and have always been interested in guns and how they work and the making of the barrels, etc. I am one of those that will never be to old to learn new ways and stuff .
I am learning a lot about the metals and that just because there are two Tauros pt92/99 9 mm and they look alike that doesn't mean that they will blue the same or polish the same. I have came across this.
![]()
mike lamb [returning]
- brownwood texas
A. In regards to the proper bluing or browning of firearms, the most important process is the degreasing and removal of all oxides and pitting. Slow rust bluing requires the solution to touch the bare metal surface of the firearm parts and will not penetrate a film of oil or old bluing which would cause a patchy undesirable finish. A high polish is not required because the acids in the bluing solution will etch the metal surface to give a pleasing satin finish.
To start the process of bluing, have all your equipment ready at hand. After polishing, coat the parts with dish washing detergent and scrub in hot water. Place the parts in your tank and boil in a solution of washing soda ⇦ on eBay or Amazon [affil link] (sodium carbonate) and hydrated lime [affil link] (calcium hydroxide). Boil for about 20 minute as this will turn all the oil and grease on the parts into soap and will clean the parts thoroughly.
From this point on, wear gloves when handling parts to keep the oils in your skin from contaminating the parts. Remove the parts and let cool until comfortable to handle and wipe the parts with a cotton ball dampened with a 7% solution of hydrochloric acid (HCL). This will neutralize the carbonate and lime on the parts and also act as a pickle or "kick in the ass" to activate your bluing solution. Moisten a cotton ball with bluing solution, underline moisten, and coat the parts with even strokes. Place parts where they can be exposed to the atmosphere on all sides. After a couple of hours you will see a coat of rust forming on the parts.This is good and humidity has a lot to do with it. The higher the humidity, the better the coating. When the parts are covered with a good coat of rust, boil the parts in a CLEAN bath for 20 to 30 minutes. Now your parts have turned black. Remove this coating with oil free 000 steel wool ⇦ on eBay or Amazon [affil link] and recoat the parts with solution as before. DO NOT make more than one pass over the parts or you will wipe off the small amount of oxide of the previous pass. Each time you make a pass, you will notice the parts a little darker. Sometimes you may get a good color after 6 passes. Other times it may take as many as ten. It all has to do with the humidity in the air. After your last pass, add washing soda ⇦ on eBay or Amazon [affil link] to the boiling water to neutralize your solution and prevent any after rusting. Immediately after removing the parts from the last bath, coat the parts with WD-40 ⇦ on eBay or Amazon [affil link] or Marvel Mystery Oil to cure and bring out the color of your work. I'll bet that your first attempt looks like hell but don't despair. Just put it back in the washing soda ⇦ on eBay or Amazon [affil link] tank and start all over or follow the advice given so many times before, "Let a professional do it"! The bluing solution is as follows:
- 300 cc nitric acid
- 240 cc hydrochloric acid
- 1200 cc distilled water
Slowly add the acid to the water stirring constantly in a three litre beaker. When mixed, place the beaker in a larger vessel and pack the outside of the beaker with ice. Add cast iron chips until no more reaction takes place. Remove the beaker and let warm to ambient temperature and add more chips. When no more bubbles are formed, the solution is complete. You now have a muddy mess but this will change. Pour the liquid into a gallon brown glass jug and set aside. After a couple of weeks, the solids in suspension will have settled out and a clear yellowish liquid will remain. Carefully pour the clear liquid into brown bottles until the bottom material in the gallon jug starts to move. Discard the rest. This mixture is cheap to make and will keep forever. Also, there is enough for several hundred guns.Good luck.
David F. Fiola- Godfrey, Illinois
A. To Mr. Lamb.
With that rattlesnake in your hand I'll tell you anything you want to know about bluing. The gentleman right after your question is 100% right. Follow his instructions. A lot of folks think the polishing is done after the bluing. Wrong. The bluing results are no better than the polishing before hand. Majority of my standard bluing is stopped at the 400 grit. If heavily pitted and customer doesn't want to spend money on removing these, I stop at 320 grit.
I hope I get to meet you at the next snake roundup in Freer.
Please let me know if you have any more questions.
To: Timothy Bell
Mr. Bell, what a pleasure to read what someone has to say about this subject who knows what he is doing. I truly believe that no other work put out by a gunsmith speaks about his work more than bluing. So much time learning to do this. I know of nothing else in the trade (metal working) that takes this long to learn and produce correctly. I would highly suggest that anyone wanting to learn how to blue, if you can, go to work for a full time shop (free of course). Offer to do anything for the knowledge.The best printed instructions are only a guide. Enjoy the trade. I have.
Tommy BurttschellMaster Gunsmith - Pinehurst, Texas
2001
![]() Gentlemen:
Gentlemen:
I have read all of your excellent formulae for gun bluing or coloring whatever. You need chemicals right?
Well, I am now a lawyer by profession, but more than a decade ago, in my high school days, when I used to practice gunsmithing (making guns so to speak), for gun coloring, I only need a rug, emery cloth, junk oils, and fire. No more. And the metal coloring would stand even to the best and priciest guns, commercially available, I have ever seen.
Of course the secret is a gunsmith's secret, that was passed on generations thru generations.
Good luck amateurs!
Atty. Johan A. Tabuzo- Philippines
A. With respect to the attorney in the Philippines. Heat bluing is an old process and requires very little skill or special training. It can be done with most steels and the temperature will dictate the color of blue. Quenching in oil is said to 'set' the color. There may be some very old family secrets you have but heat bluing is fairly well known.
Good luck in the courts.
William Stanley- Seattle, Washington
A. I recently had a crash course in tinkering with old guns. Since I came out of it with a finish, beginners might play with old cheap guns like this. I wouldn't recommend playing with anything you already like the look of ! (lol)
I recently made a "lottery ticket" purchase of an old lever action. Of the two owners in a gun store I was browsing, a customer wanted to sell an old Marlin. Since that owner present grades only handguns, it would have to wait for the next day. One day off work was too much, and I had my chance to look at it. The action worked, but was stiff, and small wonder. It had been SPRAY PAINTED. (Yes, you read that right ! Cheap, Black Spray paint!). The bore wasn't 100%, and I didn't have "Mr Goodwrench" with me. (one of two "mentors" in anything mechanical. YOU know the type...lol) Since all my friends are huge gun collectors, go figure I wanted to get a really good gun, really cheap, and have a decent outcome, win bragging points. Keep in mind this thing had all the metal (even the interior action....arrrgh!) spray painted. If I got a decent coating on, anyone can.
I took my snap decision to Mr Goodwrench. He wasn't home, wife was, I proceeded to disassemble the lever action as best I could. Mr Goodwrench looked the numbers and model up, measured barrel, etc, and pronounced it a good find, if fixed. He liked it. I got the stocks off, and we inspected the metal underneath in its entirety. Clearly, it became apparent the previous owner had removed the stocks, sanded them (beautifully, I might add. He must have worked with wood. He must have sanded the rust off the metal, and spray painted it, thinking gun finish was "special paint"...arrgh!)
Well, you can all picture this: while I'm inspecting a loose rear stock, Mr GW completely disassembles the action and puts it all in a big ziploc bag. I got an old half gallon of paint stripper, and made a rough tank out of aluminum foil, big enough for barrel and parts. In several minutes, the paint sang off. If you want to strip an old cheap gun of liberally applied spray paint in seconds, this is the way to go about it. No muss, no fuss.
After cajoling rust off as best I could, the heavy pitting on the top of the barrel that showed, as well as both flat side plates of the action area, was apparent. This thing might damned well shoot, the more the action was oiled and worked, CRISP trigger. But it wasn't ever going to impress the eye. I went for cheap functional, and just wanted "everyman" bluing to cover this 50 dollar find that had lain rusting in a basement for 50 years, in case it worked. We're talking wal-mart Birchwood Casey ⇦ on eBay or Amazon [affil link] here folks.
I am so happy to see everyone talking about sandpaper, I thought I was crazy trying it on the pitting. I had thought wet dry finish-paint-rub grit was in order, but I kept reaching for ever heavier grit in the assortment I had purchased. I accidentally had 400-something as my roughest, and I was wishing for much grittier.
The Birchwood Casey stripper [adv: bluing remover on eBay or Amazon [affil link] works well. As quick as the paint stripper removed the paint, the BWC stripper removed what bluing was left in places. After rather vigorous sanding, something resembling a decent shooter started to emerge. I have to go back and sand out a little more in a few places, but the results of six to ten coats, whatever, as many as it takes, isn't too bad. I use tiny bits of cheap sponges, a little glob I rip off a big old cheap one. It works equally well for stripper or bluer.
Careful with the little sponge when applying the bluing. Try not to scrub with it, or you'll just loosen up the oxidation you're shooting for. I didn't know all this till AFTER I was done. I was scared at first when I saw what looked like RUST....but once oiled with gun oil liberally...it looks okay. I know, you can see where it was pitted, but this thing was so horrible, yet the action so glass smooth and trigger so crisp, I had to try. I found out it put one inch groups or better at thirty yards, and I live in heavy hill/brush area. 30/30's are well respected around here, and having a "35" lever action now, I'm tickled pink.
The stock got a dark treatment with Minwax Preconditioner [affil link] for soft wood (fingernail test? lol), then Minwax Wood Finish [affil link] in dark walnut. Liberal dark walnut, left on for at least twenty minutes. The excess wiped off, and left to dry on a coat hanger hook, the stocks have a slight "stickum" feel to them, but look dark and aged. I was surprised at how much I liked the slight "stickum" feeling. I was going to finish clear it and buff it, but like the sure grip. Its not darkening my hands, and I can't see any handling marks.
Again. This isn't a presentation piece, but it has a coating and its a surprisingly good shooter. The little pin spots of whatever down the bore here and there turned out not to matter much. Actually, I'm going to loosen up on my pickiness on bores when looking for bargains at used gun places. I have no problem toting this thing around in inclement weather, and certainly don't mind if I accidentally rub it against a tree to bench a shot. I know I can strip and blue it in about an hour, and while waiting for bluing to stand for a few minutes, I can wipe down the stocks with dark walnut, though none had been required. The tackiness that doesn't stain the hand, does seal out water amazingly well.
I don't buy thousand dollar guns, simply because you're just using them up by shooting them. I target shoot way more than I actually hunt. If you have an expensive gun, let a professional gunsmith do the work. But if the stocks solid, and the action works okay, take a chance for a few bucks. trying to see past the rust on the outer finish can be hard, but some awful good bargains can be had in such a manner. Not to mention, I get an introduction to metal finishing in the bargain. Now I ain't afraid to finally do something with that perfectly good shooting .22 my late grandfather gave me (only thing, really...lol) that just has an old but solid stock and a patina of rust all over it. It isn't dollar worth what a real gunsmith would have to charge, but it's actually in great condition compared to the above described lever action. I'll let you all know how it turns out.
Birchwood Casey "Blue and Rust Remover" [adv: bluing remover on eBay or Amazon [affil link] and BC "Perma Blue" ⇦ on eBay or Amazon [affil link] were under four bucks apiece, and there's TONS left over.
Sean E Duvall- Donora, Pennsylvania
(you are on the 1st page of the thread) Next page >

No dead threads!
Your Q, A, or Comment puts this thread on The Finishing.com HOTLINE.