
| Search our quarter-million Q&As |
Home of the finishing HOTLINE since 1989
-----Polishing Stainless Steel to a Mirror Finish
< Prev. page (You're on the last page of this topic)
Skip to newest posting ![]()
Q. Hi, I am fabricator/polisher for a new company; being new, there is no experience I can draw on. My boss is happy to supply me with almost anything I find that helps the job and I would like to invite any key tips that any polisher should know. We work almost exclusively with SS, all hand tools, I've found trizact, pneumatic drums, I think I've found most of the right equipment but I can't find enough brain food.
I achieve a good dull, satin, brush finish; I can achieve a confident mirror finish but not close to the finishes you speak of, and it takes me far too long -- and polishing interior angles drives me crazy. Best I've found for this is dyna-brade for taking weld fillets out, then a thin mop. If it's a brushed finish I finish the inch or so where the wheel can't reach by hand with scotch cloth, but it leaves a finer finish than our brush finish. Any pointers in any area will be greatly received. Even if you think surely everyone knows that! Try me; no one will think you are amateur for giving me really basic advice, only me for not knowing it already but I don't mind, I know I have a LOT to learn.
- leeds, UK
August 21, 2009
A. Hi, I don't know if this issue has been resolved, or if there is still any interest in this question. Still;
Eric Brown's answer describes the issue nicely. The cause of the "orange-peel" is usually the result of the lap material being too soft for the substrate being polished.
All polished surfaces appear to have a Beilby layer. Acid etching can remove the layer, but that just exposes the microscratches that are present beneath this layer in almost all polishing processes.
Very hard laps produce scratches, but not orange-peel. Progressing from softer lap materials to harder lap materials (Buehler PoliPad, to TexMet to MicroCloth just as examples) gives a clear indication of the situation. The PoliPad with 1 micron diamond as an abrasive will produce very refined, flat surfaces, with some haze or "sleeks" evident. Following with a very short polishing on the MicroCloth (with lubricant-soap) will remove the haze.
However, extended polishing on the velvet-like MicroCloth will result in orange-peel. I believe the orange-peel is the result of differential hardness domains; areas of agglomerated polishing compound versus soft lap.
Buffing wheels by their nature produce orange-peel as well as localized galling.
- Livermore, California, USA
November 9, 2011
... we now return to our regularly scheduled broadcast ...
A. Hi Mr. Laurence,
I am Daniel Ocampo working as a tool maker in past 14 years.
Your issue caught my attention.
Regarding the orange peel like appearance on the stainless steel it only means you over polish the workpiece. It has also correlation with the speed of your polishing machine and grit of material you use in polishing. I will give some points which may resolve your problem. If you are using silicon carbide the sequence must from rougher to finer. Example, use grit 600 then follow by grit 800 and then 1000. To achieve the mirror like finish after the silicon carbide you should follow by the diamond paste. Application of diamond paste same as silicon carbide rougher to finer.
Since you have already polish by silicon carbide you use finer diamond paste. Sequence must be grit 15 mic followed by 8-6 micro and for finishing use grit 1 micro.
Hope this suggestion will help you....
- Saudi Arabia
November 15, 2011
Q. I'm an Italian stainless steel worker.
We manufactured a d-curve piece of furniture 180 cm x 120 cm with a polished stainless steel metal sheet.
After welding it we manually polished the welded parts.
The 2 polished finishes have a different mirror finish tone.
Does anyone have a suggestion to manually finish the piece (mirror finish) with a uniform/constant finish?
Maria
- Salerno, Italy
February 23, 2012
Q. I have a question about how to specify the mirror finish on stainless steel. We are a manufacturer of cameras and use stainless steel mirrors as part of the optical path so we need a true optical mirror finish with almost no scratches. The mirrors are typically 1 inch diameter 304 stainless. Currently, the surface finish specification for our stainless steel mirrors is "FLAT TO 2 WAVELENGTHS W/ 80-50 SCRATCH/DIG, MIRROR FINISH". We have used the same machine shop for years without many problems but recently we have been receiving the mirrors with lots of long small scratches. After measuring the scratches, I believe they are within spec but do not meet our optical quality requirements. Can anyone tell me what surface spec I should be using?
Bob Dobson- Horseheads, New York, USA
March 23, 2012
A. Thought of Electropolishing?
Stan MartinBioMed Eng. - Portland, Oregon, USA
April 25, 2012
Multiple threads merged: please forgive chronology errors and repetition 🙂
Q. Hi, I'm the manager in a metal fabrication company. We are doing a very large project, in which we have to polish plates of 316 S/S from the rawness of the hot-made coil surface to mirror. The thickness of the plates are 10 mm, the lengths are in average 5 meters long and the width is variable from 100 to 900 mm.
The thing is how to make a very good mirror finish and have a easy and standard process?
The final result is good but we think we can improve it and make the process quicker.
The current process is:
1. Sanding disk 80 grit (we also have sanding belts for elastic barrels).
2. Sanding belt 120 grit (we are trying with Trizact A160, and also have sanding disks).
3. Trizact A100 or sandpaper similar grit.
4. Then all the way down to Trizact A6
In these steps we have tried also with sandpaper until grit 400 and then Trizact.
Everything looks nice when we are in Trizact A6.
But then, when we are using the stitch cloth wheel with the green wax, the mirror shows up, but if you look it in some angle, you can see little dots like if we didn't completely remove the raw surface of the piece.
Are we doing something wrong?
Or that is the best you can get from a hot rolled coil of 316ss?
To make a piece of 6 m long 100 mm wide and 10 mm thick takes around 4 hours, 13 bands of trizac in different grits, plus the cloth mop and the green solid wax.
Should we use an extra or different wax or finishing mop?
Should we use scotch brite mop at the end or the begining?
I have read some answers of the forum an I'll really appreciate your opinions. Thanks,
Bernard.
- Sydney, NSW, Australia
August 2, 2012
A. Hi Bernard. I know very little about this subject except that those little dots should not be there :-)
We have dozens of threads about mirror polishing of aluminum and stainless steel, and what always fascinates me is that everyone understands the principal, and it's a dead easy one, yet it doesn't seem to be yielding to an easy mathematical solution like we'd expect.
To re-iterate it though, you could theoretically take raw steel and, with nothing but your final polishing compound, eventually get it to a mirror finish -- but it would take as long as digging the foundation for a skyscraper with a teaspoon, and would involve rivers of compound and acres of polishing cloth. So what we do instead is start with a grit that is just coarse enough to remove all mill garbage and scratches in minimum time by causing new scratches no more severe than necessary. Then we use a grit just large enough to quickly remove those scratches we just made, while causing scratches no more severe than necessary. Rinse and repeat, rinse and repeat, rinse and repeat.
But what is the best number of steps and the best ratio of grit compared to the prior step and the subsequent step? Pardon this neophyte's naivety, but there should be a mathematically supportable way to say "Start with XX grit because ... then move to YY grit because ..." :-)
I particularly enjoy your posting because it spells out the ratios that you have selected, opening the floor to a discussion of what, if any, ratios would be better and WHY.
Regards,

Ted Mooney, P.E.
Striving to live Aloha
finishing.com - Pine Beach, New Jersey
Need quick confidential answers? $25
Need project assistance? $100/hr.
August 2, 2012
August 24, 2012
![]() Thank you for this thread, it saved my life! I was ending up with an uneven "granularity" that looked like a cross between brushed stainless and smeared fingerprints. Then I came across this thread and read Laurence's words:
Thank you for this thread, it saved my life! I was ending up with an uneven "granularity" that looked like a cross between brushed stainless and smeared fingerprints. Then I came across this thread and read Laurence's words:
"If you go 90 degrees to the last operation you will be able to see the lines you have not taken out yet."
Laurence, you are my new best friend! That was my whole problem, and now that I'm using the 90 degree technique, I can see where the granularity came from and I can also see that I'm spending all of my free hours sanding! Maybe you're not my best friend after all, ha ha! I took it back down to 80 grit and I'm only at 220 now and the results are fantastic. It's great knowing when I'm done and ready for the next grit! Thanks again!
- Cupertino, California, USA
Q. Hi, this is Abhishek Purohit, from Mumbai, India. I want to know how to do mirror finishing on stainless steel sheets. Currently I am using red oxide with nitric acid and water combination. But I am not getting good finish from above combination. Can anyone suggest me any other idea.
Mr.Ajay Madan,
Thanks for your help. Can you suggest if the chemicals I am using are the right one?
- Mumbai, India
August 25, 2012
A. Hi Abhishek. As you see, we appended your question to a thread which answers it.
Sorry, I don't understand your description of what you are currently doing, but mirror polishing is a multiple step operation -- never a single step operation. While you must use extremely fine abrasive in the final step, it would take you more than a lifetime to polish a rough surface with an extremely fine abrasive; and even then, it would cause waviness, orange peel, and selective hardness -- so you must progress through the steps from coarse through fine. Lawrence describes how to do it in 6 steps. Good luck.
Regards,
Ted Mooney, P.E.
Striving to live Aloha
finishing.com - Pine Beach, New Jersey
Need quick confidential answers? $25
Need project assistance? $100/hr.
August 25, 2012
Stainless Steel 316 polishing from 250 RMS to Mirror finish, what are the process steps?
Q. I have components with complicated but open surfaces that are Investment cast. I need to bring the 316 material from a 250 RMS finish to a mirror finish.
I want to do some preliminary test to see what finish can be achieved.
Surface are is about 25 inch^2 each.
Owner - Lake Charles, Louisiana
September 6, 2014
A. Martin,
I'm not really an expert in surface finishes, but something along the lines of tumbling followed by electropolishing may be what you need.

Ray Kremer
Stellar Solutions, Inc.
McHenry, Illinois
September 19, 2014
A. I question your 250 RMS . I've never seen anything that rough. Normal mill steel comes in at about 35 RMS. So if that is the case, you can burnish or polish for a bright finish; but if you need a smoother finish less than 24 RMS, you do need to use a couple of ceramic steps. Do you know what you are trying to achieve?

AF Kenton
retired business owner - Hatboro, Pennsylvania
September 22, 2014
![]() Thanks for the response, I did a check and used fiber wheels and seems to be doing the job. The finish now is about 25 RMS which is good enough for the application.
Thanks for the response, I did a check and used fiber wheels and seems to be doing the job. The finish now is about 25 RMS which is good enough for the application.
Many thanks to all.
Martin
- lake Charles, Louisiana
September 24, 2014
Q. How important is the hardness in achieving a mirror finish?
Can I get similar results with 301 1/4 hard vs 301 full hard?
I've been asked to make some stainless steel mirrors as a side project at work. Yes I know we could just buy them...but I have time and materials and would like to be more proficient at it. I polished one for myself years ago but am having a hard time getting the same results. Currently material type is the variable.
I had previously used commercial Brasso
⇦ on
eBay
or
Amazon [affil link] and was happy with the result. Now using similar product and process but getting a cloudy finish.
Aircraft Structures - Halifax, Nova Scotia, Canada
March 27, 2018
A. You are talking about 2 different things. Hardness and a mirror finish which is subject to interpretation. Are you looking for a reflective finish or a mirror finish? A true mirror finish requires a smooth surface. A reflective finish does not. To achieve the latter, hardness will effect the time it takes to achieve a smooth enough surface to get a polished appearance, meaning it is more difficult to remove or modify the surface material profile.
AF Kenton
retired business owner - Hatboro, Pennsylvania
March 27, 2018
Q. Thanks for the quick response!
I think 'reflective' would be the best description. Obviously the clearer the image the better. It will be used to make out faded part numbers written inside the aircraft and similar detail work.
When I get back to work I will try to upload a picture of the piece I have next to the piece I am trying to recreate.
The reason I'm asking about hardness is the material I have available is 301 SS and available in 1/4, half and full hard. Just wondering what my starting point should be or what difference there is. It seems both could be equal quality. The full hard will take longer but be more durable and scratch resistant.
Cheers
- Halifax, Nova Scotia, Canada
March 28, 2018
Q. The piece on the left I polished 7 years ago and am trying to recreate … a little scuffed up but still very clear image within a few feet. The piece on the right is what I'm currently working on.
I think my problem is too much pressure and speed. Is there a better compound to use other than the Brasso ⇦ on eBay or Amazon [affil link] in the gold bottle? Thanks.
Tony Murphy [returning]- Halifax, Nova Scotia, Canada
March 30, 2018
How to get a good polish on a stainless weldment
October 17, 2018Q. We make furniture products, and a couple years ago we started offering polished stainless products. The quality of our polished products has improved immensely over the years, but we can't seem to nail down the final polish that gives it a good mirror quality. Currently, the products look very good from a distance, or in dim lighting, but under sunlight, you still see a grain and haziness in the finish, which is unacceptable to my picky customers.
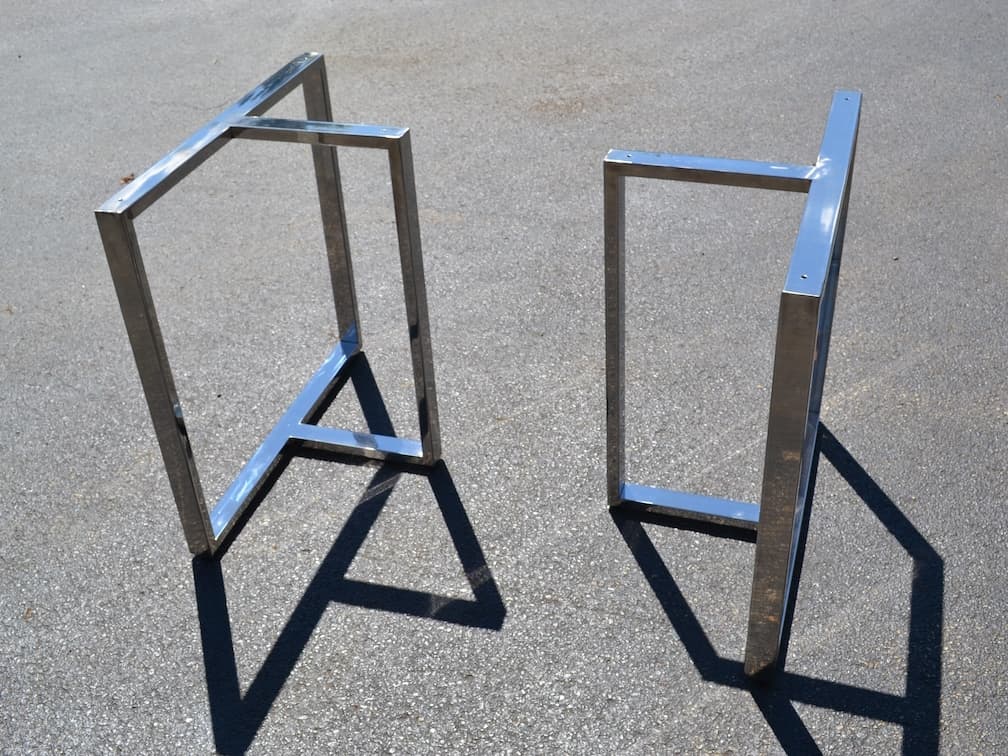
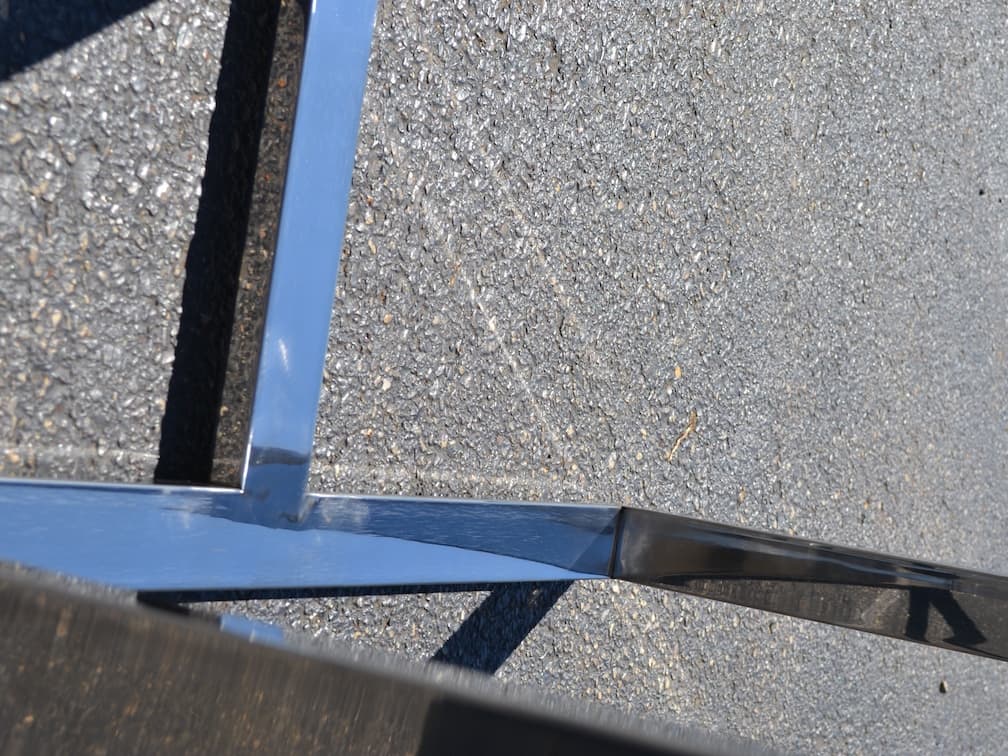
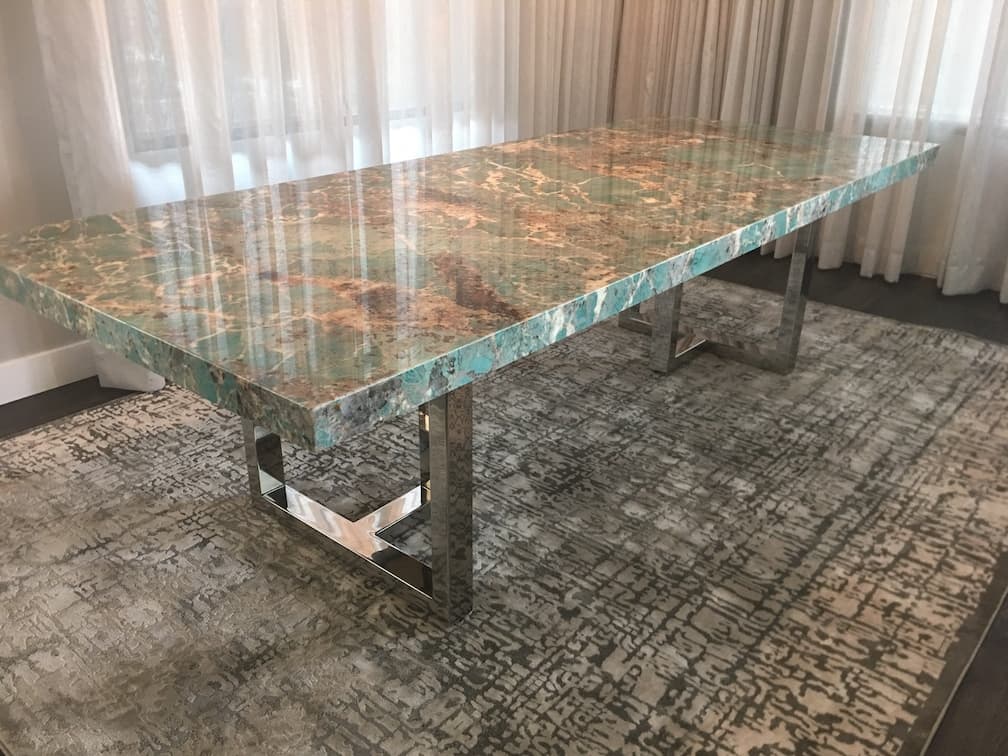
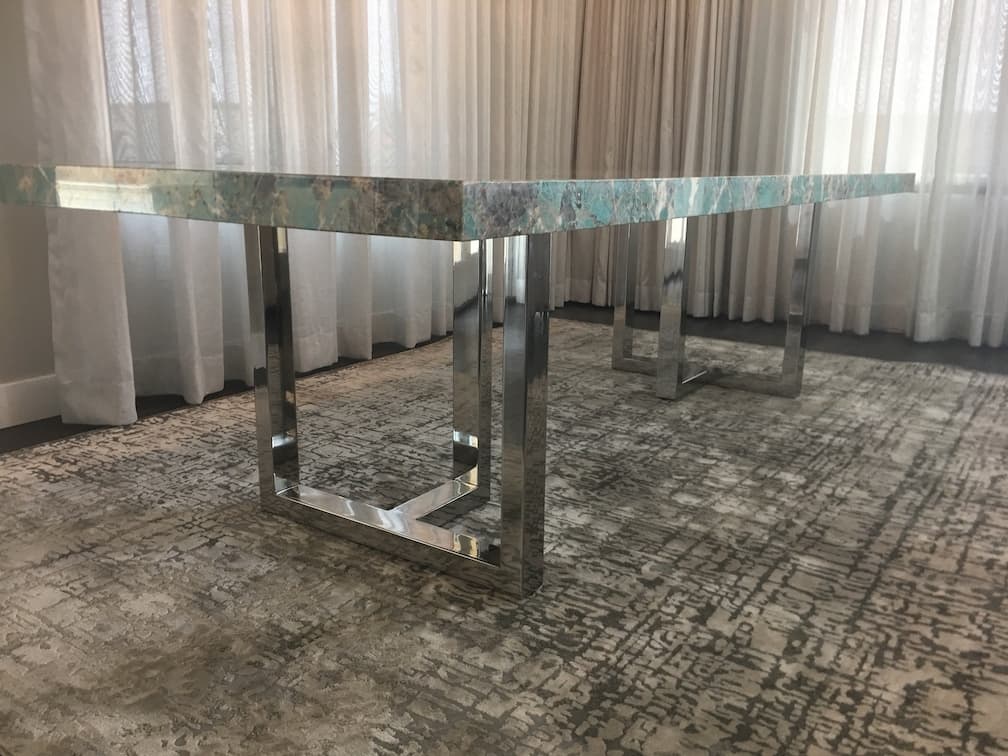
Our current process is to run the raw material through a Timesaver wide belt sander using 3M Trizact belts, starting at 120 grit going up to A6 (approximately 4,000 grit), we then cut the tubing, use a handheld drum sander to work out any scratches from handling the parts (again going up to A6 grit), then weld them together to the specified shape. The welds are then ground down, then the affected area re-worked with the handheld drum sander. Then we use a felt disc on a variable speed grinder and use white and green buffing compounds, then we use an orange NuVite polishing paste to put the final shine on the product. Like I said, it looks very good in general, but under close inspection looks sloppy.
From what I understand, conventional buffing would be faster and produce a much better finish. But I'm unsure of how we could polish the weldment using buffing pads on a handheld tool.
So I'm looking for advice on the best practice to achieve a better finish considering the process/shape of what we're making, and I'm also looking for advice on what would be the best equipment to use to achieve this.
Shop owner - Wauconda, Illinois, USA
A. You may still have to handwork the welds; however, check into electro polishing for your final treatment.
AF Kenton
retired business owner - Hatboro, Pennsylvania
December 8, 2018
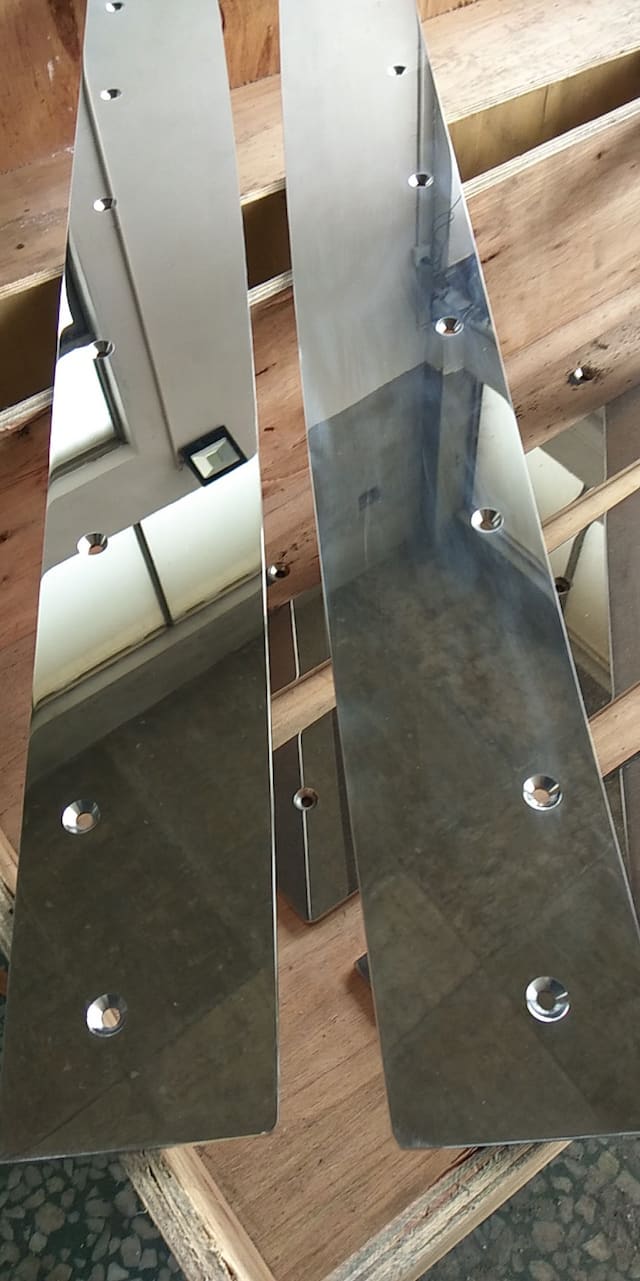
Streaky finish on my SS304 mirror polished part after buffing
Q. Hi. We have a part that needs to be 8K mirror polished on one side. The part is 1170 mm x 110 mm x 6 mm SS304. We bought a single sided 8k mirror polished board. However after we weld some parts to it and it gets moved around, it has some small scratches; small cosmetic scratches. After buffing it with a loose cotton buff and or an orbital wool buffing disc with a fine green wax, the Board has waxy streaks/reflections on it. looks like oil residue not really an orange peal as others have described on this site. I have also cleaned the cotton buffing wheel of wax (using a sharp edge) and tried to dry buff the waxy streaks out, but still no luck.
Any input is greatly appreciated.
Thanks.
Small business owner - Fort Pierce, Florida, USA
December 11, 2018
A. I was able to solve my polishing issue. After re-reading all the comments in this thread and further inspection of the grey/smokey/streaks, what I found is that it is small scratches that is causing this issue/look. Which was caused by the orbital wool disc I used on my angle grinder
⇦ on
eBay
or
Amazon [affil link]
. So I called polishing supplier and he recommended:
1-An aggressive bar of red wax with a high oil content to use on my hemp wheel.
2-A Medium course, green, bar of wax with medium oil and shine on a loose felt wheel.
3- A low course, white, bar of wax with high shine and med-high oil content; jewelers rouge
After I received everything, I decided to skip the hemp wheel and use the red wax with the felt wheel. It worked, as I could change the grain from swirls to straight. I spent about an hour on it.
Then cleaned the felt wheel with a sharp edge and rubbed the part with talcum powder to clean the red wax off it.
I used the green wax next and spent 2 hrs as I could not see the grain reducing in size. So I turned the part 90 degrees to the wheel and immediately I could change the grain. So I realized that I don't think I needed to spend that much time on it. Next time I'll try skipping the red wax and go straight to the green. After the green wax stage, my scratches are much smaller but still the grey streakiness persists.
Next, the white wax on my cotton wheel. I'm very skeptical that this next stage is going to solve my issue and I polish one area for about 15 min and nothing ... after 15 min more, it starts to clear up. Thanks to all in this thread.
Small business owner - Fort Pierce, Florida, USA
Resurface and polish High Manganese Steel
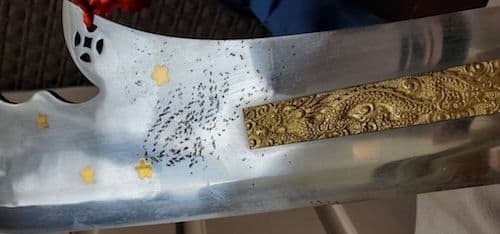
February 20, 2020Q. Hi, I'm Michael and I have a high Manganese Steel Chinese Guan Dao (Large Sword on a metal pole)
I use a cheaper one for Kung Fu practice, and had put this nice one away, well-oiled. I guess I left it too long without re-applying? There are some rust spots that began eating into the metal. Do you think this technique I found on YouTube (5 min video) will recover the metal and mirror-like finish?
To summarise:
Using Alumi-cut and Sandpaper grit, in order:
400/800/1000/1500/2000/3000/5000/7000, polish to mirror finish.
Wipe away Alumi-cut
Polish with Gords Aluminum/Stainless Steel Polish
⇦ on
eBay or
Amazon [affil link]
Wipe away polish
Should be mirror finish
Michael Buie Films LTD - Garner, North Carolina USA
A. Hi Michael. We appended your inquiry to a long-running thread on the topic, and we have several others if you search the site. The exact grit sizes to use is arguable, as you'll read in this thread -- but the principal is that you start with quite rough polishing, and end with very fine polishing, and how many steps you actually need is simply a balance between not wanting to add more steps and more work than necessary, coupled with the realization that removing a deep scratch with too fine an abrasive will take almost forever ... so typically you do use 5 to 6 ever finer grades.
You may already realize this, but for the benefit of newbies: you have to get out all the pits with your roughest grade; you can't settle for 'mostly' out, thinking they'll eventually disappear: they never will. For that reason, some people recommend not using the circular sanding shown in the video, but one direction only, then perpendicular to that with the next finer grade, etc. You don't stop using any grade until the only scratches you see are the ones you just made with that grade :-)
Regards,

Ted Mooney, P.E. RET
Striving to live Aloha
finishing.com - Pine Beach, New Jersey
Need quick confidential answers? $25
Need project assistance? $100/hr.
February 2020
![]() I appreciate your prompt response. This was very helpful!
I appreciate your prompt response. This was very helpful!

Michael Buie Films LTD - Garner, North Carolina USA
February 20, 2020
Keep sharp square edges during mirror polishing
May 3, 2020Q. Hi everyone,
I am machining a handle for a kitchen faucet out of stainless steel 304. I am having problems when it comes to the finishing of the handle. I want it to have a mirror polished finish, but when I am trying to remove the toolmarks and then buff it up I am rounding off the edges of the handle. This is problematic as I want the handle to have nice, sharp, crisp edges.
I have looked into the following things:
EDM Stones (very time consuming), Electropolishing (will this remove toolmarks?) belt grinders (will this ruin machined look?).
Any info on the best method of removing toolmarks, then polishing to mirror polish without rounding off the edges would be much appreciated.
Thank you,
Tom
- United Kingdom, Wilton
A. Hi Tom. Electropolishing attacks the highest current density area, and corners draw the most current; I don't think it's a path forward. Mass finishing, regardless of the size and type of media also sounds like it will attack sharp corners first.
I'm not claiming to actually know how to do this, but I suspect that the sanding belts and polishing & buffing wheels cannot be any wider than the handle or they'll mush around the sharp corners and destroy them.
Regards,
Ted Mooney, P.E. RET
Striving to live Aloha
finishing.com - Pine Beach, New Jersey
Need quick confidential answers? $25
Need project assistance? $100/hr.
May 2020
|
A. Without a picture of your part it is difficult to give you a good opinion or idea. Maybe you could consider attaching (glue) inexpensive pieces of material (fixtures), such as hard plastic, wood or aluminum, around the edges to produce continuous surfaces. A quarter or 8th of an inch is enough to avoid rolled edges. That is how mold inserts and glass lenses are protected during grinding and lapping. The disadvantages are that every continuous surface has to be individually isolated; also the possible marks left by the glue after detaching the fixtures. Good luck! Guillermo Marrufo- Monterrey Mexico May 7, 2020 A. Hi Tom - Green Mountain Falls, Colorado May 6, 2020 |
A. High voltage electropolishing keeps edges not rounded.

Anna Berkovich
(ed. update July, 2025: sorry, Anna has retired)
May 9, 2020
Acceptable visibility of polishing lines on mirror polished stainless, if any?
June 14, 2020Q. Hi
I would like to know what the general acceptable level of visible polishing lines is on mirror polished stainless steel ...
For example, "Uni directional fine lines visible from a distance of..."
Or "no lines visible at all" kind of thing
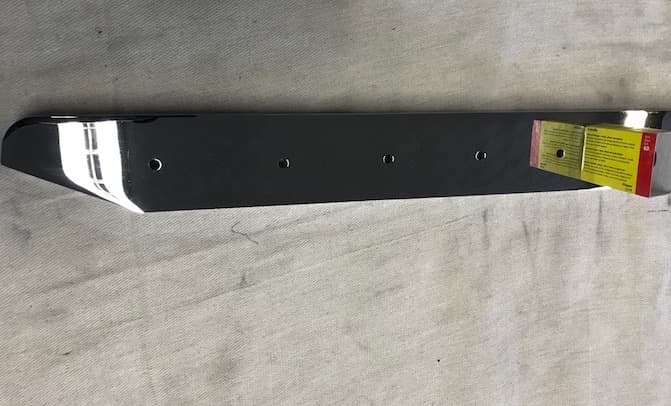
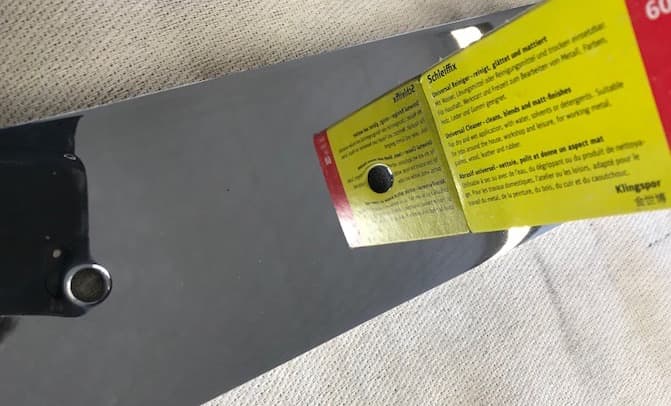
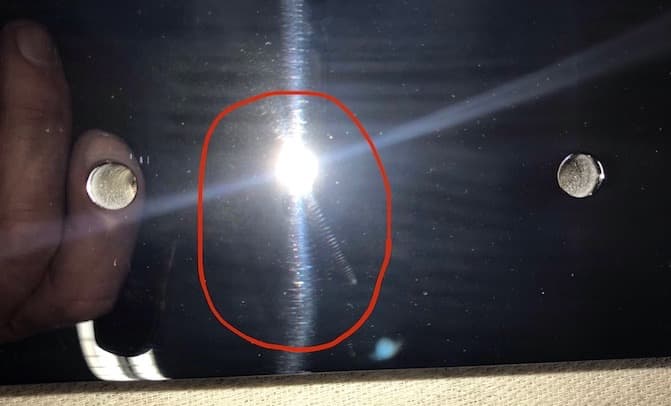
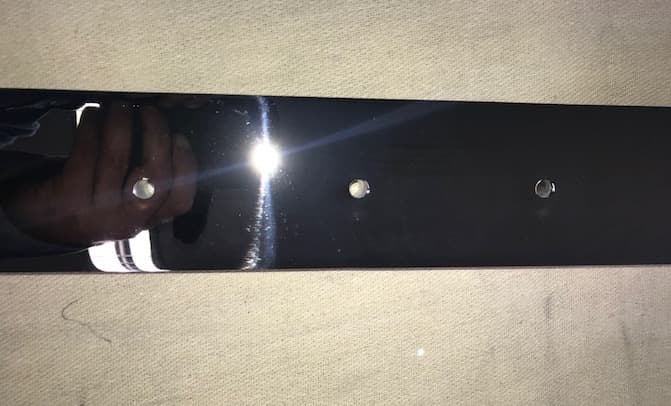
I am polishing stainless steel balcony parts and the finish is good but the are lots of fine polishing lines left that are only visible in direct light / sunlight and I'm concerned how this will look on a sunny day.
Any help much appreciated.
Richard Ockelford- South England
|
A. There is no industry standard. What is acceptable to one end user may not be to another. Only your customer can provide a definitive answer.  Jeffrey Holmes, CEF Spartanburg, South Carolina June 15, 2020 A. Unless the customer gives you a specific RMS on a print or specifications all surface finishes are subjective. Meaning unless you have a finished acceptable piece, it is up to the customer or you to decide. AF Kenton retired business owner - Hatboro, Pennsylvania June 15, 2020 |
Q. Thanks for your replies, I have tried sanding these further ... using aluminium oxide belts on a pad sander / stroke sander and now it's causing pinholes after 320 grit, see photo.
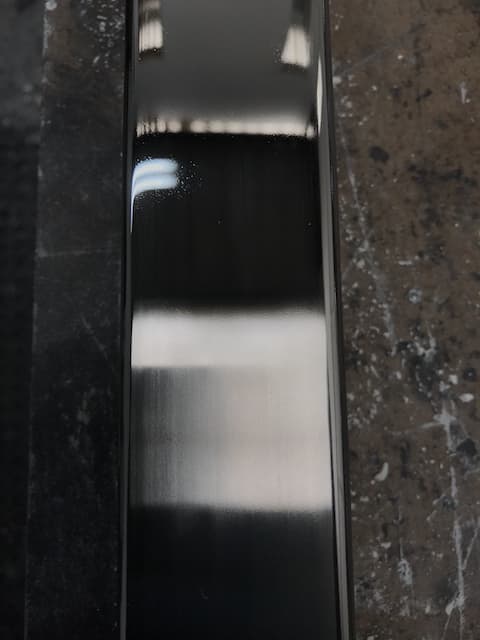
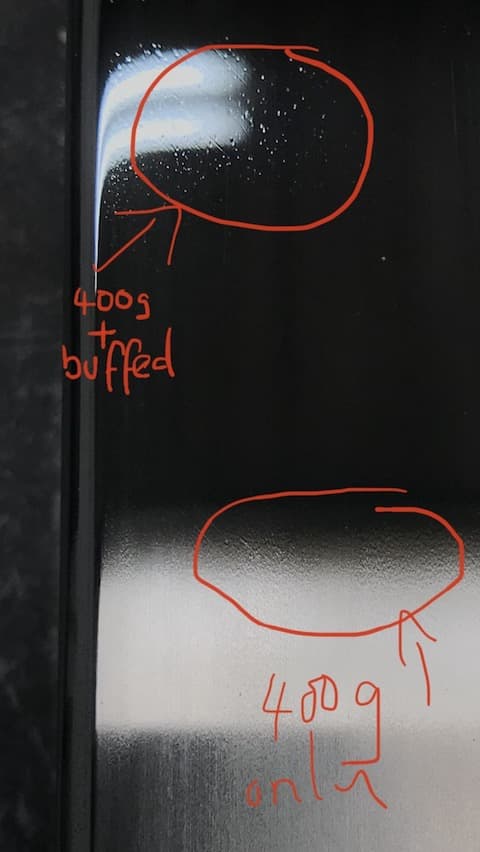
- South England
June 25, 2020
A. Any piece of metal has surface features (RMS). To remove/smooth the metal requires an abrasive finer than the RMS. The slighter the pressure of the abrasive to the metal the finer the finish. Too much pressure and you will again get roughness, maybe pitting. You might want to try a non-woven wheel before buffing
AF Kenton
retired business owner - Hatboro, Pennsylvania
July 2, 2020
Sorry! Finishing.com is temporarily Read-Only.
Ted Mooney is retiring but I have several offers to take it over.
We're working hard to make sure we find it the best new home.