
-----
Home brew aluminum anodizing help
Quickstart:
Readers who would like to start with a quick intro to the technology and lingo of aluminum anodizing, please see our "Introduction to Anodizing"
Q. I found some place on the net on how to anodize at home. Could someone fill me in one some info? When I tried adding the color, it seemed that it only stuck to the area where I had it clamped to in the electrolyte. Any other information about this process would be greatly appreciated as well.
Bob [surname deleted for privacy by Editor]1997
A. Bob,
It sounds like your part is not being anodized. There is not enough information to even start guessing what the cause. [Add more info] and we can troubleshoot your problem.
Jim.
- Navarre, Florida
Q. I too tried to anodize some aluminium pieces at home and could not get the color to stick at all. I used a 6-12 volt battery charger ⇦ on eBay or Amazon [affil link] that put 15 amps continuously. I charged the pieces for about 15 minutes (the directions said 10-15 minutes), rinsed the pieces in cold water, immersed them into a warm dye solution (which color was to absorb into the parts, to a color slightly darker than what I needed), then the parts were to be put into boiling water to seal the color. I made it up to the color part, which ended up not working. Do you have any suggestions? The author of the direction for home anodizing was jim bowes.
Aaron m. rich1999
Q. I am also trying to anodize from home and have a little bit of information but would like some more please can you tell me what power supply and what to use to get the colors?
Simon Quach- London, UK
A. You can find an extensive discussion at http://w3.uwyo.edu/~metal/anodizing.html ⇩
- The Netherlands
Ed. update: The above link is broken. Thankfully, the Internet Archive preserved a copy here ![]()
Please consider a donation to The Internet Archive.
Multiple threads merged: please forgive chronology errors and repetition 🙂
Anodizing at Home
Q. I am not sure if this web site caters to such small requests, but I thought I'd give it a shot. A while back ('94) I skimmed through an article on how to anodize small aluminum pieces at home using, I believe, a bucket, battery acid ⇦ on eBay or Amazon [affil link] / electrolyte, food coloring, and a 9 volt battery. At the time it had no relevance to me, but now I am quite interested in the idea and procedure. I have not been able to locate the formula again. Can anyone recommend a book on the subject? Sorry if this is the wrong web site, you guys seem pretty professional.
Jeff Hole- San Jose, California
1999
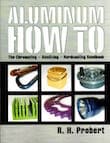
Aluminum How-To
"Chromating - Anodizing - Hardcoating"
by Robert Probert
Also available in Spanish
You'll love this book. Finishing.com has sold almost a thousand copies without a single return request :-)
A. Your inquiry is very welcome, Jeff, but our response may not be 🙂
Because doing it really right requires chemicals which are toxic, and people really should have proper protective gear, an assistant able to respond in an emergency, and hands-on training ... which is pretty unrealistic to expect.
The basic process is:
1). clean the part in a non-etch soak cleaner;
2) rinse;
3). (usually) etch the part in a hot aqueous solution of strong caustic soda ⇦liquid caustic soda in bulk on
Amazon [affil link]
to give it a matte finish and minimize fingerprinting;
4) rinse;
5) desmut the part in nitric acid or another acid depending on which alloy you are anodizing (etching the part will dissolve aluminum from the surface but leave behind a black copper or silicon smut); 6) rinse; 7) anodize in 15% by weight sulfuric acid;
8) rinse;
9) dye in hot water with clothes dye (or preferably a better dye!);
10) rinse;
11) seal (boil in hot water to close the anodizing pores and trap the dye).
Books can be selected from this page or our page of recommended texts, and will give you all of the details for the above listed steps

Ted Mooney, P.E.
Striving to live Aloha
finishing.com - Pine Beach, New Jersey
Ted can be retained for immediate
answers or long term project help
A. A copy of an article similar to the one that you read is on warpig.com. Very few people get decent anodizing at home because :
- They do not have a variable output power source
- They do not have high enough voltage, 15 is a minimum
- They do not control anodizing temperature (it generates heat)
- They do not control temp or pH of the dye bath
- They do not have a consistent cleaning/etch process.
One in 20 will get fair to marginal output and one in a hundred will get nice work.
James Watts- Navarre, Florida
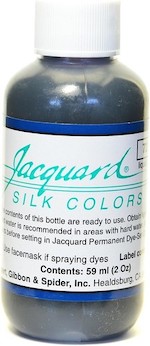
A. I would like to add that silk dyes work well for home anodizing because they come in small bottles and dozens of colors. You can use it cold from the bottle too. Some brands are Jacquard's , TinFix, etc.

Joe Davisson
St. Louis, Missouri
Q. You mentioned using 15% by weight sulfuric acid. What concentrations of Nitric and NaOH are typical?
Jesse McGowan- Alexandria, New Hampshire, USA
February 6, 2009
A. Hi, Jesse. Please see "Aluminum How To" or "The Surface Treatment of Aluminum and its Alloys". A local or university library should have the latter. It is customary to buy premixed cleaners, etches, and desmutters rather than trying to formulate your own detergents, inhibitors, complexors and acid salts.
My guess is that a typical etch is about 75 to 150 g/l, maybe a little stronger, but the solution also needs to have sodium gluconate for stability and to keep the aluminate from precipitating like concrete. Patient application of the site's search engine will take you to many threads about the etching process, but trying to learn that way can be wearisome so I'd recommend the programmed, tutorial presentation of an anodizing book, instead.
Similarly, proprietary desmuts are available to suit the parts you are trying to process. For example, you cannot etch dicastings in straight nitric acid, but need a mixture which includes fluorides. Again, patiently search the site for "desmut" and "deoxidize" for a lot of detail, but you'll probably find it grueling trying to use scattered forum replies as a substitute for an anodizing book because there are so many different situations (like so many different alloys, each requiring differing etches, desmuts, and anodizing voltages :-)
Good luck.
Regards,
Ted Mooney, P.E.
Striving to live Aloha
finishing.com - Pine Beach, New Jersey
Ted can be retained for immediate
answers or long term project help
Q. I have just spent some time on your site and it is quite informative. Before I dig into it, can you tell me if it is practical to set up anodizing at home for low production? Thanks, Jersey boy from Georgia
Ray BrandesRay-Vin - Duluth, Georgia USA
2000
A. I'm running a small anodizing setup at home, I'm using 10 l plastic containers with perfect results. Recently I have been anodizing candle sticks made from extruded aluminum. I have 9 colors and am experimenting with electrolytic colouring at the moment.
My only problem is heat, I get variations in coating thickness, bottom is for example 25 µm and top is 35 µm (I have been testing several methods to mix the electrolyte during anodizing). However my experiences are that it is easy to setup home anodizing equipment just make sure to keep track of temperature, mixture of chemicals and so on to get an even result each and every time. Finally, it is not that expensive, my setup has cost me about $125 and the results are perfect (I have compared my work with some anodising made by sapa ab).
Q. Most of my components are of 7075 alum. They very from dime size to the size of a mini floppy disk. CNC shop in my spare bedroom needs an anodizing booth for small runs of small parts. Have resources for custom stainless tanks or tables and lab equip.- beakers [beakers on eBay or Amazon [affil link] and such. I have some info of using 10-40 amp battery charger ⇦ on eBay or Amazon [affil link] s and RIT dye ⇦ on eBay or Rit Dye [affil link] in an diluted acid mixture. I know nothing of this sport and have a not so fat wallet. What works best: tank material, chemicals, probes, dyes, etc. ...how to do it (some detail...?) Is hard anodizing doable in such an environment? Thanks!
Judd Kincaid- Los Banos, California USA
2000
? Biggest question I've got is what kind of anodizing do you want to do? Typically, you use either chromic acid or sulfuric acid. The physical requirements differ for each type, but, given the EPA, I would stay away from the chromic anodize if possible. Anyway, you need to give us more information on what you want to do before we can help.

James Totter, CEF
- Tallahassee, Florida
Q. Well, for starters I want to simply seal the material, and while I'm at it, add color (blue, only). As far as chromic vs. sulfuric, that's still a bit foreign to me. The hard anodizing is for a set of small rollers that need to have zero rolling contact resistance, perhaps chrome would be best for that? I'm pretty jazzed about all this, thanks for your input! (if it helps, my components application is most similar to that of RC cars)
Judd Kincaid [returning]- Los Banos, California
A. Hi, Judd.
For the colored parts it sounds like you want to do Type II sulfuric acid anodizing, followed by blue dye, followed by sealing.
Yes, chrome plating sounds more applicable for low friction than hard anodizing.
These are very broad topics that are tough to cover in a few paragraphs. You'll find hundreds of threads about them on this site, but you may find learning faster in the more organized format of a book. Here's our "must have" booklist.
Regards,
Ted Mooney, P.E.
Striving to live Aloha
finishing.com - Pine Beach, New Jersey
Ted can be retained for immediate
answers or long term project help
Questions about home-anodizing BMX brake parts
Q. Hi guys --
I'm a newbie here, and am working on a small home anodizing project trying to anodize a couple small BMX brake parts & dye them red. I've been doing a lot of research over the past few months, but still have a few questions that I'd be grateful for help with. The other forums I've visited are pretty good, but they don't deal much with using a battery charger as the power source. I'm aware that this method isn't considered the best by purists, but this is probably the only thing I'll ever anodize, and I can't justify buying a laboratory-type power supply to do it.
Here's what I understand to be the basics. Please correct me if I've got something wrong:
- 1:3 solution of battery acid
⇦ on
eBay
or
Amazon [affil link]
-to-distilled water
- Bath at 70 °F.
- Bubble agitation with an aquarium pump, if possible
- Ventilation for fumes during anodizing
- Parts stripped of old anodic coating with sodium hydroxide (lye) solution, desmutted, polished (depending on level of gloss desired), and totally degreased before anodizing
- Do a water break test before anodizing to ensure clean surfaces
- Don't touch the parts with bare hands until after sealing
- SERIOUSLY good electrical connection to parts (I've got a piece of aluminum welding rod I'm planning to bend a "j" in & then wedge tightly into a smooth-bore hole in each part)
- Anodize & dye both parts together for best color match
- Use a big piece of aluminum flashing down the side & across the bottom of the bath for a cathode, ensuring that it's not already coated beforehand
- Hang parts in center of tank, equidistant from cathode surfaces
- Connect + charger lead to parts & - lead to cathode & keep lead clamps out of acid bath
- Anodize for 30-45 min
- Cathode should fizz the whole time
- Spray with distilled water after anodizing.
- Liquid RIT dye ⇦ on
eBay
or
Rit Dye [affil link] will work, but use ?% of the water called for in the standard directions, and use distilled water
-
- Suspend in dye bath for 30-45 minutes at 140 °F
- Rinse again with distilled water
- Suspend in boiling distilled water for 30 -45 minutes to seal
That's pretty much how I understand it. I'd appreciate anyone's input or tips.
The specific questions I've got are:
1. I saw something once where (I believe) Ted Mooney mentioned not letting the power source "rip" at full power right off the bat, so as to avoid screwing up the electrical connection at the part while in the bath. I do have a rheostat-type dial control that I could plug the charger into, but am wondering what "percentage of the whole" I should have the dial set at initially, and how I should go about ramping it up, time- and -percentage- wise. The charger I've got is an old Sears-Allstate 6/12v automatic charger. A sticker on it says that it's got "5 amp full wave dc output," and the output is listed as 5 amps at 6.3v and 5 amps at 12.6v.
2. Another site has a lot of people highly recommending a specific Degreaser. Is that commonly available elsewhere? Does anything else work as well? I use 99% isopropyl alcohol for a lot of degreasing-type stuff, and it seems to work pretty well.
3.People on the other site sometimes talk about etching the part as one of the last steps before anodizing. I understand this step to be a dip in lye solution, as would be done in initially stripping off the old anodic coating. Wouldn't this step then make the part smut up again (assuming that the particular alloy has impurities of the smutting type), thus necessitating another desmutting? And wouldn't the etching de-gloss some of the polishing you do on the part?
4.Can you mechanically desmut a surface and get good results, or do you have to do it chemically? Since this is a one-off small project, I can't see shelling out for the proprietary desmutter. Will anything else work?
5.The part is really irregularly-shaped, and fairly small, and I'm having trouble coming up with a reasonably-close surface area figure. Does that even really matter with battery-charger anodizing?
6.Instead of a separate boiling water bath for sealing, can I just raise the temperature on the dye bath, after the required time at 140 °F, and boil the part in the dye? Or does it need to be dunked into already-boiling water for proper sealing?
I'd greatly appreciate any comments, tips or advice anyone could offer.
Thank you!
hobbyist - Grand Rapids, Michigan
2007
A. I see nothing really specifically wrong with your instructions, Drew, but here's the thing...
You can read a dozen books on how to shoot a layup, but if you expect to do it satisfactorily the first time you touch a basketball, you're just not being realistic. I think your chances of getting satisfactory anodizing on a high strength alloy component on your one and only attempt are very low even if you use the best equipment and chemistry . . . and near zero with a battery charger, battery acid, aquarium pumps, aluminum flashing as your cathode, fabric dyes, insufficient tankage, and a reluctance to use proprietary chemistry. Please practice on scrap :-(
The reason for starting at low voltage is that raw aluminum is very conductive. But as the anodized layer grows, it becomes increasingly insulative, requiring increasingly higher voltage to keep current flowing. Most people hold the current constant rather than worrying about varying the voltage; i.e., you can try maintaining 12 ASF the whole time.
If you want to do hobby anodizing, that's fine, but you should do a lot of practicing on scrap before risking important parts. If you want this done only once, you might send the part to an anodizing shop for better results at less than what you'd spend for the hobby setup. Good luck.
Ted Mooney, P.E.
Striving to live Aloha
finishing.com - Pine Beach, New Jersey
Ted can be retained for immediate
answers or long term project help
A. All your instructions are OK. It is complicated but you can do that. Textile dyes can be used but 2-step colouring can be used too. Sealing must be done after dyeing. It must be clearcoat finished. Proprietary dyes are much, much better and results are safer. Your current source is OK for small size work (up to 2 dm2). As degreaser you can use acetone ⇦ on eBay or Amazon [affil link] Flammable! . As pickle you can use 10% NaOH solution (rinse well after it) or you can use fine sandpaper. You must use rubber gloves ⇦ on eBay or Amazon [affil link] and safety goggles ⇦ on eBay or Amazon [affil link] !
Goran Budija- Cerovski vrh Croatia
Homemade Type 3 Anodizing Project
Q. Hello -
I'm working on building an Anodizer at home. This would be for Type 3 anodizing of 6061 T6 aluminum. I had drafted a bath tank and sent out for quotes and was met with some pretty high prices as I was requesting PVDF as the material in question.
Here's a rough idea of what I need to figure out.
> I need an anodizing bath that can hold 120-130L of .3 Mole Sulfuric Acid.
> Dimensions of bath would be roughly 35"L x 10" W x 25" D
> Anodizer would need to be able to cool Sulfuric Acid to 5C evenly
I have a few questions about this project and the feasibility of it.
1) Is PVDF a good choice for this bath or are there other materials that could work and be cost effective?
2) In order to cool it, I was thinking either a 316 or 304 SS coil and chiller setup or (and don't laugh) I was wondering if I could convert a deep freeze coffin freezer into an anodizer.
Any thoughts and insight would be much appreciated for this greenhorn.
Regards,
Nate
Hobbyist/Engineer - Champaign, Illinois, USA
November 4, 2015
A. Hi Nate. I've designed projects which used PVDF tanks where they were truly needed (excellent corrosion resistance at very high temperature), but they cost almost 10X what polypropylene tanks cost. No need for PVDF in an anodizing line :-)
Regards,
Ted Mooney, P.E. RET
Striving to live Aloha
finishing.com - Pine Beach, New Jersey
Ted can be retained for immediate
answers or long term project help
A. I used rotationally molded polyethylene tanks that were supported with 2x4 and plywood shell. This was given 3 coats of regular enamel (not water soluble).
Agitation was with oil-less air. Look up toilet paper filter for a cheap way to do this. They used to sell these as cheap car oil filters.
316 coil will work ONLY if you keep the tank below about 65 °F, otherwise the acid will attack it.
It takes a lot longer to cool, but consider a large coil of polyethylene or polypropylene tubing both in the tank and in your chest freezer. We used a 55 gal drum with the top cut out of it and propylene glycol solution. Propylene glycol is harder to find and is a bit more expensive than ethylene glycol BUT it is non hazardous if you have an OH_OH. You will need a small pump in this system, If you get the right pump, you could run the acid solution thru the freezer coil and have it just dump back into the top of the tank. Secure this in at least 2 different ways to avoid a disaster.
Put a 1/16" hole in the top of your air sparger to keep fluid from backing up it.
Use 6063 cathodes. Consider taking them out of the tank when it will not be used for several days.
At that size tank, it must be for hobby use and not commercial.
Remember that if you plan on selling anything but a very tiny number of parts, you must comply with all EPA rules and it simply is not worth it. Fines are astronomical!
- Navarre, Florida
Home anodizing project in stainless steel tank?
Q. Hi,
I'm planning some Al anodizing in 15% H2SO4. Can I use stainless steel tank, of course I'll make sure nothing is getting in contact with walls but electrolyte.
- Texas
August 15, 2017
A. Sorry Alex, a stainless steel tank is a no-go. Use polyethylene or polypropylene for a small tank. Good luck.
Regards,
Ted Mooney, P.E. RET
Striving to live Aloha
finishing.com - Pine Beach, New Jersey
Ted can be retained for immediate
answers or long term project help
Q. Ok, thank you.
A different question about part orientation in tank. The part is a box 4"L x.5"W x 1.5"H. with .2" walls opened alone narrow side. And I'm considering agitation by compressed air. what would be best orientation? My concern is possibility of bubbles trapped inside.
And just curious if any one experimented with NaHSO4 based electrolyte (25%) with addition of H2SO4 to reduce electrical resistance?
- Richardson, Texas
A. Hi. Probably closed end down, but at an angle as is you were using it to scoop ice cream. Be aware that compressed air is usually oily and spoils everything.
Many different electrolytes have been tried (see the Intro we mentioned). The issue is that you'll probably get a different hardness and pore structure if you mess with the electrolyte rather than using the standard 15% by weight sulfuric acid. Good luck.
Regards,
Ted Mooney, P.E. RET
Striving to live Aloha
finishing.com - Pine Beach, New Jersey
Ted can be retained for immediate
answers or long term project help
Anodizing not working
Q. I have an anodizing bath set up - 2/3 DI water, 1/3 battery acid. Anode is aluminum.
My "coloring" bath is DI water and black RIT dye.
I have been pre-cleaning the parts first in a NaOH4 bath, then final cleaning with acetone
⇦ on
eBay
or
Amazon
[affil link] Flammable!
.
Most of the parts I am trying to anodize are 6061 T6 aircraft grade aluminum. A couple of parts came out black. Most are translucent reddish color, and some just do not take any color at all.
I am using pure aluminum wire as hangers. The wire generally becomes a dark black, shiny color - perfect!
Can only certain alloys of aluminum take anodizing well? Why would my hangers come out very nice, while the work pieces are lousy?
- West Hills
May 10, 2018
A. Hi George. Addressing typos first: the counter electrode in anodizing is your cathode, not your anode; the work is the anode. There is no such thing as NaOH4, you probably meant NaOH.
Order of operations next: you can preclean with acetone ⇦ on eBay or Amazon [affil link] Flammable! if you wish, but final cleaning should be NaOH; reverse those steps.
6061 T6 can be anodized, but the current will try to flow to the pure aluminum hangers first. Not only that, but you may not have good enough contact -- such that very little current is actually flowing to your parts. Try sanding the edge of your wire, and the contact area on the part, and then wind very tight.
Red parts do not have thick enough anodizing. So it sounds like you had some parts with good contact, some with poor contact, and some with none. Good luck.
Regards,
Ted Mooney, P.E. RET
Striving to live Aloha
finishing.com - Pine Beach, New Jersey
Ted can be retained for immediate
answers or long term project help
Q, A, or Comment on THIS thread -or- Start a NEW Thread