
| Search our quarter-million Q&As |
Home of the finishing HOTLINE since 1989
-----Antique finish concrete stain for cement statuary
Q. Hello! My name is Reggie and I operate a small garden shop. My question is how do you antique new concrete? Is there a chemical or stain that will turn new statues from the paste white look of new to the brown mottled look of old?
Reginald Smyreantiques - Salisbury, North Carolina
1999
Q. Reggie,
I own a small garden statuary business also. It has been very difficult to get people to share information. We are located 7 miles from Mexico. We are not a threat to anyone. I really like the stained statuary but I do not know what stains to purchase or the process to get the layers of color. If you know, please share. If I learn the process, I will be happy to let you know.
Good Luck,
Vickie Hawkins- McAllen, Texas
2002
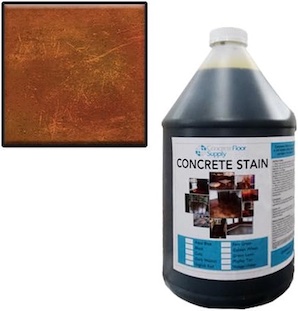
A. I have had great luck using stains from Smith Paints. It is a permanent one step finish.They are in Ohio and are extremely helpful. They are not related to me.
Bobbi Smithantiques - Corbin, Kentucky
2004
A. To stain cement statues which are brazen white, brush a wash over them. This stain is easy; 1 cup black paint to one cup water. You can make it lighter or darken by the obvious tinkering of proportions. Practice with it a bit.
Lucille Messinagarden gal - Langhorne, Pennsylvania
2006
A. Acid Staining 101
The purpose of this article is to share one man's experience with acid staining concrete statuary and selling it to satisfied, comfortable customers. Results may vary by geographical location. I assume the reader to have no knowledge at all of this process and will give detail many readers may already know. Thanks for being patient.
To see photo examples of the finishes described in the article, type
"Acid Staining 101" in any browser search engine and click on the link that would normally be in this position.
I prefer Scofield Lithochrome chemstain. It is muriatic acid based and although not as caustic as pure muriatic acid ⇦ on eBay or Amazon [affil link] , it will stain and mildly eat into your clothes. It will also stain your hands fairly quickly but other skin seems to resist the color. Other skin however does feel the burn not long after a drop gets directly on your skin, so take care. The stain colors the concrete through a chemical reaction. When applying with a brush (as I do) you will notice that within only a few dips, the tin part of the brush starts to turn pink, then rust. It will disintegrate if you leave the brush sitting in the acid. Do not do this. It "kills" the acid, and dead acid is useless. Pour small amounts of the stain into a glass jar or measuring cup for application. Always assume any stain poured out of the gallon jug will be wasted if not used. As you apply, the stain in the jar becomes activated by dirt and concrete particles picked up by the brush and will become inert within a day or so. Never pour dirty acid back into the jug as it reduces the life of the whole gallon.
Generally speaking I use the stain at full concentration. I find that for my use, the more dramatic coloration looks best. I do however, for certain effects, cut the stain with water.
B. Product Info
(color information below is based on white cement demolded approx 3 to 14 days)
Our colors are:
Weathered Bronze - yellow-green to green with amber highlights. Both colors darken with additional coats. Colors get richer after rinsing and drying a bit.
Copper Patina - an even, pure mint green tint. Will darken a bit with extra coats, but not much and appears to get a bit hazy after drying. One of the most caustic stains. Best for second color applications. (no one seems to like this color by itself)
Antique Amber - dark yellow to yellow-orange tones. Just a few coats to max out the yellow-orange and is also very caustic. Color takes just as you see it, no noticeable change after rinse / dry.
Faded Terracotta - orange-red to red. This color has the unique quality of "dusting". After rinsing and drying, a layer of color dust will wipe away from the face with a dry rag. Areas will be greatly changed in appearance. If left for an extraordinarily long before rinsing, the red will appear to cover in heavy concentration. This will dust later, but some patches will stay very dark. The dusting does give some beautiful effects when used on the right piece, (detail, relief) but use wisely. Additional coats do little for color change. This is the most unpredictable color.
Black - dark mahogany brown to black-brown. Darkens over one or two more coats. Single coats (especially when cut with water) will leave a good amount of highlights. Stains hands fastest. Will cover most other stains as an antiquing coat or salvaging a horrible color experiment gone wrong.
Dark Walnut - very similar to black, but does not seem to penetrate the same and rinses away leaving some very nice looks. The color is more of an aged, antique brown with a lot of amber highlights. Additional coats will sometimes darken up close to black.
Padre Brown - yellow-brown to medium brown. This color changes the least after rinsing. Covers evenly and ends looking very much the same as you see.
Fern Green - I do not use this color, I prefer to get my green tones from weathered bronze and copper patina.
Color Mixing: I only do a few single coat color mixes. For these I use terracotta, black, brown, or walnut. The others seem to work better as layered colors. Overall, adding a bit of terracotta to any of the other mentioned colors gives some natural color effects. Brown and terracotta gives a red-copper even coat finish. Black or walnut & terracotta gives an aged, rusty metal finish that dusts a bit and leaves a realistic, uneven coloration. The secret here,...experiment.
C. Application
General tips for application:
1. If you grind and patch seams, let them completely dry before staining. Often the patched seams will take darker no matter what, but fresh patch takes even darker still.
2. I do not seal the concrete after staining. The aim of the staining for me is to appear like natural aging. The stain does not wash away, but will age naturally if left outdoors. I say let the elements do their job. Nature will finish what the stain started.
3. The stain will be resistant to areas for different reasons, so accept it. Spots where release agent has built up, flat areas where the concrete is more compact, areas with less calcium concentrated in the mix. Ten coats won't change that. Work around it.
4. Old concrete will take the colors differently. Generally, it appears to be lighter, less vibrant versions of the same colors. Black is the exception here. Black takes more of a true black tone, but lighter. Almost a pure gray. Terracotta dusts much more on old concrete and leaves a light orange color. Padre brown turns a green-beige.
5. Time left on before rinsing does have an effect on color. I find from 5 to 25 minutes a good range to work within. I have forgotten to rinse and returned an hour later to find some interesting results as well. Again, experiment.
6. Missed spots are obvious and ruin the illusion. Be attentive and get everywhere.
7. The color rules apply the same but result in different finishes on gray concrete. I have also done some work on colored (mix-in) concrete and I must say it can look excellent. Put some thought into the colors you choose according to the color you are applying to.
Beige to buff concrete looks great with lighter color combos. Dark brown, greens and gray look incredible with dark combos. Gray also looks best for single coat rust finishes.
Applying to a statue or fountain:
I apply with a brush. It gives me more control over the coloration. Try to keep the pieces in the position they will be displayed in as you stain them. Leave statues upright, stain bowls right-side up. The runs in the stain should look like they were left by water running across them over centuries. Work from the bottom up so later runs will be less distinct by rolling over already stained areas. Also work the lines of the piece, if you have a large pedestal, the obvious lines can hide where you stopped vertically and stained across the piece horizontally. Stain the faces that shows the most first, that face being the front of a statue or the decorated lip of a fountain bowl. On a 4-sided planter, do complete sides. Wetting the surface of a very detailed or textured piece will help carry the stain into the pours and crevices more evenly. In some cases you may need to work the brush to get into areas. Be thorough. Those white spots you miss look awful.
I have a fountain with a 42" hexagon bottom bowl that has a rounded lip at the top & bottom and a deep thistle design in the middle. I wet the whole bowl down then I hit the smooth border at the bottom first and fast so there is little time for the first side to stain before I finish with the last. Next I hit the deep design in the center. Because there is a clean separation between these elements, you won't notice I stained one and then the other. The center takes much more time to work into the detail. I add a bit of water to the stain and apply generously to the deep crevices. The spillage will not show because we already stained below. A quick lap around the top lip and down the inside (yes, I do the inside of bowls from the top to the bottom. I like the streaks.) finishes the coat. I like to stain the bottoms of pieces as well. It just looks better if the piece ever gets moved and the bottom is seen, that it matches.
When using layered colors, (multiple coats) as I almost always do, work the darker color first making sure to get the second coat as completely covering as the first. In heavy, uncut doses, weathered bronze, copper patina and antique amber will actually eat through some darker colors and leave heavy highlights. This helps if you let a stain get too dark.
A final note on terracotta (or any combo with terracotta in it), the day after finishing wipe the piece firmly with a dry rag to remove all loose dust. Rinse with a hose and let dry. The day after, wipe down again.
D. Selling it
A few points that I have found helpful in closing a sale and not having to deal with "buyer's remorse" issues later.
1. Explain that the goal of the staining is to give a natural, aged look. This covers several implications. It comforts them as to perceived imperfections in the finish. If you want an even, manufactured look, paint it. Nature is uneven. Now might be the time for you to mention that because of this finishing, no two are ever the same. The subtle variations make them all unique.
2. People also have a tendency to try to match their house color. These natural colorations go with any house. Black or walnut with a second coat of patina is the most neutral antique finish I've seen and goes anywhere.
3. Show fountains wet. The colors are completely different when wet. Much more vibrant and impressive.
4. Layer multiple colors. The finishes are much more realistic and gets peoples attention faster. I sell a black & green fountain faster than a black or a green alone. Experiment with separated colors also. I've done everything from different elements on a wall fountain to a 42" monarch butterfly in realistic separated colors and it can look fantastic (although time consuming).
----------
I apologize for the inability to quote exactly, I may have mistyped some portions. Links are not allowed here, so I'm doing the best I know how.
You can find the original source of this article by using the following exact keywords, including quotes: "Acid Staining 101" in any search engine.
There you will find a link to pictures of examples that use these finishing techniques.
- Albuquerque, New Mexico
February 15, 2009
|
|
Hi, James. Thanks for your efforts! It's not exactly that links "aren't allowed" so much as the fact that this site, which has been on the air for 20 years, as an Electronic BBS before there even was an internet or search engines, is trying to be a permanent reference -- and 95+% of all links break in just a couple of years. That's one reason we prefer people to post an answer rather than a link to an answer ... and you did a great job of it! Regards,  Ted Mooney, P.E. Striving to live Aloha finishing.com - Pine Beach, New Jersey Need quick confidential answers? $25 Need project assistance? $100/hr. |
Q. I am looking for the verdigris finish that is black undertone with a dark to medium light green shadow on cement yard statues ... what paint, solutions or formulas do I use. My ex mother-in law once did this but of course we are not on speaking terms, hahahahaha. The statues have a very tarnished look when finished. She use to call it "antiquing". Thanks for any help
Ginny P. [last name deleted for privacy by Editor]- Florida
March 3, 2012
Sorry! Finishing.com is temporarily Read-Only.
Ted Mooney is retiring but I have several offers to take it over.
We're working hard to make sure we find it the best new home.