-----
Thickness of phosphate coatings and thickness measurement
Q. Dear all,
We are facing the problem of bore diameter oversize (Plug gauge going loose in transmission gear inner dia.) after Phosphating process, and phosphating layer observed 6-7 micron after 6 min timing. Please suggest me for the reason of bore oversize.
Employee - Delhi, India
August 4, 2022
A. Hi Kuldeep. I think the first thing to do is to double check for any possibility of a mistake in where this oversize situation developed because you wouldn't want to make changes based on bad info. But after that, Guillermo_Marrufo tells us that an overactive etch or excessive immersion time in the phosphatization stage may cause this.
Luck & Regards,

Ted Mooney, P.E. RET
Striving to live Aloha
finishing.com - Pine Beach, New Jersey
Ted is available for instant help
or longer-term assistance.
⇩ Related postings, oldest first ⇩
Q. We need to check the thickness of zinc-iron phosphate coatings on parts we receive from suppliers. The parts are too heavy to weigh on an analytical balance, in any case we are more interested in checking thickness than coating weight. Our spec for thickness is 15-30 microns. Any suggestions?
Bill Martin- Decatur, Illinois, USA
2001
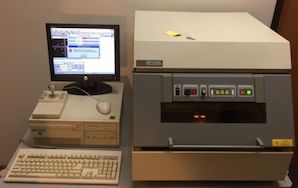
A. The industry accepted method is weight, not thickness. Thickness will vary depending on the type of steel. Have your phosphater run test panels (3"x 10" or smaller) same time as the parts. A lab can find the weight per sq. inch. If you REALLY need to check thickness, maybe a lab with an x-ray fluorescence machine could do thickness. I am sure this method would cost a whole lot more.
Bill Hemptech svc. w/ chemical supplier - Grand Rapids, Michigan
Q. I am doing a project on the phosphate coatings as my final year project in B.Sc Engineering at University of Moratuwa, Sri Lanka. At the moment we do not have a proper method to measure the thickness of the phosphate coatings, which were developed during the project. Please be kind enough to give any information on the thickness measurement of the phosphate coatings. Any documents of researches carried out under the above topic are very much appreciated.
Bhatiya Dewagiri- Colombo, Sri Lanka
2002
A. Hi Bhatiya,
Do you mean the actual thickness of the coating, or the amount of phosphate coating that has been deposited?
The actual thickness is difficult to measure because there is no clearly defined boundary between the coating and the base metal. Remember that the top portion of the metal surface has been converted into the phosphate coating.
The amount of coating can be determined gravimetrically by immersing a phosphated panel into a solution of chromic acid.
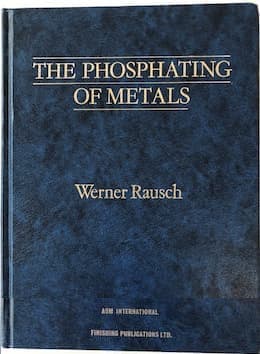
A good discussion can be found in Werner Rausch's book, "Phosphating of Metals"
⇦[this on
Amazon
or
AbeBooks affil links].
- Naperville, Illinois
Interference of phosphating layer with press fit
Q. I have an application where a phosphated sintered female part namely Hub (density 6.5~7.0 g/cc) is press fit with a steel shaft. The design interference is 0.060 mm to 0.100 mm (0.0024" -0.0039"). Recently I had lot of failures where hubs slipped off from the press fit under working condition. We have specified phosphating layer in the bore to an extent of 0.005 to 0.012 mm (0.00019" - 0.00047"). My query is whether the presence of such phosphated layer in the interference will weaken the joint or not?

G. Muralidharan
steering systems - Chennai, TamilNadu, India
2006
A. Most likely the cause may be an over etch during the pre-cleaning or an over exposure to the phosphating solution of the parts.
Guillermo MarrufoA. My thought would be that the interference fit is crushing the phosphate to a fine powder which can work out and also act as a lubricant.
James WattsNavarre, Florida
![]() Thanks for the responses. I am glad that I could move a step or two forward with these inputs.
Thanks for the responses. I am glad that I could move a step or two forward with these inputs.

G. Muralidharan
steering systems - Chennai, TamilNadu, India
Q. Hello,
My name is Buzz,I work for a precision machining co. in PA. We have a new job we need some help with. We're machining G2 Cast Iron (hardened & tempered to 250-300 BHN). It is cylindrical in shape (8.5" long x 2.5" O.D. x 1.7500"-1.7510" dia. bore after plating). How much size buildup should we allow for from the manganese phosphate plating to hold the close tolerance bore?
Any help would be greatly appreciated.
Thanks,
Precision machining - New Stanton, Pennsylvania, U.S.A.
2006
Multiple threads merged: please forgive chronology errors and repetition 🙂
Q. Respected sir,
One of our customer needs Anti seizure phosphatizing to his components with the required coating thickness at around 0.005 to 0.007 mm. Sir, Is it possible to measure the coating thickness after phosphatizing ? If ,yes please tell me the measuring instrument required for measurement.
Please suggest the standard for the same. As per our customer requirement, Anti-scuffing phosphating with de-hydrogenation FF AG8-10, Durability 13 Hrs. as UNI 4239, Anti scuffing efficiency test 100% min. as UNI 4722. Min. thickness req. 5 to 7 microns. please suggest us that instrument also which is checked thickness of the phosphatizing layer.
Thanking you.
Product Designer - Pune., Maharashtra, India
February 16, 2009
A. Most people will use mechanical measurement of before and after, dividing by two if it includes 2 sides. Test panels are not as reliable as sections of scrap parts. Notice that your "before" measurement has to be after any grit blast or chemical attack. Notice also that for really reliable information, the measurement has to be taken in the same spot--exactly. Notice that with repeated measurement, some of the tops of the phosphate will break off or wear off or polish. For electronic measurement, it requires excellent standards, which most people do not have. I do not think that magnetic will work if this is iron phosphate, but you might be able to prove that it does with the right fudge factors, IE: as a go-no go gauge.
So, you come down to what is the required precision of the measurement. Most people would just use weight loss rather than direct measurement, but this requires a lab with a good balance and haz waste disposal (chrome in the stripping agent).
- Navarre, Florida
Q. Hello Dear,
My customer is want to measure coating thickness with SEM (cross Section method).
We are applying Manganese Phosphate coating (3-7 Micron).
Generally for this kind of low thickness, we are using Weight method for measuring the thickness. Because during the cutting of plated part, coated surface is deformed.
Could you send to me your suggestions and comments.
We have SEM but we are measuring only granule size & distribution of plated surface.
Automotive Supplier - BURSA, TURKEY
August 26, 2010
A. The thickness of various types of phosphate coatings will be of the order of 1 to 50 microns. However, for practical purposes, the coating thickness is usually quantified in terms of weight per unit area (usually as g/sq.m or mg/sq.ft) and commonly referred to as coating weight. The reason for the adoption of coating weight rather than coating thickness as the usual measure of coatings is the difficulty in measuring the latter, compounded by the uneven nature of the substrate and of the coating.
The ratio between coating weight (g/sq.m) and coating thickness (microns) varies between 1.5 and 3.5 for the majority of industrial phosphate coatings. For light and medium weight coatings, 1 micron can be regarded as equivalent to 1.5-2.0 g/Sq.m.
A non-destructive method based on specular reflectance infrared absorption (SRIRA) has been used for the determination of zinc phosphate coating weight. X-ray fluorescence is a nondestructive and accurate technique for measuring the thickness of thin phosphate coatings.
Scanning electron microscopy will be useful to determine grain size and uniformity of the coating, as reported by you.

T.S.N. Sankara Narayanan
- Chennai, Tamilnadu, India
(ed.note: The good doctor offers a fascinating blog, "Advancement in Science" )
![]() Dear sir,
Dear sir,
Thank you very much for your info,
Also we are already applying coating weight method but our customer has requested coating thickness.
We will try to convince our customer with your info.
Regards,
Mech.Eng. - Bursa, Turkey
A. It is possible to measure the thickness of a manganese phosphate coating by SEM, but using its EDAX facility. The system will need calibrating, but the principle is that you start with a very low beam energy and then gradually increase it until the detection peak reaches its maximum value. You need to calibrate the beam penetration distance for your selected atom against the beam voltage. The better peak to use will the manganese, because it is the heavier atom, but you may need to take account of any manganese in the substrate. I have successfully used this technique for measuring very thin layers of platinum and palladium - typical thicknesses of less than 100 nm

Trevor Crichton
R&D practical scientist
Chesham, Bucks, UK
Q. We are measuring manganese phosphate coating thickness on steel components.
We are using instruments based on magnetic pulls. The thickness range of coating is 5 to 10 microns. We are getting average coating thickness in the range of 13-14 microns. My instrument has calibration standard of 70 microns. So we calibrate between 0 and 70 micron.
My queries are as follows:
1. Is it okay to check coating thickness of 5-10 micron with an instrument calibrated with 70 microns standard sample.
2. Is it possible to check accurately the coating thickness, say within one micron, with some other method.
In charge of a testing lab - Haridwar, Utterakhand, India
October 13, 2010
A. First, Manganese phosphate is typically a very rough finish so that it can hold oil. That said, it is nearly impossible to get valid numbers.
Second, your standard should always be near the range that you desire to measure. See if you can get another standard that is about 20. 70 is far too big for good results.
- Navarre, Florida
Q. Hi,
I need more explanation related this topic. I have a Positest coating thickness meter which according to the manufacturer that my device has the capability to measurement of paint, galvanizing, and phosphate coating. You mentioned that the phosphate coating cannot be measured due to the top surface of base metal has been converted to phosphated condition. Can you kindly elaborate more to your opinion?
Thank you very much.
- Jakarta, DKI, Indonesia
June 14, 2012
A. Good day Michele.
There is some info in letter 51028 "Controlling Manganese Phosphate Coating Thickness".
Regards,
- Toronto, Ontario, Canada
A. Hi Michele,
Phosphate coatings are normally measured in coating weight, not thickness (MIL-DTL-16232 [from
DLA]
is a good source for how to do the test).
The problem with phosphating is that it is highly crystalline, discontinuous and uneven. This means it is nigh on impossible to get accurate readings with either eddy current or magnetic type thickness testers. There all sorts of influences that makes the method inappropriate including inability to place the probe flat to the surface, crystal edge effects, surface discontinuities, etc.
Aerospace - Yeovil, Somerset, UK
Q. Hi
We want to know about amount of phosphate layer thickness on steel for protection and having better performance. Actually for incoming inspection of our wires, we need to have a method to get some information for checking them. Consequently could you help us to find a kind of standard or method to inspect of phosphate layer thickness on steel wire?
Thank you in advance for your cooperation.
Respectfully
- Saveh, Iran
December 15, 2012
A. Hi Javed. We appended your inquiry to a thread which may fully or partially answer it for you.
Regards,

Ted Mooney, P.E.
Striving to live Aloha
finishing.com - Pine Beach, New Jersey
Ted is available for instant help
or longer-term assistance.
Q. Dear sir
I would like to ask for the standard thickness zinc phosphating of the surface material.
How many microns will be accepted for thickness phosphate?
Can you show me for the standard (may be in ISO or ASTM)
tq
Mario
Indonesia
- Tangerang, Indonesia
October 10, 2013
A. Hi Mario. We appended your inquiry to a thread which helps answer it. In addition to the explanations provided here by TSN Sankara and others, you may also wish to review letter 17826, "Phosphate Coating Weight Specifications". One good standard is TT-C-490 [from DLA] ; another, which I see referenced but which I don't have myself, is Indian Standard IS: 3618. Good luck.
Regards,

Ted Mooney, P.E.
Striving to live Aloha
finishing.com - Pine Beach, New Jersey
Ted is available for instant help
or longer-term assistance.
![]() Hi, This is kalaiyarasan, working in MSGI Automotive P ltd. as a dy. manager paint shop.
Hi, This is kalaiyarasan, working in MSGI Automotive P ltd. as a dy. manager paint shop.
MSGI Automotive P Ltd - Chennai, Tamilnadu, India
July 30, 2014
Q. Hello! I am working on a project where I need to find a method/product that can measure the zinc phosphate coating weight on different metal plates. We are at the moment using a Gardo®meter but we are getting wrong answers with it, giving results that are not correct. We know this because of verification from the lab. Any help is much appreciated!
Kind regards.
Student/apprentice - Göteborg
February 8, 2022
A. Hi David. I haven't used a Gardo®meter, but understand that it functions by measuring the reflectance/absorption ratio. If this proprietary testing device is not working properly for you, you should talk to Chemetall about what might be wrong either in your operating procedures or in the device's operation/calibration.
Brian Terry suggests on this thread that MIL-DTL-16232 [from DLA] offers instruction on how to properly determine actual coating weight, and you may be able to do this strip & weigh method in-house or have a third party do it as verification of whether the results from the lab are accurate. Labs aren't alway right :-)
Luck & Regards,

Ted Mooney, P.E. RET
Striving to live Aloha
finishing.com - Pine Beach, New Jersey
Ted is available for instant help
or longer-term assistance.
Q, A, or Comment on THIS thread -or- Start a NEW Thread


