-----
Thickness measurement of gold plating
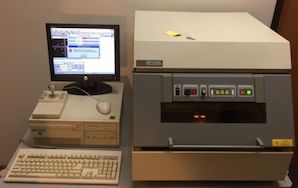
Q. Hello everyone, I am a senior Engineer working in the field of PCB manufacturing and electroplating for over 20 years. I know from my long experience in manufacturing PCB that the only NDT to measure the thickness of our ENP/Gold layers on copper is XRF technology, otherwise you need to do a cross-section. Problem with cross-section is it will not be helpful for testing samples fast during production to make sure our electroless nickel bath (which I am sure you know is fickle, sensitive, and very high maintenance) is working properly. So I am trying to convince my management to buy a new XRF instrument as a backup for the existing one, and they want me instead to diversify and invest in a different technology.
I have searched for long on my own, and asked several suppliers, and the answer is always the same, the only NDT available is XRF. Do any of you have any advise in this regard?
- Jeddah, Saudi Arabia
June 2, 2022
⇩ Related postings, oldest first ⇩
Q. We are looking for a reliable method of measuring the thickness of our electroplated gold layer.
We are aware of the X-ray (expensive), and calculation by weight of a sample piece. Are there any other ways to measure it?
Many thanks,
Peter
Peter Knaapelectroplating shop - United Arab Emirates
1998
A. The other methods, as I understand, are Beta backscatter and magnetic/electromagnetic induction. "Beta" is not likely to be cheap either, but less expensive than x-ray. Magnetic methods are not that accurate for very thin films, but ok for approximation. I would suggest checking around for Eddy Current method. This method has been improved lately to measure new coatings.
Mandar Sunthankar- Fort Collins, Colorado
A. Besides x-ray fluorescence (best for speed and accuracy on thin gold, especially if you want to do a nickel underplate at the same time), you might look into beta-backscatter. A number of distributors carry this technology. The oldest, but tried and true method is cross section, but it is heavily dependent upon the skill of the operator, is destructive of your sample, and takes a relatively long time (an hour or more per sample preparation).

Bill Vins
microwave & cable assemblies - Mesa (what a place-a), Arizona
A. A very common method for accurate measurement for thickness of electroplated metals is by microscopic measurement of metallographic prepared cross sections. This is a destructive test, but can be performed on almost any shape for almost any type of coating.
There are many commercial laboratories that perform this type of analysis. Measurement of gold plating, especially thin plating layers, is subject to errors from poor preparation, so make sure that any laboratory that you use has a proven track record with thin plating and soft metals.
If you are looking to do this work in house, equipment that you need is probably a little cheaper than XRF. You will need a trained technician - polishing technique is a little more difficult to master than XRF.

Larry Hanke
Minneapolis, Minnesota
A. I have had some experience with cross-sectioning for thickness measurements. The problem with soft metals is smearing during cutting and polishing. A diamond saw (expensive!) probably would work better for cross-sectioning. But a layer of harder metal such as nickel on top will reduce smearing. Again, potting will help too. So it all depends on how accurate you want to get. For really good accuracy in thickness, I would recommend electron microscope (SEM) if cross-sectioning is used.
I personally prefer a straight measurement method that does not depend so much on people skills. I became tired of all the set up, training, maintenance, etc. These eventually come to the same cost as x-ray. If you do not have the set up, just send it out to a lab.
Mandar Sunthankar- Fort Collins, Colorado
Multiple threads merged: please forgive chronology errors and repetition 🙂
Gold flash thickness measurement
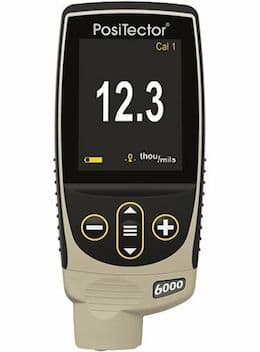
combo magnetic & eddy-current coating thickness tester

on eBay or Amazon
(affil link)
Q. Dear Sir,
Would you advise the method of measuring Au plating (Au flash) layer thickness. The Au layer should be in the range of 0.2-0.7 micron- meter.
I know that I can use Auger + sputtering or the EDAX or XRF to get the result. Any another method?
And someone said that there should be another method called " zero time cross over" ( I am not sure the exact name) What is the theory behind this method?
Thanks for your kindly help.
Best regards,
Kelvin YU- Hong Kong
2001
A. You can measure the thickness of gold with Beta Backscatter, Coulometic, Gravimetric and Microscopic. The X-Ray Fluorescence method which you mention is probably the most common and easy to use. I am sure there are other methods that I am not thinking of.
Neil BellAlbuquerque, New Mexico
Measuring the gold thickness by gravimetric method
Q. I know the method of gravimetric method but the problem of me how can obtain the sample without loss any thing from weight because the area of sample in calculation and weight of sample.
Ibrahim AhmedDubai Center Laboratory - Dubai
2006
A. There are 2 common gravimetric methods.
1) Weighing before and after plating. Use additional samples to determine the weight change of pretreatments prior to gold plating.
2) Dissolution. For gold: weigh the plated sample, dissolve the substrate in 50 vol% nitric acid, then weigh the gold.
For further details, see ASTM B767-88 "Standard Guide for Determining Mass Per Unit Area of Electrodeposited and Related Coatings by Gravimetric and Other Chemical Analysis Procedures," and/or
ISO 4524-1 "Metallic coatings - Test methods for electrodeposited gold and gold alloy coatings - Part 1 : Determination of coating thickness."
- Goleta, California
Rest in peace, Ken. Thank you for your hard work which the finishing world, and we at finishing.com, continue to benefit from.
A. Hello Ibrahim,
Just a note on gravimetric thickness testing. There are too many variables using this method for part thickness measurements. Many of the variables are plating related such as gold concentration, temp, pH, current density, time, alloy or brightener concentration (if using hard gold), buffer and make-up salt concentrations, and more importantly the configuration of the part. Thickness distribution on the part can vary from 5-15% depending on the variables mentioned here. The method is also time consuming and labor intensive. UPA Technology has gold thickness measurement devices if you don't currently have one. Using one will save you a lot of time and money, and help you keep your gold thickness distribution in check. Good Luck!
process engineer - Malone, New York
XPS Vs XRF Plating Thickness Measurement
Q. I need some explanation from Plating experts out there.
Can someone explain why XPS (X-Ray Photoelectron Spectroscopy)is better and more accurate technique to measure plating thickness than a common XRF (X-Ray Fluorescence) measurement ? I use XRF method to measure Au/Ni Plating over Cu base metal in my production. Customer wants me to verify and confirm Au/Ni thickness by using XPS, which is expensive and time consuming method. Any suggestion ? Thanks.
plating shop employee - S.P., Kedah, Malaysia
June 12, 2013
A. Gold and nickel thickness on copper can be easily measured by XRF. Gold and nickel standard calibration foils are available.This can be used for creating measurement applications.
If gold thickness is less than 50 nanometer then it may be difficult to measure using XRF.
Otherwise XRF is the easy and fastest way to measure the thickness of coated layers.
- Bangalore, Karnataka, India
Thickness measurement of 18K Gold
Q. Hello,
We have problem in measuring thickness of sample; it has layers as
Au (~0.2 micron)/AuCuIn (%Au 65~75%, 1.7~2.7 micron)/Au (~0.1 micron)/Pd (0.25~0.9 micron)/Cu/CuZnMn (base material)
Now we used XRF (standard free product, Fischer XDV-SDD) but its result has a variance 30-40% of cross section result (thickness determined by SEM).
Are there other ways to measure thickness more accurately? We prefer to use XRF, how to improve its precision?
Thanks & Best regards,
Thao
Lab Engineer - Ho Chi Minh City, Vietnam
June 28, 2014
A. Hi Thao,
XRF is the supreme to determine the thickness (ASTM B568) of multi layer coatings with different substrates.
Initially Do NORMALISATION with substrate (base metal) which is to be plated for thickness test after plating.
Then calibrate using nearer (thickness) standards. Then go ahead and thickness test.
I hope your problem will solved.
Regards,
Process Engineer - Tumkur , Karnataka , INDIA.
Q, A, or Comment on THIS thread -or- Start a NEW Thread
