
| Search our quarter-million Q&As |
Home of the finishing HOTLINE since 1989
-----Coating tables and bar tops with thick clear pourable plastic
< Prev. page (You're on the last page of this topic)
Resin, Epoxy, Other?
April 28, 2015Q. We are remodeling our home and doing it on a very short shoestring. Right now we're working on the bathrooms, which were a later priority until the plumbing upstairs started leaking.
My husband is an old master cabinetmaker/yacht builder. He's built a million interiors in high end homes, yachts, and custom coaches. For forty years he's been creating amazing masterpieces and everyone who has ever worked with him or has seen his work is in awe of his abilities and know-how. He and I butt heads over every project we attempt together. He wants to stick to the "tried and true" while I see a brave new world with all sorts of possibilities.
You know what materials he's looking at for the vanity counter tops...laminate, solid surface, boring, boring, boring. What I want to do is make the counter out of resin, epoxy, whatever with sand, shells, and other beachy things embedded in it.
My idea is to use whatever substrate is needed and cover it with resin or something mixed with white sand. Then, I suppose once it's set up some, I'd arrange shells, pebbles, dried seaweed, grass, little dried or fake sea life, tiny "beach things", sparkles & stuff, on the sand. I have read that things like shells should be clear coated before covering them with resin. Then, of course, I'd pour a final layer of resin, let it cure, un-mold it, hand it over to my husband to cut the hole for the sink and install it.
My gigantic problem is that I have no idea what materials to use. I've been researching for about a week and am just getting more and more confused. My husband and son have finally seen pictures that helped me illustrate what I'm visualizing and now they're both on board and very gung ho. I'm being asked how much this is going to cost and how long it'll take to cure but I don't have those answers since I don't even know what materials to use. Can ya'll please throw out some suggestions and education? I'll really appreciate it!
I have a few more questions about some other things going on with this project but I don't want to overload ya'll all at once.
Thanks!
Homemaker, Hobbyist, Wife of a Pro Woodworker - Wakefield, Virginia, USA
A. Hi Cheryl. Although I haven't used the thick, pourable epoxy myself, I have read hundreds of postings about it and come to the conclusion that it's like anything else: you'll make mistakes on your first try: the shells will float, or the carefully placed sand piles will be washed away by the flowing epoxy, or another little problem will mar your first effort. So get some small pieces of plywood, discarded shells and extra sand -- and try it first :-)
Regards,

Ted Mooney, P.E. RET
Striving to live Aloha
finishing.com - Pine Beach, New Jersey
Need quick confidential answers? $25
Need project assistance? $100/hr.
April 2015
Q. Hi Ted! Thanks for the rapid response. Shoot, you mean I'm going to have to work to figure this out? ;)
Can you or anyone recommend materials that should do what I'm attempting? I think my husband might frown upon me buying a whole lots of stuff to experiment with.
Cheryl
- Wakefield, Virginia USA
April 28, 2015
A. Hi again Cheryl. As I said I haven't done it, but "thick pourable epoxy" is what you want if you want something thick and pourable. But yes, it's expensive. A gallon is 231 cubic inches, or 462 square inches at say 1/2" thick.
I'm sure your husband no longer makes the mistakes he made 40 years ago, as he's been experimenting for 40 years. But if he wants you to bet it all on one shot rather than getting a bit of hands-on learning and practice, start right off with your final piece :-)
I suspect you're going to find it almost impossible to let it set up some and then arrange. I don't know from personal experience, but I'm pretty sure that fewer pours is going to work better than many pours, although good success is reported above with two layers. You may be able to glue your sand and shells and stuff down before the main pour(s). Good luck.
Regards,
Ted Mooney, P.E. RET
Striving to live Aloha
finishing.com - Pine Beach, New Jersey
Need quick confidential answers? $25
Need project assistance? $100/hr.
April 2015
Q. Can I use epoxy coat to fill in areas that did not hold the clear epoxy to my tabletop?
melissa voyles- marshfield Missouri usa
May 4, 2015
Best type of clear finish for a rough surface to be used as a bar top
Q. I've been researching what the best clear finish is for rough surfaces to give a Class A finish.
For example: I have a rough countertop made of stone, has a sandpaper feel. I want it to be even smoother and have that nice glossy finish.
What options can I use to achieve this?
1. Clear epoxy
2. Tempered glass on top -- what I'm clueless about is what adhesive I would use to attach this to the rough stone countertop.
Contractor - Florida
June 3, 2015
June 16, 2015
I'd certainly use glass.
It will cost less.
It will resist scratches and stains better
It will not discolor over time
It can easily be replaced if damaged
Any glass shop can recommend the best type and thickness, cut it to size, and polish the edges smooth.
You do not need to glue it in place. Simply glue some 1/2" or 3/4" diameter rubberized cork dots to the underside. you need them only at the corners, and about every three feet along the length.
Any car parts store will have 1/16" thick rubberized cork as it is commonly used to make gaskets.

Jeffrey Holmes, CEF
Spartanburg, South Carolina
What accelerates the cure time of bar finish?
Q. I would like to know if there is a way to accelerate cure times for bar finish. I'm trying to build a coffee table for my parents anniversary. I've made it a memorial table. Pictures of their dogs. With dog tags and collars. To encase the collars with bar finish I had to go 3/8" thick on the bar finish. We left 12 hours between coats. The 4th coat is still wet. Been wet for 5 days. How can I speed up the cure time?
Ryan Rexinhobbies. - Sturgeon Country, Alberta, Canada
July 16, 2015
Why do I have pock marks after a few hours of applying the high gloss resin and how do I fix it?
Q. i used the high gloss epoxy on a dining room table, I used it over a well cured oil based polyurethane. I got the air bubbles out and the surface was nice and smooth. After a few hours I started getting pock marks. Why does this happen and what can I do to fix it?
sandi haineshobby - reading Pennsylvania
November 5, 2015
A. I have worked a few "poured" tops and have a couple tricks that work really well.
Mixing... Accurate measurements are critical. ALSO some are measured by weight and not volume, so I suggest reading closely. The "mixing" container should never ever be used for pouring to the table/surface top. Parts of the binary will hug the walls of the container (you won't see them) and will create soft spots in your pour.
Substrate prep... Porous surfaces need pre-sealed or coated with a thin layer of your resin prior (or deco glue will work) to the main pours (1/8 to 1/4" pour is best). Set time is critical on pours and products will tell you the best time gap.. ANY cracks or holes WILL be drain holes when you pour.
Air bubbles... First thing is avoid creating them. The mixing process is tedious and best done with a mixing tool on a drill. Do not "whip" up your resin, and do not get in a hurry, you have plenty of time to mix. After the pour, a simple heat gun
⇦ on
eBay or
Amazon [affil link] works the best.. Propane is great if you have some practice but the heat gun will avoid burn/discolor issues.. (a blow dryer is not a heat gun FWIW) I suggest multiple passes as you can not see most of the tiny bubbles at all (you will only notice them popping as you run your heat gun across the newly poured surface). Repeat the process as many times as it takes to observe no bubbles popping..
Cleanliness... A clean shop is important here as your poured top is going to be a dirt magnet for hours and hours. It is not a bad idea to make a cover (that does not touch the table top) to set in place after the pour and blow out (bubble removal).
I have more but these are the main catch points I found..
- Fort Wayne, Indiana
May 2, 2016
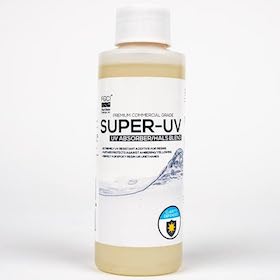
Q. I just poured a bar top for my tiki bar and we got bugs and leaves that landed on it while wet...how can I get them out? I'm planning on pouring over it with a UV resistant epoxy...if I cut the bugs out , can I pour over that with no signs that they were there?
Karen Jarolik- Copperas Cove, Texas
April 24, 2016

Q. Hi there, I am in the process of re-vamping my kitchen worktops. I have primed them with Zinsser B-I-N Primer Sealer
⇦ on
eBay or
Amazon [affil link]
, and will be adding a coat of V33 cupboard paint. I would then like to coat them with epoxy resin, to get that high gloss finish. I am OK to use Envirotex Lite [affil link] over the V33 cupboard paint? Any tips would be greatly appreciated.
Thanks for your help.
Gail
- United Kingdom
June 12, 2016
Resin table top problem
Q. The wood slab I poured with a resin (enviro tex) is
Lifting at some places on the edges. How and what can I do to fix this without doing a repour?
- grand island, nebraska united states
September 7, 2016
Q. I'm planning on making a set of corn hole boards using bottle caps and clear resin. I will take any and all advice on this b/c I don't want to screw it up. It's taken me far too long to collect the caps. I plan on building a frame around the boards so I need advice on that and need advice on the best resin/epoxy to use to get a nice, clear, durable finish!! THANKS!
Carol Stewart- Indian Trail, North Carolina, USA
September 9, 2016
Q. Hello,
Thanks for great advice on resin application!
I have a 70's burl wood table that I bought recently that needs to have the resin removed as it has some damage.
Has anyone any experience on how to go about removing the half inch of resin?? If I could just get the top finish off, I would be happy.
Thanks very much for your help with this!!
- Vancouver, BC, Canada
October 27, 2016
January 2, 2017
Q.
I've nearly completed my outdoor coffee table. The top is approximately 5 feet long by 27 inches wide and approximately 1.5 inches thick. It's a large, live edge slab of Black Walnut.
The problem lies in that there's a large 'hole' through the wood. The hole is irregular, approximately 8 inch x 8 inch and goes all the way through the slab.
I've screwed a piece of Lexan on the underside of the slab and have sealed the edges of the Lexan. In the cavity I've arranged an array of coral pieces, some are attached directly to the Lexan, others are 'elevated' above the Lexan by means of metal 'stands' (copper plumbing components).
I now need to fill the void with a clear resin in order to embed the objects and to bring the resin fill up to the level of the tabletop.
I've looked into all sorts of different resins, but really do require something that is pourable (preferably without a lot of fumes) that will cure without a lot of temperature restrictions, vacuum pumping, etc.
Does anyone on here have any suggestions (i.e., specific product) as to what I should be using. I do realize that I will probably need to do this in layers in order to get a thickness of approximately 1-1.5 in3.
I'm only going to get one shot at this. There are a lot of hours into this project so far. A failure would be hard to live down.
- Toronto, Ontario Canada
A. Hi Mark. Sorry but we don't compare brands on this largely anonymous website because experience shows it is almost always a disaster (salespeople posing as satisfied customers, effusive with praise; people afraid to be critical of a specific brand for legal reasons, so reports are unrealistically favorable; posters lose their spirit of camaraderie when postings recommending competitive products affect their livelihood). But I think a general error here is saying you're only getting "one shot" at this. Before working on such an important piece, you really need to play around with the resin a bit to discover for yourself how it all really comes together. You have to acquire a feel for how it flows, how quickly it actually hardens, what happens with bubbles, how thick you can pour before trouble, whether there will be visible lines from a double pour, etc. You can't become an expert, able to deal with a tricky project, just by reading. Good luck.
Regards,
Ted Mooney, P.E. RET
Striving to live Aloha
finishing.com - Pine Beach, New Jersey
Need quick confidential answers? $25
Need project assistance? $100/hr.
Q. I am a first timer and I see references to different epoxy's so I need to get clarification. I am doing a lazy susan for the centre of my dining room table (approximately 24"-36" in diameter). The wood is distressed wood and I can put the epoxy either onto a finished surface or a non finished surface (I need to know which is better). I want the top to look like "glass" once it's dried and finished....what kind of epoxy should I use? Should I use the 2 part (resin and hardener?) I watched a video where it was hardener and resin mixed together (50/50) and then poured and smoothed out with a straight edge until all the white "haze" was gone and then let set to dry. It looked easy but after reading some of the above information (one guy said from breathing in the toxins he could almost feel the epoxy harden in the back of his throat - sounds scary). I need to get some direction on the best way to do this and the safest.
Thanks in advance.
- Toronto, Canada
April 25, 2017
Q. I want to coat my bedside tables with something that prevents rings and cigarette burns. Should I go with 2 part epoxy or something else like "liquid glass" which seems to be new on the market and available only for car application in the USA. Other applications available from Europe. It say it is nano technology. Thoughts?
PS: thank you for helping everyone, very few threads last this long and are useful.
Elaine sayersRetired
September 14, 2017
A. I have used enviro tech on my kitchen bar with good results. By the way, a few extra tips to pour the epoxy, I had no problems pouring another layer of epoxy over a sticky layer that didn't dry, to fix the bad layer. Also next time I'll run a bug zapper in any indoor area the day before, the bugs love the resin. I did have to cut them out and pour another layer. 3 layers was the charm anyway, perfect thickness. I didn't build a frame, just made sure back edge of counters had good putty in cracks and let the edges drip onto taped down plastic over cabinet doors and floors. Then smoothed the vertical edges with a sponge. Also turn off house fans to avoid dust during the pour. Also I bought several pairs of cheap flip flops in case I stepped into drippings of the resin on top of the layers of floor cardboard. I threw away the flip flops when they picked up any stray resin and put on new ones. Hospital shoe covers would work well.
Q. But, I am now wanting to cover a deck table that already has several coats of urethane. Does epoxy resin bond well over urethane? Maybe this question has been answered before because google brought me to this site when I asked, but I can't find it.
- Grandy, North Carolina
October 21, 2017
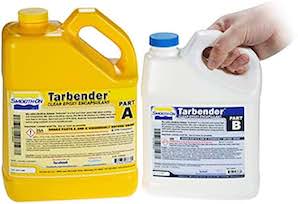
A. I've been doing bar tops tables and live edge tables. The company I've been using is smooth-on they are just a little more costly but I have been very happy with the products. The encapsulation product is called Tarbender and it can go on super thick and not crack or yellow and it takes powder dyes well.
And a little tip: a very thin layer of epoxy sealant before flow coats will help the sneaky bubble problems, and pour thru a pantyhose to get rid of a ton of air bubbles to start. Oh and once you torch two or three times, walk away; this stuff all has a working time and if it gels, the torch will push ripples into the surface that won't flow out. Hence the prep sealing! Oh it costs me about 75-90 bucks for the gallon kit at their website.
Mike Balsley- St peters Missouri USA
January 1, 2018
Q. I am making a sink top for a vessel sink. I was planning to pour self leveling epoxy.
1. what is the best brand to use that will remain clear?
2. can I spray paint the MDF first and coat with clear epoxy afterwards? , or is it better to mix in a base coat of powder in the first coat or two of epoxy?
3. I want to add some gold colored flakes in or after the base coat. Which is better? Where can I buy the flakes?
Thanks for your consideration.
Do It as commanded by herself - bellaire, texas, USA
April 3, 2018
Ed. note: Sorry, Alan, we don't post brand comparisons (why?)
Q. Newbie here! I have a makeup vanity that I am considering attempting to mix different colored acrylic paint with 2 part epoxy and pour on top. I have a couple of questions. First, the top that is on there currently feels like a PVC type smooth plastic (someone replaced the wood with this). I was originally going to just sand and clean before pouring but now I'm concerned about the chemical reaction in the resin "eating" the plastic. Am I over-thinking this or is this a valid concern. If so, is there a solution to the problem?
Next, I noticed in videos that half used a blow torch and the other half used a heat gun. I believe the heat gun was used primarily to push the different colors around but was also being used on the low setting to pop bubbles. Is it best to use one or the other or maybe advisable to use the torch for bubbles and gun for spreading product?
And lastly, is there a major difference in your run of the mill epoxy and art brand epoxies? One claim said that the art brands dried harder and clearer but I feel like that seems like a silly claim. Any and all advice welcome!
- Ashtabula, Ohio, United States
September 2, 2018
Q. Can you use this on a picnic table? It gets about -20 °F in the winter. Will it crack? Hubby wants to do this with pictures under it at the cabin. Under a roof but still outside.
Jan Bartoretired - Midland, Michigan. USA
August 14, 2019
October 2019
A. Hi Jan. Epoxy is not UV resistant, so it's not great outside. And pourable epoxy sounds laborious to form up for a typical picnic table with its gaps between the slats. I don't have the experience to predict whether it will crack, but polyurethane -- which is made for outdoors -- sounds like a better bet to me.
Regards,
Ted Mooney, P.E. RET
Striving to live Aloha
finishing.com - Pine Beach, New Jersey
Need quick confidential answers? $25
Need project assistance? $100/hr.
Sorry! Finishing.com is temporarily Read-Only.
Ted Mooney is retiring but I have several offers to take it over.
We're working hard to make sure we find it the best new home.