
-----
How to polish aluminum for motorcycles to chrome like finish

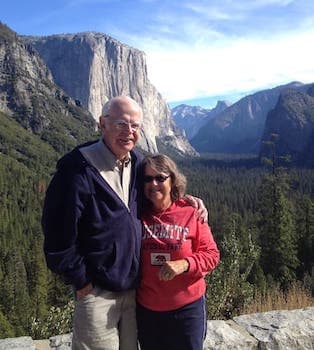
Polished aluminum frame, courtesy of Mike L
Q. Could you please advise me on how to polish aluminum motorcycle frames and rims and tools needed and what type of sandpaper to use to get chrome-like finish, and stripper to strip lacquer coating.
Thanks greatly,
William N [last name deleted for privacy by Editor]- Bronx, New York
2001
A. THIS IS NOT AN EASY JOB -- BE WARNED
1. Remove lacquer with furniture paint stripper ⇦[this on eBay or Amazon affil links] .
2. Start with relatively rough sandpaper. Use something rough enough to take out all existing scratches. Move to the next finer grade. Sand in a different direction from the first grade. Sand until all scratches from first grade are gone. Move to the next finer grade. Sand in a different direction from the first grade. Sand until all scratches from second grade are gone. Repeat this process using finer and finer grades until you get the finish you want. Most jewelers do this for six or seven times before buffing. For a motorcycle frame, each sanding will probably take an entire day. You may also need to buff with a buffer ⇦ on eBay or Amazon [affil links] and jeweler's rouge ⇦ on eBay or Amazon [affil links] to get a true mirror finish. Immediately coat your part with spray clear lacquer, use several coats. I would suggest practicing on flat parts before attempting something as difficult as wheels or frames. Ultra-fine sandpaper is available. Use wet-dry sandpaper so you can wash the aluminum dust off the sandpaper. WEAR! A DUST MASK! ⇦[this on eBay or Amazon [affil links] . Aluminum dust is not a good thing to breathe.
Personally, I'd suggest looking at powder-coating your parts at a shop, instead. Very cool look, reasonable price, much less work.
Good luck,
Bob Z [last name deleted for privacy by Editor]- Bohemia, New York
A. Use a wet dry sandpaper and a mild solvent together if you keep the sandpaper good and wet the process will go a lot easier, you might want to wear rubber gloves ⇦ on eBay or Amazon [affil links] and goggles ⇦ on eBay or Amazon [affil links] .
S Taylor
- Thunder Bay, Ontario, Canada
A. Start off with a DA use 180 grit paper till you get all the anodizing off the frame. Then move to 220 grit, then to 400, 600, 800 and finally 1000 with the air powered DA. When you get this far your frame is pretty close to polishing. Next pull out the 1000 grit wet and dry paper, sand by hand and sand in one direction only, cross sanding will cause scratches. Then move on to 1500 then to 2000 all with wet or dry paper, now your frame is ready to polish.
Get out a handy car buffer ⇦ on eBay or Amazon [affil links] with polishing wheel and use a rubbing compound ⇦ on eBay or Amazon [affil links] rough cut for automotive buffing, this will take a bit of time for the first time polisher. I use a car buffer for my frame jobs, rims are too small to use it on, keep pad damp so that compound doesn't ball up or gum the pad. Once you are done with this stage clean pad and use an automotive polish such as Perfect It III ⇦ on eBay or Amazon [affil links] ! Re-buff the frame one more time with this and you're ready to use Mothers Mag & Aluminum Polish ⇦ on eBay or Amazon [affil links] on a baby diaper or polishing rag, remember with the final polish to keep your rubbing motion in one direction. For rims I use a automotive paint stripper. Remove all paint and start sanding same as above , but instead of using a car buffer I use a high grade DIE GRINDER [adv: die grinders on eBay or Amazon [affil links] with polishing wheel and same as above.
I hope that this helped you out, its really not that hard but it takes a while to get the results you want. The first frame I polished and I did it the exact same way I told you took me 1 hour on each side to fully polish my frame to chrome like finish.
Mike L [last name deleted for privacy by Editor]
- San Leandro, California
 NEVER POWDER COAT ALUMINUM! Any temperature over 300 degrees can warp your part! Also, DO NOT USE A CHEMICAL TO REMOVE PAINT. It hardens the aluminum and you will not be able to get the shine you want.
- Nwa, Arkansas
March 13, 2008
A. Thanks, Josh. I imagine that powder coating temperatures can distort some thin aluminum articles sometimes, so the warning may be helpful; but there are literally square miles of powder coated aluminum roofs and architectural features out there, and tens of thousands of different parts and components made of powder coated aluminum. Some strippers are probably bad for aluminum but Aircraft Stripper is used on aluminum aircraft skins, and it won't hurt aluminum.

Ted Mooney, P.E.
Striving to live Aloha
finishing.com - Pine Beach, New Jersey
This meeting place welcomes Q&As, photos, history, & interesting tidbits 🙂
Please engage with other posters
• When people show interest in each other's situations, the page quickly becomes a fun & informative learning experience for everyone !
• When people post their own questions while showing no interest in other people's postings, it quickly deteriorates into a string of unanswered questions
Q. I have recently purchased an old Honda motorcycle and the aluminum components are in a sad way. This bike has been parked out in the weather regularly for about 25 years, and hasn't been cared for in the looks department..... Now I've got it and I'm starting to restore it to its former glory and shine but I'm really having troubles with polishing the aluminum parts. Can anyone offer some helpful advice to get me on my way?
Thanks in advance!:)
Andrew N [last name deleted for privacy by Editor]- South Burnett, Queensland, Australia
2004
Q. Hi, I have a 2000 Yamaha r6 and wanted to polish my frame and swing arm. The problem is that I don't know what tools I will need or where to begin. I know that Yamaha's have that rough part on the frame that I will need extreme help making it smooth like the other part of the frame. So if someone has polished a Yamaha's frame before could you give me that information and don't leave out a thing especially that rough part of the frame.
Thank You.
Victor S [last name deleted for privacy by Editor]hobbyist motorcycle - Raleigh, North Carolina
2004
Q. The frame on my Yamaha R6 was polished about 3 years ago and although I am constantly polishing it with Simichrome ⇦ on eBay or Amazon [affil links] or Mothers Mag & Aluminum Polish ⇦ on eBay or Amazon [affil links] , I still can't seem to get it to shine as it used to, I have heard from other people that you can re-sand the frame to give it more shine or you can use brown tripoli buffing compound ⇦ on eBay or Amazon [affil links] as well but I'm not familiar with either procedure and can't seem to find anybody who is, can you provide any assistance.
Your help will be greatly appreciated in the situation, thanks.
Mario Z [last name deleted for privacy by Editor]hobbyist - West New York, New Jersey
2004

A. First of all, Anodizing is the second hardest substance known to man. You can sand on it for hours and not make a dent. Anodizing is VERY vulnerable to acid. Simple oven cleaner ⇦ on eBay or Amazon [affil links] has a high enough acid content to remove anodizing.
It works fast, so be careful not to get any on aluminum parts you do not plan on polishing. Mask off with masking tape and plastic which ever parts you DO NOT want the anodizing removed from. DO NOT spray the oven cleaner, it is too hard to control. Use a cup, spray the oven cleaner into the cup, and then brush it on in heavy coats. You will see the anodizing bubble up, then, just simply wash it off of the frame, This will save you days of sanding time.
NOTE: your frame will look VERY bad when the anodizing comes off, it is normal, don't freak out and think you ruined it. Once you start sanding it cleans up very fast.
If you plan on doing the "Matte finish" part of your frame, you will need to start with a very rough paper. On the smooth parts of the fame, you can start with about a 300 grit, move to a 400 grit..then 600, 1000, ..
If you have a 1/4 sheet palm sander it will greatly reduce sanding time.
You will know when you have sanding enough for each grade, when you get through the 2000 grade paper, the aluminum will be like glass. You will need at least two VERTICAL buffing pads. and a small hand held grinder ( the pads are 4 inch pads, the type made of strings tied together) You will need bars of brown Tripoli, and bars of red Rouge.

Start with the brown Tripoli, turn the grinder on, with the buffing pad on it, and run it across the bar. go WITH the grain of the aluminum and polish until it shines. When you have a pretty good shine, thoroughly clean the aluminum with a cleaner made for it. Switch pads and repeat using the red rouge. Recently I have started using a white jewelers rouge, it colors a little better.
Don't cheat on the sanding, be thorough. Or else the result will be what looks like a shiny and dull finish...you will see spots not sanded well enough when you start polishing.
Also, ONLY remove the anodizing and polish the aluminum you can see, this way you can keep wax on it. Unprotected aluminum will oxidize.
Hope this helps.
Steve C [last name deleted for privacy by Editor]- Walton, Kentucky
Thanks for the great response, Steve. Two very minor notes: Anodizing is an extremely hard surface but it's not the 2nd hardest substance known anymore; oven cleaners are not actually acid, they are very strongly alkaline/caustic.
Ted Mooney, P.E.
Striving to live Aloha
finishing.com - Pine Beach, New Jersey
Q. I have a 2001 Yamaha R1 street bike. I want to polish the frame on it but I have no idea where to begin. It does have the rough place on the frame near the feet area. Can you help me out and let me know exactly what to do step by step?, thanks.
Brian W [last name deleted for privacy by Editor]student - Toledo, Ohio
2004
Q. I'm trying to polish my 1998 Yamaha R1 frame. could you tell me how to do it. I've started with a 80 grit dry sanding,and move to a 150, 200, 300, all the way up to a 1500 grit wet sanding, but it don't shine right what am I'm doing wrong. Do you have any tips cause I've heard that a Yamaha frame is different than others of course, all frames are different. Do you know of any good tool to use any thing to help me.
Corey L [last name deleted for privacy by Editor]hobbyist - Junction City, Kansas
2005
A. The one thing I disagree with you on is the sanding direction. You HAVE to go AT A RIGHT ANGLE to the last direction you sanded, rather than WITH the direction in order to get a true mirror polish. Also, keep your buffing wheels separate from one another (change wheels each time you change compounds and keep them clean, PLUS water-rinse your part well between compounds). I just polished my rims and I used 220, 320, 400, 800, 1000 grit and then Tripoli rouge on a spiral sewn wheel, then white buffing bar ⇦ on eBay or Amazon [affil links] on a loose buffing wheel... They GLEAM like CHROME with no pitting at all. But the key is go up-down with the 220 grit, then left-right with the 320, then up-down with the 400, etc. each time going until the previous grits' scratches are gone. It takes a ton of patience, but it is worth the effort.
Martin C [last name deleted for privacy by Editor]- Ft. Lauderdale, Florida
Ed. note: Additional interesting letters on polishing of aluminum frames and rims include threads no. 800 and no. 1831.
This meeting place welcomes Q&As, photos, history, & interesting tidbits 🙂
Please engage with other posters
• When people show interest in each other's situations, the page quickly becomes a fun & informative learning experience for everyone !
• When people post their own questions while showing no interest in other people's postings, it quickly deteriorates into a string of unanswered questions
Q. I have a set of Audi TT rims that are aluminum. They are already polished but I want to do a high polish on them. I have seen one guy that has them looking almost like chrome. Someone has told me there is a thick clear coat on these rims. What route should I take in making them high polished?
What compounds do I need etc?
student - Toronto, Canada
2005
Q. I would like to high polish my motorcycle frame. I have a good idea on how to do it, but I need some assistance. I would need to know what tools I should use. (I have many) and the technique. Thank you.
E.VASQUENZSELLING BIKES - P.R. & Florida
Q. I have just polished my motorcycle frame and got a shine but can anyone tell me why my frame looks cloudy? I have used all of the right compounds for buffing but the frame is still cloudy.
What should I do? Should I start all over again?
Can anyone help me?
fixitman - Clarkston, Georgia
Q. Should I shoot a couple coats of clear after I sand or is the wax my only line of protection?
Kirk H [last name deleted for privacy by Editor]- Orange, New Jersey
2005
Q. Do you think it is a good idea to do a clear anodizing to my frame after I have polished it to prevent oxidation?
Ramsey G [last name deleted for privacy by Editor]USAF - Eielson Afb, Alaska
2007
Q. Yes I am also wondering what is the best protection for a newly polished frame (Yamaha R6 1999) as well as what maintenance practices should be taken to ensure the best shine and protection of my newly polished frame?
Michael G [last name deleted for privacy by Editor]bike owner - Kansas City, Missouri
2007
A. I have restored two bikes, a 1957 BSA Gold Star and a 1972 CB750 Honda, on both engines I have polished the aluminium parts to MIRROR like finish using the 360/600/1200/1500 wet-dry sandpaper and then buffing with various size/shape rag wheels using MET-ALL aluminum polish. The first can I bought about 30 years ago, used it all (2 lbs.),just last week I bought another can (1 lb.) as I don't think I'll live long enough to use another 2 pounds, cost me 9.00 U.S., most pilot shops stock it at local airdromes ... and it's made in the USA.,good luck
Ed. C. Weyn- Waterford, Michigan
A. I have a pair of rocker panel moldings that I have to restore because the reproductions are just plain junk as far as quality goes and the NOS replacements are very expensive!
I have begun the process by using oven cleaner to remove the Anodizing and now I am ready to begin the sanding process to remove scratches. They need to be sanded and polished to a chrome shine finish and I need some input on this. I will protect the shine by using "POR-15 Shimmer" as a sealer. Thanks, Sal.
Hobbyist - Fraser, Michigan
Ed. update July 2023: We believe Sal was thinking of "Por-15 Glisten", which doesn't exist anymore. A search for it on por15.com says it's replaced by their 2k clear coat [adv: Por-15 2k Clearcoat on eBay or Amazon [affil links]
A. I did my bike frame. I used a 3M Green Non abrasive stripping wheel. It will not gouge into the metal. Once the paint was gone. I broke out the sander to knock off the cast look. I went through this process:
80 Grit
120 Grit
220 Grit
240 Grit
320 Grit
400 Grit
600 Grit
1000 Grit
1500 Grit
2000 Grit
Finish sanding with 3000 grit trizak pads
Broke out my Baldor bench mount buffer and muscled it around the bike holding it in my hands
I finished buffing it using white compound
I roughed it in using brown.
I worked it like a prom date using green
As I said above, finished it with white.
After I was done, I was asked who chromed my frame, Job well done..
- Hanover Park, Illinois
Q. Did anyone of you use any type of clear when finished sanding and polishing?
Chris Herrick- Greensboro, North Carolina
January 4, 2008
A. You can get a good result on non-cast parts of aluminum frames by using aircraft paint stripper to get paint and/or clear coat off first. Then start with medium or #0 steel wool [affil link on Amazon] for first cut. Then go to #00 or 000 steel wool ⇦ on eBay or Amazon [affil links] for second cut. I call them cuts because you can feel the wool slide for a bit then it starts to bite. The bite is what you want to feel when using the wool. Pay attention to what you feel. If you feel slick or slippery parts, they need more work. This applies to both cuts with steel wool.
When uniform "wooling" is complete, get a pair of latex gloves and some aluminum polish. I recommend Mothers Mag & Aluminum Polish ⇦ on eBay or Amazon [affil links] or qater (if you can find it). Rub the polish on small areas with old t-shirt or thick paper towel. I find going the same direction works best but, isn't always possible. Polish until the area is "black". Then take clean rag/t-shirt and rub until the black is holy cow I did that myself shiny. This way saves a lot of sandpaper and dust. The cast parts of the frame will take more time. I suggest a brass wire wheel to smooth out the casting marks. You will have to take those scratches out with an extra cut with courser steel wool [affil link on Amazon]. Hope this helps.
Aaron Lach- RSM, California
![]() Readers: Want more? letter 800 is a highly detailed thread about polishing of aluminum.
Readers: Want more? letter 800 is a highly detailed thread about polishing of aluminum.
Regards,
Ted Mooney, P.E.
Striving to live Aloha
finishing.com - Pine Beach, New Jersey
A. Just a word of advice on the use of steel wool on aluminum. They are dissimilar metals and tiny bits of steel can embed in the aluminum causing corrosion. A friend once mentioned that is why you see the white corrosion specks on old motorcycle parts. Can't be sure that's true, but the dissimilar metals seem to make sense. I always use sandpaper or "Scotch Brite"
B. Daniel- New Haven, Connecticut
February 6, 2010
A. Polishing your bikes aluminum is easier than mentioned; done it to three Honda's I have owned.
- Step one: Stripease airplane paint remover; this will remove all paint so be sure to only get it on the parts you want to polish.
- Step two buffing wheel, jeweler rouge, and a disk sander that will accommodate the buffing wheel (Milwaukee tools makes one).
- Begin buffing with jewelers rouge and buffing wheel on the sander; to finish use a hand aluminum polish of your choice, Mine was rebels metal polish which I can not find now best stuff I ever found.
If not, use Mothers or etc. to finish it out. That was the easiest no scratches to work out from sanding; enjoy the shiny aluminum
- Lacombe,Louisiana

A. Hey guys, I have an award winning Norton Commando, the best polish I have used is a product called "purple" from california try it!
Richard Clark- Melbourne, Victoria
A. A word about abrasive papers and which grade to begin with when 'sanding' or polishing a part. I have read various pieces of advice saying that you should begin with #80, or #320, for example. Do not listen to this advice. Instead, choose a grade of abrasive that matches the surface that you want to polish.
If your surface is in a very rough condition with deep scratches, then begin with a roughish grade of abrasive, erring on the side of smoother. Test sand a small section and see how long it takes to remove all marks. If it takes a long time, go back to a rougher grade or two and do another test on another section. You have found the correct grade when it takes only a short time (less than a minute) to remove all of the marks on your test section. Then work your way up with successively finer grades in the usual way.
However, if you part has a fairly smooth surface to begin with, then choose a grade of abrasive that matches the surface. Again, err on the side of smoother. If you have chosen a too fine of a grade, it is very easy to go back a step or two in grade. Once you have found the grade that removes every mark and leaves only the abrasive scratches behind, work you way up the finer grades until your desired degree of polish is obtained.
If you follow this technique for choosing the correct grade to begin with, you will see that it could save you a whole lot of time in unnecessary sanding. There is no point in starting off with a very course grade like #80 if #320 removes all marks quickly. I have spent many years sanding wood, metal and plastics, and using this advice have saved me much time in unnecessary sanding or polishing. Good luck in your project!
Doug Kerr- West Wyalong, Australia
A. Aluminium is easy to polish, you don't have to go over board with the abrasive prep work. Use sateen on a colored stitch mop up to 300 grit, it come in grits from 150 to 400, and its a grit in glue.Then use Menzerna 523BFF Grey Compound on a sisal mop, which will bring it up ready to be polished, this will even get rid of gouges you missed with abrasive work and leaves it a dull grey smooth finish. Then use either Menzerna P14 White Compound or Menzerna 439T Green Compound on a white stitch mop. and finish with Menzerna P164 Blue Compound on a calico G mop. this will get it to a fine mirror finish, you can go one step further and use either Menzerna P126 Pink or for extra special Menzerna P175 Yellow Super Finish. I can guarantee this method will work, I use this all the time. as I'm in the trade. It's fast and works.
mike smith- Grimsby lincolnshire UK
![]() Followed many suggestions here while refinishing a 25 year old Magna. Started with the T Fal aluminum paint & finish stripper, next oven cleaner then sanding with 600, 1000, 1500 then buffed with tripoli & white oxide compound. Finished with Mothers Aluminum polish. Thanks! I never expected results like this from a bike that had been left unprotected for years.
Followed many suggestions here while refinishing a 25 year old Magna. Started with the T Fal aluminum paint & finish stripper, next oven cleaner then sanding with 600, 1000, 1500 then buffed with tripoli & white oxide compound. Finished with Mothers Aluminum polish. Thanks! I never expected results like this from a bike that had been left unprotected for years.
- Warwick, Rhode Island USA
November 29, 2010
Q. I want to re-polish the heads & jugs on my s&s motorcycle engine, They are polished aluminum but kind of dull compared to other parts (i.e., cases etc). What is the easiest way to accomplish the shine I am looking for?
Bennie Tinkerhobbyist - St.Louis, Missouri
May 14, 2011
Q. How do I buff and polish my meat tenderizer head in my metals fabrication class? My teacher wants to know what kind of formula stuff that goes on it so I can get a better grade than the boys in the class.
nicole bhigh school - hoyt lakes, Minnesota, United States
May 7, 2015
A. Hi Nicole. I guess we must assume the meat tenderizer is made of aluminum?
These polishing and buffing compounds do not chemically react with the aluminum to brighten it; rather, they abrade it to remove oxidation products and to smooth it for good specularity.
The one that really matters is the last one (finest grit) that you use, because this is what determines the size of the tiniest of scratches and leaves a mirror-like finish. But the thing is, it would take an eternity to get from rough aluminum to a mirror finish with Mother's polish; it would be like trying to dig the foundation for a skyscraper with a teaspoon.
If you read Bill L.'s posting, he used 600 grit, then 1000, then 1500, then buffed with tripoli, then buffed with white oxide compound, then with Mother's polish. That is, he used 6 steps with progressively finer grit. Hopefully your part isn't starting as rough and doesn't need to be as smooth and you'll be able to do it in, say, 3 steps, like fine sandpaper, tripoli, and Mothers. You can do it by hand, but if you have a low power battery operated drill, or a Dremel ⇦ on eBay or Amazon [affil links] tool, with some buffing pads it will go much faster. Good luck.
Regards,
Ted Mooney, P.E. RET
Striving to live Aloha
finishing.com - Pine Beach, New Jersey
May 2015
![]() I have Just taken the motor on a $35,000 chopper that has been sitting for 12 years and then rode very hard last riding season. This is what I did and I am absolutely amazed at how it is coming out. Non-polished parts look like chrome and the polished parts look like they are well mirror now. I will post pictures as soon as I am done.
I have Just taken the motor on a $35,000 chopper that has been sitting for 12 years and then rode very hard last riding season. This is what I did and I am absolutely amazed at how it is coming out. Non-polished parts look like chrome and the polished parts look like they are well mirror now. I will post pictures as soon as I am done.
Cleaning agent uses:
- Dawn dish soap -- enough to cut grease
- rubbing alcohol -- a little less than half a cup
- vinegar
⇦in bulk on
eBay
or
Amazon [affil links] about half a cup.
This believe it or not works great and cuts right through grease and cleans up motor great.
This I started with 400 grit wet dry ( important)... you do not need to rub hard but to remove any deeper scratches more pressure. Then I moved on to 1000 then 2000 then 3000 sanding pad 3M. Then using a 1" buffing wheel on a Dremel and, keeping the surface wet at all times, buff, then hand buff with jewelers rag.
I am actually amazed at what this looks like. I have had a few buddies ask if I will be willing to do this for them now. I am not even done yet.
DIY Choppers - Leawood Kansas
January 16, 2016
Q. I'll have to try that right-angle direction switch when progressing through the grades of paper; it makes sense! I have been struggling for a long time trying to polish the aluminium valve covers on a Honda CX500, because I have not known what size the scratches are that I am trying to eliminate, and then I would apply a "cutting compound" (U-POL 333 and 334)by hand, but couldn't tell if that was adding scratches or exposing existing scratches.
I have used these grit grades of wet & dry abrasive paper in sequence: 1k> 1.5k> 2k> 2.5k> 3k> 5k> 7k!
Now I'm using just the 7k paper to produce a matte finish, then I rub on Autosol Aluminium Polish
⇦ on
eBay
or
Amazon [affil links]
, followed by U-POL 335 Ultra Gloss Final Glaze (part three of a 4 part automobile polish kit).
But, what should I expect of a finish? Using a 20X loupe, I can see that the surface of the metal looks like human skin, with pores and fissures; is that just the way aluminium is, or can I improve on that?
Cheers,
- Coffs Harbour, NSW, Australia
January 9, 2018
Q, A, or Comment on THIS thread -or- Start a NEW Thread