
| Search our quarter-million Q&As |
Home of the finishing HOTLINE since 1989
-----Gunsmith Blueing / Hot Bluing of Firearms
Quickstart:
The 'black oxide' process is usually called 'bluing' when applied to firearms. Hot bluing/black oxiding is done in a tank of concentrated caustic soda plus oxidizing agents like nitrates and nitrites, operating at a slow boil. Depending on the concentration of salts in the solution, that boiling temperature will be between 265 °F and 300 °F.
A special, severe danger with this process, which has maimed and killed people, is 'eruption': water must be frequently added to make up for evaporation losses, but water flashes to steam at 212 °F, so there is the possibility of a slug of water encountering this much hotter solution and, instead of mixing with it, flashing to steam and blowing the contents of the tank onto an operator.
Cold bluing / room temperature blackening is a safer copper selenium coating process which simulates real hot bluing although it is not as consistent or corrosion resistant; although it's best suited to touch up, it has also been used industrially in some instances.
< Prev. page (You're on the last page of the thread)
Q. To blue or not to blue that is the question.
I have been blueing for about 9 months and have tried everything short of using black paint. (Just kidding)
I have read everything there is to read on Parkerizing and blueing, and basically it's expensive. If you want to do it right it is anyways ... or if you want to pay someone to do it for you.
My first try was the hand rub method... using Birchwood Casey products. First I degreased the parts, then the Rust and blue remover [adv: bluing remover on eBay or Amazon [affil link] finally a good final cleaning on the bench grinder with the steel brush. Then I hand rubbed the Perma blue ⇦ on eBay or Amazon [affil link] on and let it cure in gun oil.
Final product okay (At the time beyond my wildest expectations) by todays standards.. acceptable at best.
Next I tried the dunk method. I still clean the parts the same way, but I actually bought enough blueing solution to fill a little bath and dunk the parts in there and let them sit until the were blued. After which I once again cured them in gun oil.
Final product: better, a tad darker but still not Factory.
Next: The Boil and dunk method. Once again, cleaning the parts, as mentioned above but next I boiled them in a bath of water, epsom salt [affil link] and baking soda [in bulk on eBay or Amazon [affil link] . (This will remove whatever you thought you had removed but was still sticking on it . The Epson salt/Baking soda sets the boiling point a little higher : approx. 225 °F) Then the same dunk and cure method.
Final result: Nice Dark and deep blueing. When curing the pieces black residue did come off, but I was told this is normal. I am very happy with this blueing, but I am about to try the Copper sulphate/Iron Chloride/Hydrochloric acid/Nitric acid in Water solution. and per the advice of the Local Curio and Relic Gunshop I will cure in WD-40 ⇦ on eBay or Amazon [affil link] this time.
I want you to know I did have to build a couple of baths in PVC to accommodate all this, but I haven't spend the $125 I would have if I was to have a gun blued.
One last word of advice.... You will have to look high and low to find Nitric Acid. I actually had a Neighbor (Aspiring Chemist) distill me a 90% pure batch of Nitric Acid.
I will keep you all up to date on how this last blueing turns out.
Michel M. Thiran- Tarpon Springs, Florida
2002
A. To all the gunsmith's out there who just post a short "this is my trick and I won't tell you" My question is "why are you even here? I thought this was designed to help people to get a better understanding about this process and possibly try their hand at it.
To all the gunsmiths who have contributed advice and ideas, I applaud you. you care about actually helping people knowing that it probably won't make any negative impact on your business.
The main reason of this post is to impart a few tidbits ... no I am not a gunsmith but I am not afraid to try my hand at new things. I have a 98K Mauser that HAD a bit of pits in the metal and to spend $200 for refinishing AND have to wait a few months due to the workload of the local smiths is not a sensible option on a gun I paid $140 for. First of all I agree that the polishing job is one of the most important steps in this process. I have tried cold blues without success (of course this was before I realized polishing was such a big deal) and am now trying Dicropan IM from Brownells. A setup is not too terribly expensive. I am using their Black Iron tank ($40) and two electric hot plates bought at a local store ($50 for both). You will all probably laugh but for polishing I used a Craftsman benchtop belt sander with fine (160 grit) belts and was able to remove almost all the pits except for a couple deeper ones. When using this method, remember to use a light touch and constantly move the piece so that the belts will not wear away too much metal and make it look uneven. Another thing to remember that there is a point on the belt that has no metal behind it which allows the belt to bend inward a bit with light pressure and this was used with great results on the barrel. This method required a minimum of time and effort and produced what I think are great results that resulted in a nice shiny even mostly pit free surface. I will let you know how using the Dicropan goes. Hope this helps. Also I do agree with the gunsmiths who have posted ... if the firearm is a rare treasured item then by all means take it to the professional because it is probably easy to mess it up.
Michael A [surname deleted for privacy by Editor]- Port Orchard, Washington
![]() Thanks for the answers you provided, Michael. Please post any other answers you want, and any questions you wish. It's certainly appreciated!
Thanks for the answers you provided, Michael. Please post any other answers you want, and any questions you wish. It's certainly appreciated!
There will always be differences of opinion and friction about where the dividing line is between what amateurs should do themselves vs. leave to professionals. As Bob Dylan told us: "You don't need to be a weatherman to know which way the wind blows" -- you should be one before making a public announcement regarding mandatory evacuation. And most people can share some of what they know, but not all of it. Please, this is my site, a place of camaraderie & aloha, and it's not your place to make people feel unwelcome here when you don't like their posts 🙂
Dicropan IM appears to be a swab on solution, not a true hot bluing solution. People shouldn't 'try their hand' with hot bluing chemicals until they've had Haz-mat training or at least hands-on instruction from experienced people. Hot black oxide solutions can erupt and maim & kill people. Beginners are both more likely to cause an eruption and less likely to recognize the warning signs. Helmet, face shield
⇦ on
eBay or
Amazon [affil link]
, apron
⇦ on
eBay or
Amazon [affil link]
, gloves
⇦ on
eBay or
Amazon [affil link] , and boots are mandatory! ... and remember that the first rule of safety is "Never ever work alone!" Good luck!
Regards,

Ted Mooney, P.E.
Striving to live Aloha
finishing.com - Pine Beach, New Jersey
Need quick confidential answers? $25
Need project assistance? $100/hr.

A. I found it interesting reading about all the people trying to find info about blueing guns. I have tried to find info and places to order chemicals to blue guns for about 2 years. The ones I have found and contacted haven't responded. I finally found a place called Shooter Solutions that sells parkerizing kits. I ordered one of their Dark charcoal parkerizing kits; it was very easy to use -- just clean your piece and dilute the parkerizing solution with proper amount of water and heat to 200 °F and submerge part for about 20 min. or so or until solution stops fizzing take part out rinse with hot water and oil. Instructions are included with kit. I have so far parkerized 4 long guns and they turned out to be a beautiful dark gray charcoal almost black color which is as tough as original military and it doesn't have any smell. I still have enough solution left to do several more long guns. The prep before the process was easy also, all I did was sandblast with 280 grit corundum and rub smooth with Scotch Brite pads. I like this finish better than bluing on gun for use as hunting guns.
Jerry Hoxit- Brevard, North Carolina USA
Q. I came across this site some time ago and have been browsing it for letters on slow rust blueing. I want to use this process on some custom Mauser rifles that I am building, instead of having them hot blued.
I cannot get hold of the ready to use solutions, supplied by Brownell's amongst others, because US companies don't ship chemicals to Europe and these solutions are not available over here.
I am not a chemist, but have access to a lot of chemicals since I am a teacher in a technical school.
I would appreciate some proven recipes and "how to do this" for rust blue solutions that give a dark, black, sustainable appearance and that can be mixed and processed at home.
Hope to get some answers soon!
Marcel ten Thijehome gunsmith - Borculo, Netherlands
2004
![]() Wow, and I just went to my local sporting goods store and bought a 3-step gun blue kit for 12 bucks. I think it worked great and all of my household pets are still alive.
Wow, and I just went to my local sporting goods store and bought a 3-step gun blue kit for 12 bucks. I think it worked great and all of my household pets are still alive.
While reading the questions and responses I see basically the same exchanges. Those who don't know how dangerous this stuff really is as well as the responses from people who actually have a clue as to the potential hazards involved. I being one of those people that always tries to do it myself and for some reason I usually succeed.
I thank all of the people who know for telling all of us who don't know, to stay away from the field of chemistry. Unless we know where to shop for the stuff we probably shouldn't be messin' with it.
GREAT SITE!
Have an awesome day!
- Youngsville, North Carolina
2005
Q. Is anyone interested in continuing this thread?
Hi,
I'm new here and have been reading through these posts. I can probably answer or direct folks to the answers of most of these questions.
Thanks
- Austin, Texas
2006
Ed. note: the thread remains active and supported, Tim, and is visited every day. Please add whatever comments and Q&As you wish.
There are a hundred readers looking for answers for each writer who posted one.
![]() I was goggling for Blue Wonder ⇦ on
eBay or
Amazon [affil link]
and found this site. I have to say it's been a lot of interesting reading. I don't even like reading about this sort of stuff :) sorry.
I was goggling for Blue Wonder ⇦ on
eBay or
Amazon [affil link]
and found this site. I have to say it's been a lot of interesting reading. I don't even like reading about this sort of stuff :) sorry.
Just had to say for about the past six or seven years now I sit at my computer doing what I love (making graphics) while my husband sits just as long rubbing his guns. Rubbing hours upon hours.
We have both found what keeps us content. That is a good thing.
He does all his own reloading as well, and has taken several of his guns apart and (whatever he does between) put them back together. And has redone the wood on several. He is retired, I tell him he should do this as a business at home 'cause he enjoys it so much, but he won't? I know if I could get a business doing my graphics I would jump on it.
Oh well nothing to learn from me here just a little input, maybe some other wives out there might enjoy my post.
Keep smiling, you made a woman with no gun interests (except shooting one) read all these interesting messages.
- Ennis, Texas
2007
Ed. note: Thanks very much for your peaceful letter, Cathy; reading it lowered my blood pressure a few points. I'd say I learned quite a bit from it :-)
Q. Can anyone tell me the difference between gun blue #5 or #7, as opposed to gun blue #9. I just can't seem to find it anywhere.
yvette barronbass pro - bossier city, Louisiana
2007
A. These are not industry standards, Yvette, and I don't think there is any industry-wide meaning or distinction to such numbers. I think it's just individual brand names like the model numbers of automobiles or Jack Daniels' old #7 :-)
Ted Mooney, P.E.
Striving to live Aloha
finishing.com - Pine Beach, New Jersey
Need quick confidential answers? $25
Need project assistance? $100/hr.

A. If you can get a copy of Roy Dunlap's "Gunsmithing" book ⇨
it will have some good bluing tips. I have used the nitre combo mix and it does a great job, but is very time consuming. Very durable. I have used the sodium nitrate
⇦ on
Amazon [affil link]
-potassium nitrate-caustic soda combo, which is probably one of the best around. Again, getting the combinations right is key, and as others have suggested, polishing and cleaning is vital. The nitrate version is the one I am currently using. Used to be able to buy the Royal Black but can't find it anymore. good luck
- Bristol's Hope, Newfoundland
May 14, 2010
 Hi, I would like to be very blunt for a minute... If all you have to say is leave it to a professional, I would really not like to hear the rest of what you have to say! In all due respect, you are "master gunsmith's" yes, but the issue that I have is that I am a very talented young man with a grandfather that was a gunsmith that died before I was born and a father that is a Master pipe-fitter/steamfitter. I have learned many things from my father and have been blessed with his mechanical talents, hell I was taking apart cars when I was 13!
All I hear is leave it to a professional, but my question is, where did you learn it from? Don't you owe someone to pass on your trade? I live in Phoenix and I'll be damned if I can find a gunsmith that is worth his salt, so to say, to take me on as an apprentice, and comes with the benefit of me cleaning the shop and I'm talking about polishing machines to a luster to match the weapons they turn out just to be taught the "right" way. And the response that I have got has been all about not wanting to have someone steal their secrets or some other lame excuse that revolves around the same idea.
I must be missing something but the same trade secrets that you are trying to protect are the same secrets that are going to die with you just like my grandfathers and in this world, you more than anyone should know that things just aren't done right anymore. Maybe there is a reason for that? Well my answer to that is I will teach myself and take the time to learn how to do things the right way without the help of anyone, even though I would like to have someone there to let me know I am doing things right. for what its worth think twice about why you discourage the younger generation and maybe you will start finding secrets of why most young kids are so screwed up.
Anyway that is just my 2 cents for what it's worth and I have found all of the chemicals needed to put together the mix, even the solution in the amateur gun-smithing book, and yes I had to learn how to make spirits of nitre all my myself. and to add I put my entire bluing setup tanks, salts and all together for just about 100.00 usd. I also took 4 years of jewelry class in high school and was a body man for a while and can make metal shine like glass. I don't think it will take that long to learn.
So in closing, yes, I would love more than anything to hand scrub a shop to learn the proper ways of doing things because I take pride in what I do and if it's all for nothing someone just got a polished floor and machines out of the deal. But I don't think I'll have any takers, I haven't so far. My suggestion, get some books and read everything, take a machining class and practice making perfect junk and turn your own guns into works of art and still not have any respect but now you did the job right. Thanks for your time. I'm still a potential apprentice.
- Maricopa, Arizona
July 22, 2010
Ed. note: Sorry that you're having trouble pursuing your passion; that's clearly an aggravation.
But if you don't like some posts, skip them and focus on the others. This has been a site dedicated to camaraderie & aloha, and appreciating other people's points of view since 1989.
A. This comment is to Justin Gates, Justin I understand your need to learn this stuff. I too have a passion for guns and would like to get better at gunsmithing. I am planning on attending a 5 day session or 2 at the gunsmithing school in Oklahoma this summer. They hold 5 day sessions covering different topics all summer. I want to learn more about using a mill and lathe for barrels. Their classes are reasonable $250.00 and lodging at the school is like $50.00 a day. The total class will cost me $500. Very reasonable to learn a trade many want to keep "Secret". I hope this helps: https://gunsmithing.nra.org/find-a-school/
Mark Davis- Fort Worth, Texas, USA
November 21, 2010
Ed. note: a 5-day session sounds like a great idea !
A. This has been interesting reading.
Years ago I came across a formula for hot bluing salts that I used to re-blue a pistol and three 22 pistols that I made.
1 US gallon of water.
5 pounds of caustic soda.
2 1/2 pounds 33% ammonium nitrate fertilizer.
Get the water boiling and add the caustic soda keeping the water to a slow rolling boil.
A little at a time add the ammonium nitrate. There is a heat producing chemical reaction so it is necessary to keep reducing the heat as you add the ammonium nitrate. The down side is that there are large volumes of ammonia
⇦ on
eBay or
Amazon [affil link] gas released. Stay down wind and on a still day use a fan to create a wind. Do this outside.
The bluing from this formula is on the blackish side but is quite durable.
A couple of years ago I tried to source some caustic soda to make a new batch for a barrel I put on a Falling Block Works action and never got around to bluing. It seems that the home brew pharmaceuticals use caustic soda and in Canada it is like hens teeth.
I decided that I would have to rust blue the barrel and went looking at what is available. I quickly realized that shipping rust bluing chemicals was going to problematic and expensive. Make my own seemed to be a reasonable solution to my problem. Nitric acid always seems to be needed but again problematic and expensive and expensive shipping. I finally found a formula that I actually had all the required chemicals for.
2 fl oz hydrochloric acid sometimes labeled muriatic acid (building supply)
2 fl oz ferric chloride
⇦ on
eBay or
Amazon [affil link] (circuit board etching, electronics hobby store)
8 fl oz distilled water (drug store)
8 fl oz methyl hydrate (building supply)
The only caution here is that you must add the acid to the water, then you can chuck all the other stuff in in any order. I found out very quickly that hydrochloric acid as diluted as it was still fumed and turned stuff in my shop rusty. Before exacerbating the situation I added framing nails until there was no more digestion. The last nail just would not get eaten away. There was a black sediment that I think was the carbon in the nails, I used a coffee filter and a plastic funnel to filter that out. It would probably be better to kill the water/ hydrochloric acid mixture before adding the ferric chloride
⇦ on
eBay or
Amazon [affil link] and methyl hydrate.
The long and the short of it was I ended up with a nice rust blued barrel. I took 2 goes to get it right. I was expecting to see red rust and waited and waited (to long) and got pitting. The barrel did rust but was a very dark brown with purple hints.
Hints. Shellac in the bore and any other places that absolutely do not need to turn rusty, works wonders. When the bluing is done methyl hydrate will remove the shellac.
Red rust will turn to black oxide using electrolysis and seems to do a more thorough job than boiling. Google for "electrolysis rust removal". The electrolysis method uses washing or baking soda that will kill any acid.
- Williams Lake BC Canada
April 24, 2011
A. Follow up to my previous posting....
I have taken the time to fully research all the chemicals involved in the old bluing methods and I have to say that I have some new pointers....
First...Sweet Spirit of Nitre evaporates too fast to even have it as a usable chemical. As oppose to making my own I obtained some from a chemical supply store, and no you CANNOT GET IT FROM A DRUGGIST, it's barely made or used nowadays. The name for it is ether and was used in starting fluid until the FDA took it off the shelf, hence why it started cars so well, atomizes very fast.
I have found that you can sub hydrochloric acid for muriatic acid and is in just about the same aqueous solution that was used with hydrochloric acid. This is a gentle prep bath for taking out copper fouling out of the barrels that will deplete you new bluing solution. Temp about 150 ° will do fine to open the pores in the metal and release trapped grease and grit without a harsh effect on the metal.
After fifteen minutes in that bath take and soak in just under boiling water to rid the acids. Some will say to add a bit of vinegar
⇦ in bulk on
eBay
or
Amazon [affil link] or something to that like but I have not had to, it just neutralizes the acid.
Next let it dry and cool, common sense "hot don't touch" and then you may start your polishing. 110% of your bluing job comes down to prep, don't skimp. Card with file, 60 grit to take out the carding scratches all the way up to buffing for me. I like perfection.
Next your tank of sodium hydroxide, you need to clean the parts once again. 175 °F will be just fine," again common sense sodium hydroxide will blind you with just a drop" prepare and as for me, I wear a full suit going forward.
Dip in the tank and please done cork or plug the barrel because you're asking for an accident. Remember when heat up and cool down pressure from the atoms expanding causes a bad situation. I took this next line out of a book and I would quote but the author and book is not in front of me. After fifteen minutes lift up just a little bit of the part out of the bath for just a second, if the water rolls off you still have oil or something on the part, this will give you splotches. After you can lift it up and I say just for a second because the rusting will start very quickly being exposed to the air you can take the part and place it back in the hot water for a quick rinse. Then into the bluing bath.
My concoction is:
2 parts sodium nitrate
1 part potassium nitrate
1.5 parts sodium hydroxide
1 or 2 table spoons of non-iodized salt
And 5 parts water.
Mix dry ingredients first.
Then (slowly add distilled water)
Bring up to temp; I don't us a thermometer I just keep it right at a simmer. This will take a while and you will have to mix it up as it comes up to temp. I would once again use PPE and well ventilated area but this mix will not combust 1 because of the lack of carbon 2 you need 2 times the energy to bring the mix to critical.
Soak for fifteen or 20 minutes then I move my parts to an ice bath for a few seconds then back in the bluing solution for 10 minutes then into the hot water for 15 minutes. After that let dry and swab the bore with and oil patch and oil the hell out of it. I use marvels mystery oil, but that's up to you.
Like I said before, everything is in a book and I had to read an organic and inorganic chemistry book just for back up. If you don't know what you are doing or can't even do the proper research to find out what the old names of chemicals were compared to what they call them now, you're going to hurt yourself because this is an art not for the lazy man. Just my thoughts. If I missed something please post so I may correct.
- Maricopa, Arizona
A. Justin Gates
I used to use potassium nitrate in the bath as well. The theory was that it would blue high vanadium steels better. After many years I finally quit and replaced the volume of potassium nitrate with sodium nitrate and it worked exactly the same. The niters are the important part of the solution. I'm not entirely sure what sodium chloride (common salt) would do to a bluing solution. My volumes of niters, lye and water was basically the same as yours.

Rod Henrickson
gunsmith - Edmonton, Alberta, Canada
November 29, 2012
Q. Hi,
I have recently started hot bluing firearms and have a couple of questions.
I have so far completely hot blued three rifles with good results, however, I am having difficulty regulating the temperature of my salts tank to the often suggested "slow rolling boil".
The tank is 40" x 6" x 6". I am using industrial dial thermometers with 9 inch probes which extend into the tank within 1" of the bottom. The tank is heated with an LPG (propane) pipe burner.
I do understand that it is the concentration of the caustic salts to water which regulates the solution's boiling point however I seem to reach the correct temperature of approximately 148 °C at which point the solution will go from a normal "heating" state to a sudden boil over which leaves much of the solution on the ground.
The bath will then seem to stabilize without bubbling or any obvious reaction at a temperature of less than 140 °C at which point I introduce the gun parts to the bath.
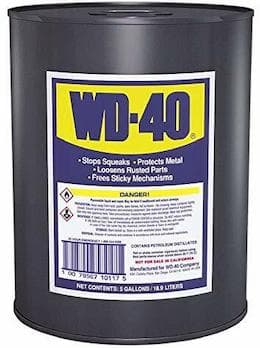
This often results with the parts changing color to a grey/green while immersed and a blotchy red color after they come out of the neutralizing tank (after rinsing). I then remove the parts and hang on a wire hook, spray with WD-40
⇦ on
eBay
or
Amazon [affil link]
and rub down with 00 steel wool
⇦ on
eBay or
Amazon [affil link] which reveals a pleasing finish however after much rubbing and wiping with a dry cloth.
Is this the normal experience with hot bluing or should is there something that needs adjusting?
Any comments are appreciated.
Add Note: Yes I am very aware of the safety precautions required during this process and adhere them religiously.
Thanks JB
- Sydney, NSW, Australia
November 20, 2012
A. Jeff Borg
Your volume of solution is far too small for the size of your burners. You are creating a situation where you are getting a steam explosion between the tank bottom and the solution. Or it is getting hot so quickly that the entire volume of the solution is boiling and not just the solution on the bottom of the tank. Use a pipe burner that runs the entire underside of the whole tank. Turn your heat down so that you get a slow rolling boil and fine adjust your heat by adding water to cycle your temperatures between 280 and 300 °F. Adding water to cool and letting water boil off to cycle back up. It should normally take almost 1/2 hour to go from 280 °F to 300 °F. Rusting and green or brown sludge on the parts generally means that your salt solution is too high in the tanks. Super high salt solutions can also cause boil over conditions. When you mix your tank for the first time follow the manufacturer's volumes to the letter. If you are uncertain of your tankage size add a couple gallons of water and then add the recommended weight of salt for that much water and continue until you get the volume you are looking for in your tank. Never guess. When you get to where you want write the final number of gallons of water and weight of salt used for the tank on the salts pail or better yet stamp it on the tank with metal stamps so you will have it next time.
Rod Henrickson
gunsmith - Edmonton, Alberta, Canada
A. In addition to what Rod said...you should always have a stable boil prior to immersing parts. When you immerse parts into a still bath you will get that smutting and color.
You had also mentioned that you are aware of the dangers of this operation but having a spill over every time you run the bath is asking for trouble. I would ask for some advice and direct assistance from the manufacturer before continuing.
- Albany, New Hampshire
![]() Thanks for both responses guys, and I'll be contacting the manufacturer as well.
Thanks for both responses guys, and I'll be contacting the manufacturer as well.
The solution was mixed by weight to water (volume) to the manufacturer's instructions but I have a suspicion that it may have become more concentrated after the boil-overs.
I have a couple of jobs to do in a week or so and will attempt to re-regulate the solution. The funny thing is, the jobs have finished quite well despite the discoloration prior to neutralising. I will attempt to keep you posted.
Many thanks,
Jeff.
PS. Rod, I've benefited from your advice on the Practical Machinist Forums.(JBCGUNS) I wish you lived next door to me! LOL.
- Sydney NSW, Aust.
A. Just to be clear: The ONLY factory-applied blueing on guns is the hot caustic nitrite method which has often and clearly been described by Ron Henrickson. There is NO other method used on new guns by any manufacturer.
The so-called "cold blueing", or "room temperature blueing" as sold by Birchwood Casey and others is not the same thing. It is not as black, not as durable, and always produces some smut.
To put it another way: I once investigated the Birchwood-Casey process. After observing the process, and the need to hand wipe the resultant smut, I remarked to the salesman: "But it isn't really black". His response was "Well, there are different colors of black".
Hot caustic black is the only way. Listen to Ron and he will tell you how to do it correctly.

Jeffrey Holmes, CEF
Spartanburg, South Carolina
![]() I thought I would update my progress for the benefit of others on visiting this site.
I thought I would update my progress for the benefit of others on visiting this site.
My hot bluing operation is now working perfectly and safely. The root of my problem was in fact the burners, however it was an issue of them not being hot enough.
Because the solution was yet to be used, the concentration of salts still needed to be fine tuned and on the diluted side of the "operating" level of concentration. This meant that the boiling point was somewhere around the 130 - 135 °C mark which coincided with the heating capacity of my burners in open air. I was using lids on my tank to improve heating efficiency but this also hindered my ability to monitor any visual changes.
When the boiling point was reached at this stage, a steam explosion would occur within the tank and boil over causing temperatures to fluctuate quite rapidly. The burners would then struggle to reheat the solution without the lids off and temperatures would stabilize at a lower temperature.
Larger burners have allowed the solution to be regulated with the lids off.(I basically now use the lids until the temperature has reached about 80% of where I need to be and remove the lids). Alterations in salts concentration now result in predictable temperature variations and I now get a slow boil at 148 °C which is perfect. Using a hot degreasing process, have virtually no blotching or discoloring after the second rinse.
I have now put about a dozen firearms through the system with varying ages and steels and providing my preparation processes are to standard, the finishes are impressive and the process compliments my existing slow rust bluing practices nicely.
- Sydney, NSW, Australia
January 20, 2013
Q. I have a question regarding the safety of the chemicals used for blueing of guns. Are there any procedures to follow when setting up a blueing facility such as ventilation, safety gear etc. What are the side effects of using the chemicals? What would the effect be on contact with human skin.
Kind Regards
Johannes
- Gaborone, Botswana
February 4, 2013
A. Hi Johannes. Hot gun bluing uses concentrated lye boiling at up to 290 °F. It would certainly burn you very badly, and dissolve your skin (people have been killed by boil-overs). Yes, individual exhaust hoods on the tanks would be required. Operators require googles, rubber gloves, apron ⇦ on eBay or Amazon [affil link] , & boots. Many people think full face shields are more appropriate than googles.
Here in the USA you would be expected to have the plant designed by experienced professionals and to have any operators attend haz-mat training. Things are probably rather different in Botswana, but you still should, as a minimum, see other bluing facilities and talk to their operators to understand what is involved. It is difficult to talk about safety issues with strangers on the internet because, to avoid writing an 400-page book in reply, there is a natural need to make assumptions about what the other person understands, and the assumptions can be wrong. But the biggest potential danger is probably 'eruption' ...
Pure water flashes to steam at 212 °F, yet these tanks are at 275-290 °F. because the concentration of salts is so high that their boiling point is 275-290. So a slug of replacement water to make up for evaporation loss can essentially 'explode' to steam and shower the contents on the operator if the water is added at the wrong place and time. Some people feel gently sprinkling over the surface is safest.
Regards, and say hello to Mma Precious Ramotswe of the No. 1 Ladies Detective Agency there in Gaborone for me; she's one of my very favorite people :-)
Ted Mooney, P.E.
Striving to live Aloha
finishing.com - Pine Beach, New Jersey
Need quick confidential answers? $25
Need project assistance? $100/hr.
Q. I See The Beretta Fs 92 slide. On this slide there is color. Is this black oxide?
If yes, then what is the detail procedure to make black oxide?
I checked the Beretta slide. It looks like lacquer is sprayed on the surface. I am confused if this is lacquer spray or a chemicals solution.
- Peshawar Pakistan
March 1, 2015
Hello Saif. I don't know whether you are looking at the original factory finish or if someone has done a repair, and I don't know whether black oxide was used originally (but there is at least a chance that some reader will know). But we have appended your inquiry to a thread about how black oxiding is done. Good luck.
Regards,
Ted Mooney, P.E.
Striving to live Aloha
finishing.com - Pine Beach, New Jersey
Need quick confidential answers? $25
Need project assistance? $100/hr.
![]() Micheal, please keep us posted I am just at the very beginning stages of learning to rust blue and I like your thoughts.
Micheal, please keep us posted I am just at the very beginning stages of learning to rust blue and I like your thoughts.
- Spencer, Massachusetts USA
March 15, 2015
A. I have used Brownells blueing preparations for years with excellent results, good tech support too.
Best wishes,
bob
- Alpine (PO) California, U. S. A.
A. In respect to any further readers of the "hot blue" topic, I must re-iterate with the advice given with regards to purchasing the appropriate chemicals from Brownells, etc. -- especially the U.S audience who have no trouble purchasing from them -- basically a no brainer, buy don't mix your own, no matter how small the quantity required.
Hot home blended "formulas" for caustic finishing at 250-290 ° are stupidly dangerous to mix in sufficient quantity for a 7 gallon tank mix.
Ammonia gas when the lye and caustic are mixed is lethal and comes off in clouds. Agitation when mixing the two chemicals is nerve wracking to say the least, which, unless you do mix them correctly PRIOR to tanking, will NEVER offer correct colour of finish or any kind of finish for that matter
The fumes are also intolerable while cooking.
It is also a black, not a blue, finish and is uneconomical by comparison to commercial ready-made formulas which also contain other additives for safe working practice and guarantee a excellent finish by comparison.
If you get it wrong both in the mixing stage, or when it goes into the tank when you add the water, you run the risk of seriously suffering the most painful of burns/scars. How do I know this? Because I used to manufacture my own brew before I found a commercial supplier. I still have the scars as a reminder of those early days. Don't mix your own, pay for the job and save money.
firearms dealer - scotland, uk
February 14, 2016
A. Very helpful comments, Kevin, thanks! There is however one thing about bluing vs. blackening which I don't think has been mentioned on this page yet. Regardless of what chemistry is used, matte finishes tend to come out black, and very highly polished surfaces come out much bluer.
Luck & Regards,
Ted Mooney, P.E. RET
Striving to live Aloha
finishing.com - Pine Beach, New Jersey
Need quick confidential answers? $25
Need project assistance? $100/hr.
A fast way to get "slow rust finish"
Q. I first read this thread probably six years ago; even went by and visited Tim Bell in Lake City, SC, one of the contributors. Every so often I think I will try slow rust bluing; usually I lie down in a quiet dark room for an hour and it goes away. But about a year ago I met a remarkable man, in his 80's, who lives in Eli Whitney, NC; he can build anything from scratch, and especially likes to build authentic muzzle loading rifles. I won't give his name, not having asked him, but his method of bluing, which I have watched once and need to do again, seemed simple and effective, and I wondered it any of these readers might be able to comment and even improve on it.
Having polished as everyone does, and degreased, I think using a solvent rather than soap (I myself have used Methyl Ethyl Ketone, which boils a little higher than acetone); he then puts the part, in this case a gun barrel, in a tank of boiling water--outdoors, over a wood fire. When it's suitably hot, he fishes it out, not touching it with his hands both to avoid oils and because it's darned hot, and dabs on Mark Lee Express Brown #1; the barrel immediately begins turning quite brown. He then plunges it back into the boiling water, and the brown turns black. He pulls it out, rubs it fairly gently with a cloth, and then puts on more of the Brown, if the barrel is still hot; otherwise he reheats it first; and repeats this same cycle maybe five or six times, till he gets the color he wants. He then coats the barrel with (I think) motor oil and lets it sit for a couple of days. The result is very dark and pleasing to the eye, and the whole process takes less than a morning; so it's "slow" rust bluing, but it's not that slow--not sitting overnight in the humidity to rust, each coat.
I may have some of the details wrong; I'm hoping to contact him again around Xmas and see if I can watch and maybe even video the process; but I hoped this might stimulate some helpful comments from this forum.
Thanks,

Lowrie Beacham
- Efland, North Carolina, USA
November 29, 2016
A. As a CERTIFIED gunsmith working in the industry for many years, I have learned much about metal finishing. From my experience, I have found that the only reason to use these Neanderthalic formulas and methods of bluing is if you are performing a true, honest to god, return to original restoration (where the method of finishing is inspected and graded/judged to influence value).
There are many different ways to attain the finish and color you are looking for (cold blue is the worst!), some much more tedious and expensive than others. But in a nutshell, leave this work to the professionals that have been properly trained and mastered this skill. You will spend much more time and money, and without the PROPER chems and methods and temperatures (in which some of the information you are getting here is incorrect and very unhealthy to the metal) you will NOT end up with the desired look you are trying for and need to bring to a CERTIFIED gunsmith to correct your mistakes and give what you really want ... otherwise, you may as well use "rustoleum" spray paint because that's the quality you'd expect to get from some of these methods (for the love of god, please don't spray-paint your gun ... I was making a point).
It sounds like some of these responses have the experience and knowledge to do this right, but a lot are just quoting some regurgitated, made up formulas that I guarantee they have never used successfully and you will end up risking damage to your metal. Also, the most important part of metal finishing is PREPARATION! One tiny mistake in prep work, and it can cost you time, money, and possibly severe contamination (I have witnessed this myself.) The job you're looking for is best done by a CERTIFIED, trained professional that knows what he is doing as well as willing to take responsibility for his work. and it is way, way cheaper than botching a job because you were trying to save money! I have had to work with over-dehydrated metals from botched attempts to blue, and let me tell you when I do, the customer pays dearly for their mistakes. I hope this makes sense to you.
M. Hufford- Katy, Texas U.S.A.
March 25, 2017
While some of what you say is correct. Your comment knocking about regurgitated formulas as being of little value is a bit of "pot n kettle" is it not!?! You went to school or learned from another smith. Thus you did not nor did 99% of those doing bluing work invent or discover the formulas. No, you and them were taught them. In other words given them either from book or in person. Either way were you to post your formula even being a master in bluing you still would be simply regurgitating something you read or were taught. Now yes I agree fully there is a huge difference between someone giving a recipe they have personally used vs someone just doing research and posting what they found. The key is presenting the facts. Stating you just found this recipe in this book or you have used this recipe many times personally.
In my opinion telling people to leave things to professionals has dumbed down the western population as a whole. 99% of people cannot do 1/100 if what my grandparent knew how to and I was lucky it was passed on and to me.
Every time anything with a bit or danger if not using common sense or bothering to find the correct way and everyone screams leave it to a pro. Tree falling in yard leave cutting it to a pro. Car brakes leave it to a pro. Gunsmithing leave it to a pro, on and on. I was taught how to cut trees, work on guns & cars reload, how to birth cattle, put stitches in to seal a wound. Pull a tooth and countless other things by the time I was a mid teen. People today if they lost the comfy western first world conveniences would be lost and die. This includes many so called preppers as it takes far more than reading books and storing supplies.
It is always bad to restrict knowledge.
- New edison,
September 3, 2021
![]() Hi Tony. Your viewpoint is a good one, but it is an increasingly complex world where specialization is becoming necessary, like it or not. And M. Hufford did not so much claim that he had a secret formula he wouldn't share, as that top-notch work is a matter of years of experience and mastered skills possessed not just by him but by professionals in the trade, i.e., certified gunsmiths.
Hi Tony. Your viewpoint is a good one, but it is an increasingly complex world where specialization is becoming necessary, like it or not. And M. Hufford did not so much claim that he had a secret formula he wouldn't share, as that top-notch work is a matter of years of experience and mastered skills possessed not just by him but by professionals in the trade, i.e., certified gunsmiths.
I don't think knowledge is being carefully hidden; rather, that all fields have the same issue. I doubt that Michael Jordan could tell us in a forum posting how to drive to the net, or that you can explain here how to breach birth cattle, or that Enzo can tell us how to build a Ferrari. There is always a dividing line between what we can do ourselves vs. when professionals are needed; you and I don't need a plumber to change a sink faucet set, but if we think we will ever ever be able to properly solder wipe a lead pipe joint we're kidding ourselves.
If you don't like M Hufford's viewpoint, there are 80 other postings on this one thread, and dozens of other threads about black oxide and bluing just on this one site. Or ask a specific question and you'll probably get good answers.
Luck & Regards,
Ted Mooney, P.E. RET
Striving to live Aloha
finishing.com - Pine Beach, New Jersey
Need quick confidential answers? $25
Need project assistance? $100/hr.
Q. I have been bluing guns since the mid 70s. For years I used a buffing compound called "alo sheen" supplied by Herters; this was as good as it gets. Is it still available, and from where?
Bill Aumer- Milford Iowa
May 2, 2017
Ed. note: Sorry, apparently "Alo Sheen" is long discontinued, but there are countless buffing compounds available.
![]() I wanted to join the conversation by stating that the art of rust bluing and temper bluing is being lost because of trade secrets being protected, and the failure to pass these processes along to the next generation. I am glad that finishing.com is keeping these crafts alive by having a forum to pass along to people like myself that want to learn, but by no means do I care to try to make a living from it, or heaven forbid take a professional gun smith's business from them. I started researching the methods because no one can tell you this method will match that models finish. So, as a collector, I want to know these variations.
I wanted to join the conversation by stating that the art of rust bluing and temper bluing is being lost because of trade secrets being protected, and the failure to pass these processes along to the next generation. I am glad that finishing.com is keeping these crafts alive by having a forum to pass along to people like myself that want to learn, but by no means do I care to try to make a living from it, or heaven forbid take a professional gun smith's business from them. I started researching the methods because no one can tell you this method will match that models finish. So, as a collector, I want to know these variations.
I experimented once with steel plate to create a very black of black surface color for a solar heat collector plate. I basically grilled a the clean bare steel on my gas grill and basted it (yes like barbecue) with the blackest dirtiest used motor oil I had on hand. Believe it or not this plate is still without rust after being thrown around in my garage boxes 10 years later including the scratch offs. What I did not know at the time was the process I was doing which was tempering.
Most pre WWII pistols were either "rust" blued or "tempered" blued. Based on my collection, I feel most European guns were rust blued like FN,& Mauser, Beretta.
The American made pistol seemed to be big into the Temper bluing which the finished pistols were heated in charcoal troughs with a mixture of bone ash and possible oil. Later, they were finished in rotating ovens I am pretty certain were all made by the American Gas Furnace Company which supplied the proprietary "Carbonia" mixture to Smith & Wesson, not Colt. Colt to my knowledge, referred to their finish as Royal Blue. Either way the process was the same, the pistol once finished polished and cleaned was heat exposed to the charcoal mixture then oil quenched to stop the process, then cleaned and sealed.
My 100 plus year old FN 1903s which were rust blued still appear almost new, were military issued, handled, and holstered which doing the same to a Colt 1903 will ruin the finish very rapidly on a tempered blued pistol . Collectors know from experience, its very hard to find and very expensive to buy a perfect Colt that is 100 years old. But the appeal of the finished look of the Colts tempered finishes are much more appealing than the rust blue finish of the FN 1903. For one, the level of polishing enhances tempering, but with rust bluing you can only polish so much than its hard to get the gun to rust.
Since I am not professional Gunsmith, I am going to pass along some things I have learned.
Wikipedia Metallurgy Tempering is a must-read as the examples of color change are done excellently to learn the process. https://en.wikipedia.org/wiki/Tempering_%28metallurgy%29
copper sulphate
⇦ on
eBay or
Amazon [affil link] in a rust blue solution probably has absolutely nothing to do with creating the black iron oxide, but I am of the opinion the greater the quantity in the formula, the greater the blue verse black appearance, which creates a reflective light spectrum creating the blue effect.
Rust bluing depends on the metal content, adding iron shaving to a rust blue formula probably enhances the black finish. Mill scale on hot rolled steel is identical to almost every FN pistol with exception to very early FN 1900s that have the "Royal Blue" rust blue look. So think about it, if mill scale is identical to FNs finishes than the FN rust formula was probably a simple recipe to convert the guns steel content to rust.
Touch up on rust blued guns can be done by applying a rust solution to the spot, then steaming the specific spot to convert to black. FN steamed their rust blued pistols, they did not boil them as boiling is time consuming and risk greater contamination than steaming. FN also had a huge steam generated power plant so they had plenty of steam for the ovens. Wallpaper steamers are great and can be easily modified as needed, also a stainless steel pot with stainless steel basket works great for steaming.
I am mentally building my temper oven which to replicate Colts and S&W, which had an outside drum that was heated creating an internal chamber that had another shaft that rotates the mounted parts the opposite direction and tumbles the bone ash charcoal mixture over the parts. One source said the charcoal bone ash mixture did nothing to effect the color of the finish but eliminated oxygen from the internal drum chamber. The bone ash probably does nothing for the color but helps control heat transfer and oxygen removal, but any oil or tar substance in the mixture would effect the finish color because quenching in clean motor oil leaves a light blue patina, verse quenching in dirty motor oil leave a black finish. Based on how the later oven Colt 1903s look blue or black leads me to believe the mixture effects the finish color. S&W Carbonia finish was a pine tar mixture and aren't those finishes very black?
is a great source for all finish types, and formulas and section H discusses temper bluing and S&W Carbonia oven process is described. It takes a read or two to understand the archaic English, but the formulas are extensive and done in grains and pints, and grams and ccm. I am starting out with formulas that are foot noted to produce good results with a corresponding letter matched to the formula. This is where a formula with very high content copper sulphate is noted to produce a Saxon Blue look. This book can be bought for a Kindle. Part 2; Section 4; C10 (M) formula is the one with a high amount of copper sulphate and the noting of a Saxon Blue finish, which is probably the similar to the first FN 1900s very blue color, then later a grey black color so a notable formula change in FNs production.
Potassium nitrate is Spectracide Root Remover and its pure, I dissolved it in hot water, coffee filtered it twice, then recrystallized and dried it and found no impurities. copper sulphate is drain cleaner in the plumbing department and appears to be pure crystals; lye for hot salt solution is sold there also, and hydrochloric acid is in the concrete cleaner section simply dilute to reduce concentration. Ammonium nitrate is usually sold at local coop feed suppliers, Lowes and Home Depot do not stock. 99% Nitric acid cost me the most for a pint about $80 but $35 of that was hazardous shipping cost so you might find a local source. ferric chloride ⇦ on eBay or Amazon [affil link] is sold at Radio Shack, and the alcohol can be bought at a liquor store being pure grain alcohol at 90% to 95% grade. Harbor freight sales a great scale, and you can buy a dc multi power supply to operate it or batteries. I hope to do some samples of formula variations using a base starting formula then seeing the variations with varying quantities of iron fillings and or and copper sulphate.
I hope I am sharing and passing along some great trade secrets. I have learned more here than any gun forum so hopefully people can pass it along. Ed Simpson
- Rogers, Arkansas
November 30, 2017

Sorry! Finishing.com is temporarily Read-Only.
Ted Mooney is retiring but I have several offers to take it over.
We're working hard to make sure we find it the best new home.